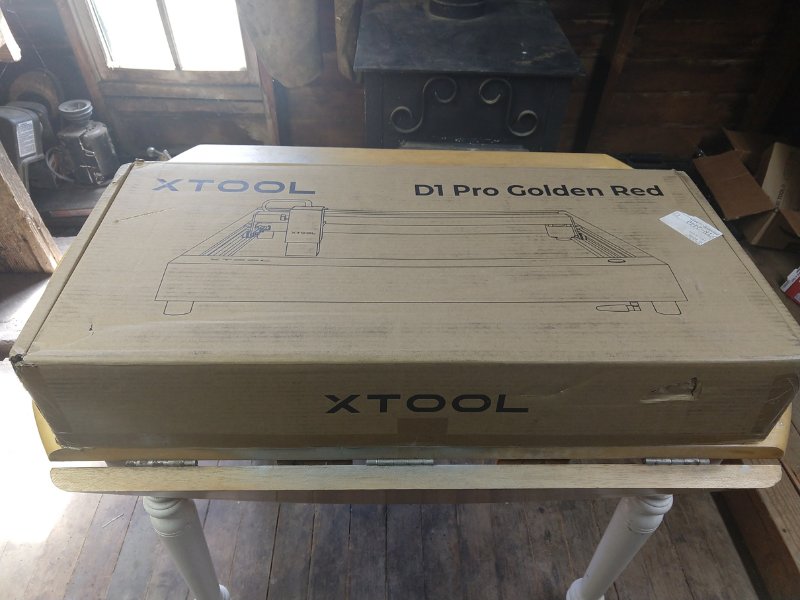
If you’ve been a CNCSourced reader then you’ll know how big a fan of the original 10W xTool D1 Pro we were. Well, now there’s a superpower 20W version, and we have one.
We’ve always maintained that if you’re looking for the best diode laser under $1,000, go for the xTool D1 Pro, and now with the 20W version, our recommendation is the same – but this time, you’ll be able to cut tougher materials even quicker!
TLDR: we highly recommend the xTool D1 Pro 20W, and think it’s the best diode desktop laser cutter around.
Is the xTool D1 Pro 20W worth it?
The 20W version is a few hundred more dollars, so it’s your personal choice if the extra power is worth it to you: do you want to cut extra-thick wood and acrylic, faster? I personally loved it, but I’m impatient :). Though if you want the RA2 rotary module as well, it does start to add up, and you’re looking at $1,400.
However, the xTool D1 Pro 20W WILL make you money. It can knock out $20-25 custom beakers in well under an hour (you’ll need the RA2 rotary add-on for the curved surfaces), and can cut thicker woods for custom decorations and designs faster than ever.
So, it comes down to whether you want to invest more in your home setup or small business, and whether the higher price is worth it, or if you’re best sticking with the 10W (or even 5W version).
Also, the 20W is red. And red is cool. No basic silver-grey around here.
Also also, if you already own the xTool D1 Pro 10W, you can purchase the 20W laser head separately for $599.

xTool D1 Pro 20W
Available at:
xTool D1 Pro 10W vs 20W
Before we get into the cool stuff we made, here’s a quick summary of the main specs, compared with the standard D1 Pro 10W, so you can pick which best suits you:
| xTool D1 Pro 10W | xTool D1 Pro 20W |
|---|---|
| Up to 6mm thick basswood in a single pass | Up to 10mm thick basswood cutting in a single pass |
| Mostly for engraving, such as pictures/photos | 8mm acrylic cutting in one pass |
| 0.08*0.06mm laser spot | 0.08*0.10mm laser spot |
| Faster to cut materials (400mm/s speed) |
xTool D1 Pro 20W: Our Pros and Cons after Testing It
Software: accessible enough that even beginners can use it right out of the box, while robust enough to do just about anything you need a laser to do.
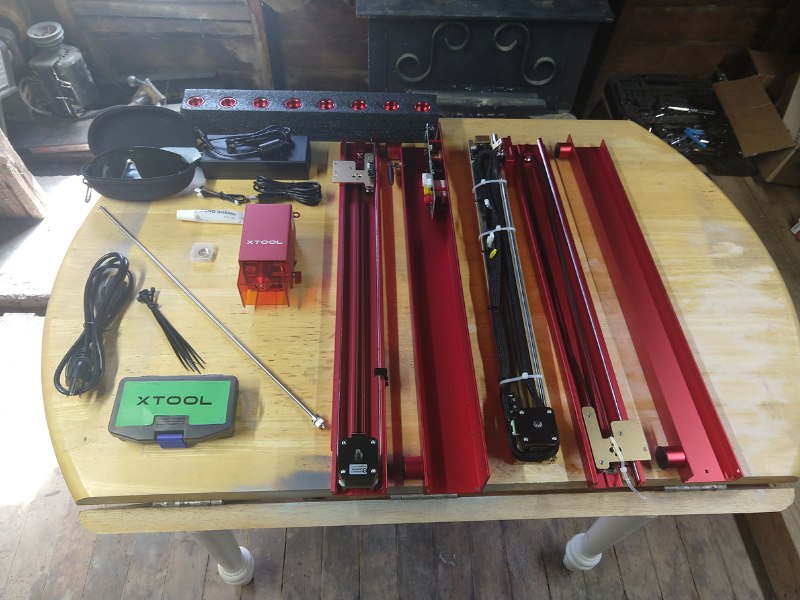
Simple assembly. Though, be sure to put everything together with the screws somewhat loose, and then tighten them all at the same time once assembled.
The laser has excellent power: we were able to easily dice through 0.5” plywood.
The build quality is 5/5. We’ve mentioned previously in our xTool D1 Pro vs Ortur LM3 comparison that we felt the xTool was better built, and this is still the case. No exposed belts, and a very sturdy build for maximum precision and stability.
Air assist isn’t included: either you buy it yourself as an extra ($139) or do a DIY job. I re-purposed a small air compressor and 3D printed an adapter, but you may prefer to pay the extra for a specialized piece of kit.
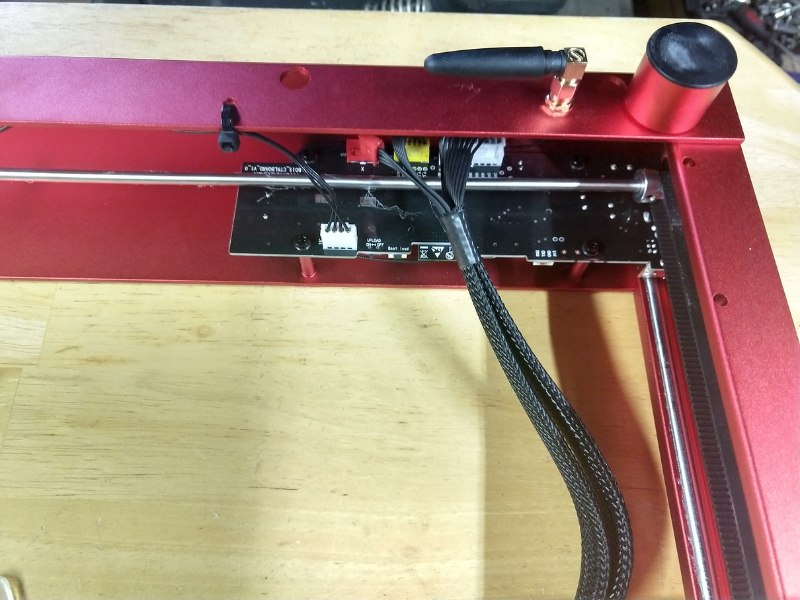
The WiFi antennae is frustratingly positioned. This is minor, but because it’s on the bottom of the front of the machine, everytime you try to shove material through the gap at the front, you smack the antennae. I wish they would have put it literally anywhere else!
While we appreciate the focus that has gone into making this machine super safe, sometimes the overzealous “fire detection” feature shut off the machine when there was no fire danger. This will require some tweaking in settings.
CNCSourced is reader-supported. When you buy through links on our site, we may earn an affiliate commission. Learn more
So overall:
- All in all I would say that the laser is a pretty good one. The build quality is 5/5
- If a 20 watt laser is what you feel you have to have then, I would think this is the way to go. Is it worth the added price? That is up to you to decide based on what you plan to cut.
Also, make sure to tighten the tensioner screws on each axis. I found that I had to tighten them more than the instructions let on.
Assembly
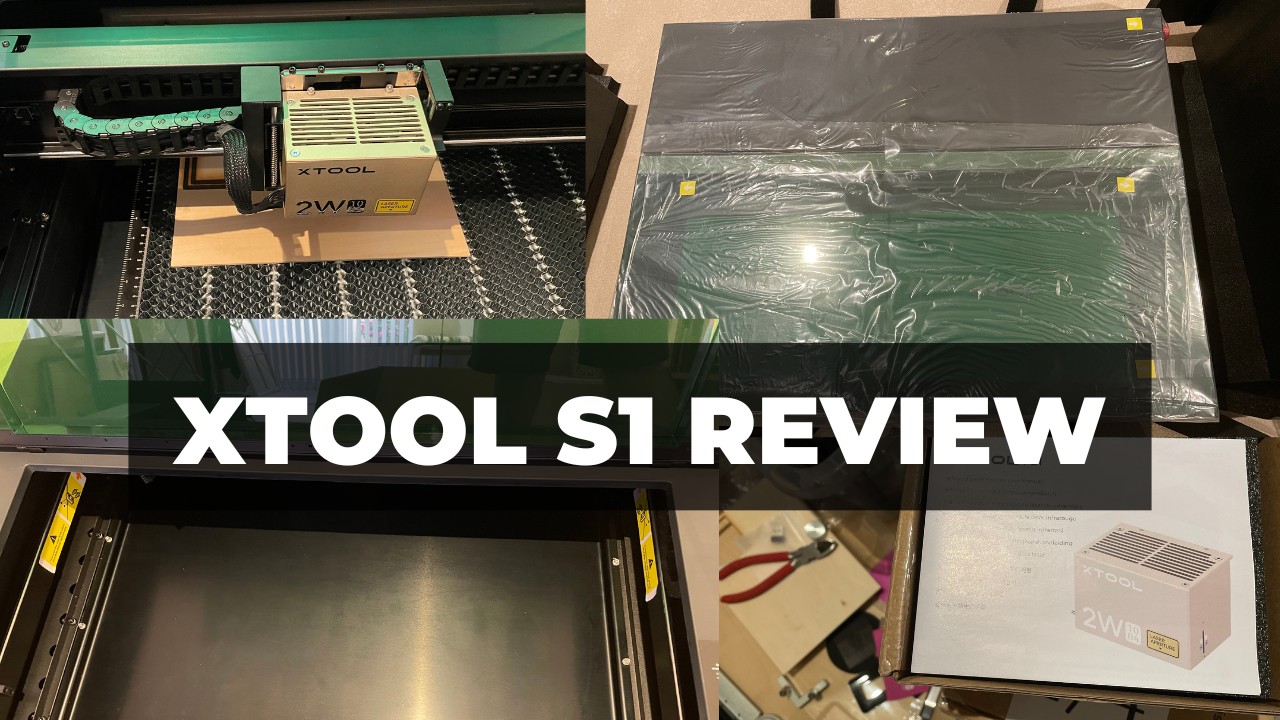
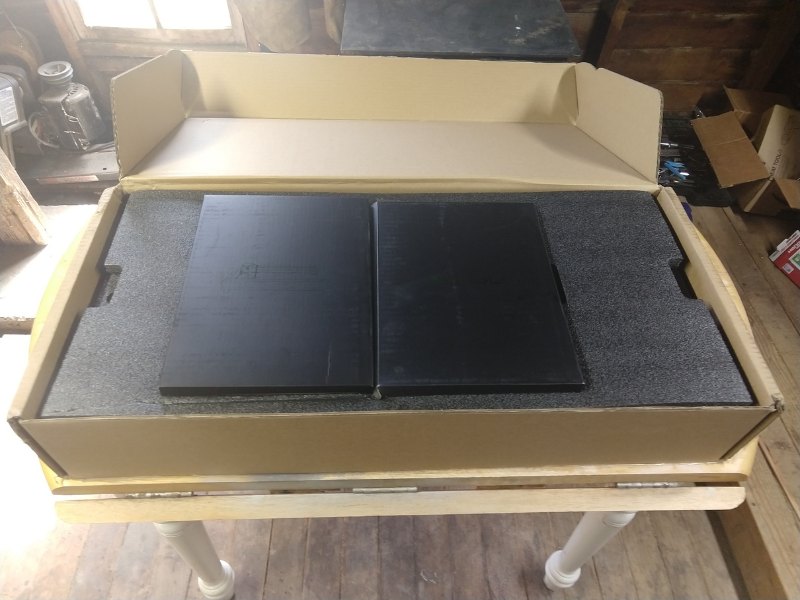
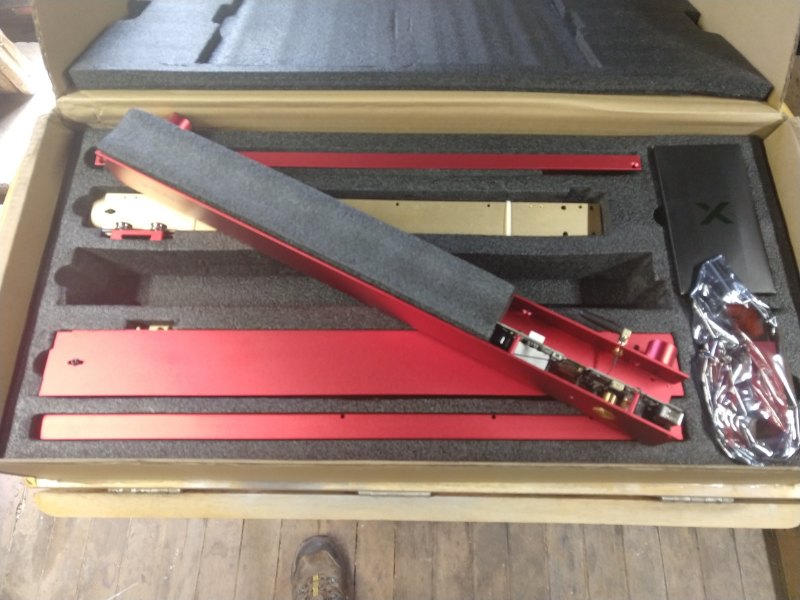
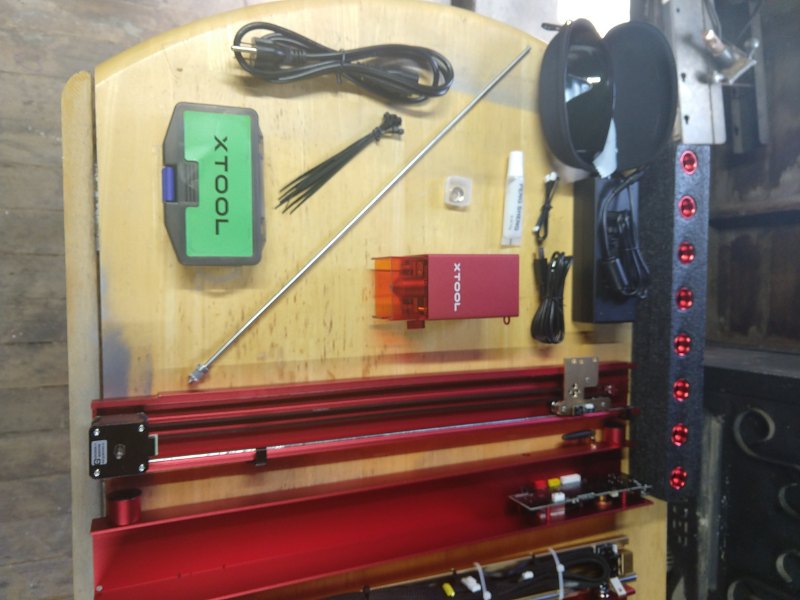
The xTool D1 Pro 20W comes well-packaged, so you don’t need to worry about any in-transit damage.
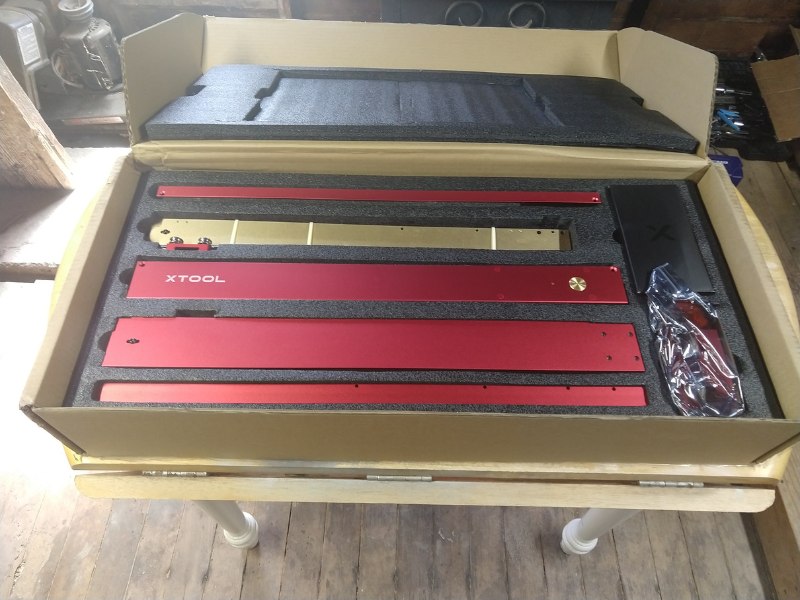
The assembly process for the xTool D1 Pro 20W was easy – the laser comes in four main metal parts to assemble for the square chassis, and then you just need to attach the gantry and laser head, and the electronics and power supply.
The xTool D1 Pro takes around 30 minutes to assemble Even if you’re a complete beginner it won’t take longer than 45 minutes.
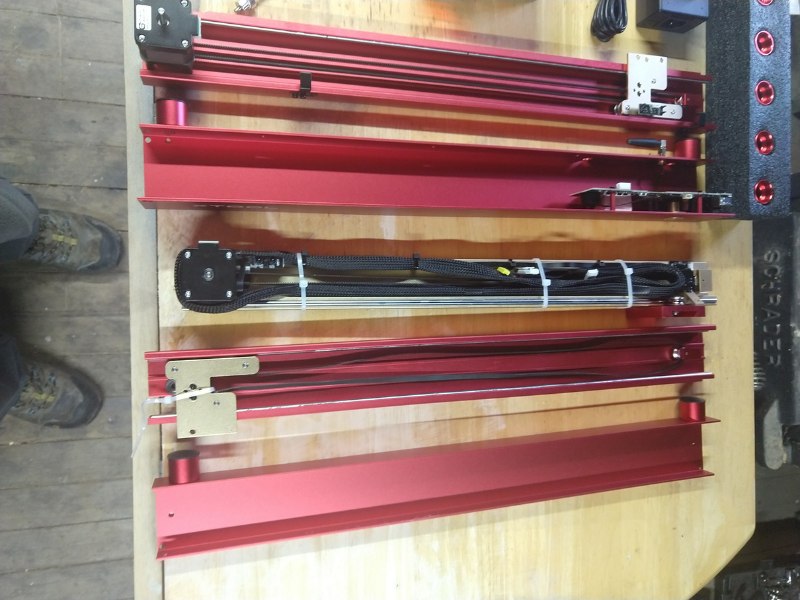
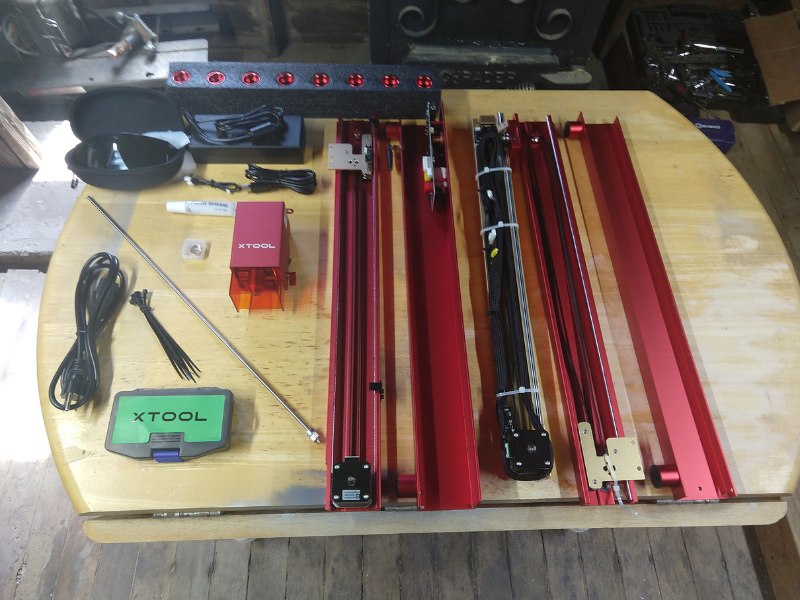
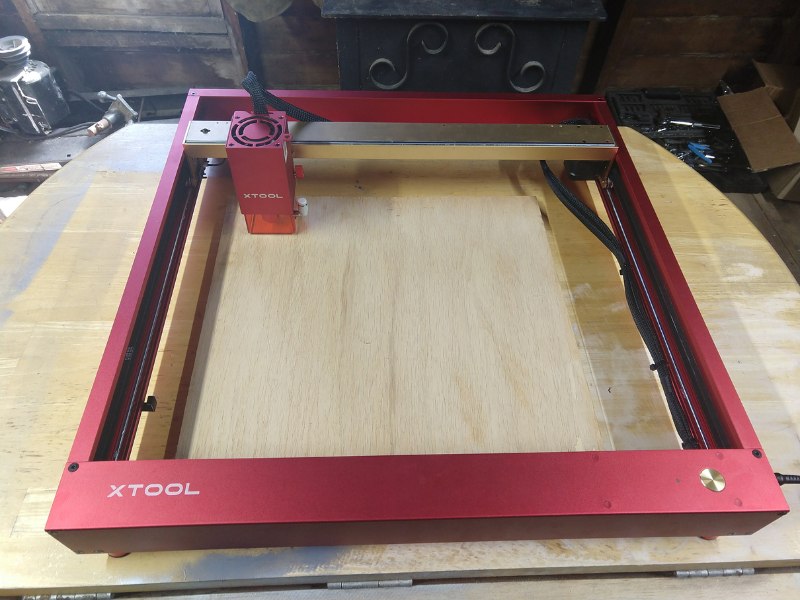
My impressions on handling the parts was that it’s superbly well made.
The full-metal chassis even protects the belts, which isn’t the case with the OLM3.
I’ll go into more details later in the article, but at CNCSourced we’ve been through over a dozen diode lasers (including the competitive Ortur Laser Master 3, the LM2 Pro, Snapmaker 10W laser head, Longer LK5 laser, and many more), and this feels the most premium in build.
For comparisons between the xTool and other popular brands, you can check our guides:
- xTool D1 Pro vs Ortur Laser Master 3: Hands-On Comparison
- xTool D1 Pro vs Atomstack Options
- Snapmaker vs xTool: Which Brand is Best
xTool D1 Pro 20W: Laser Cut Test
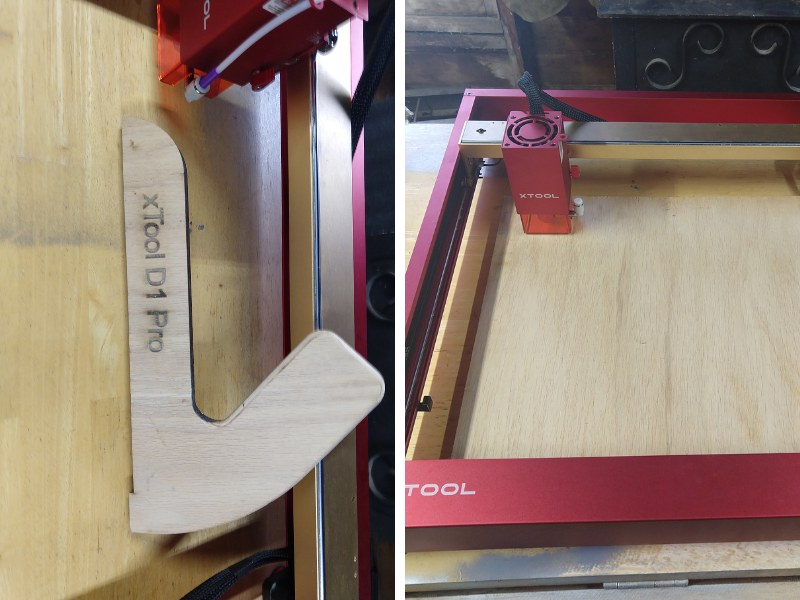
One of the first projects I tried was to cut out a “push block” for my table saw. This was no everyday job, I think anything less than a 20W laser – or maybe perhaps 10W – would really have struggled with this.
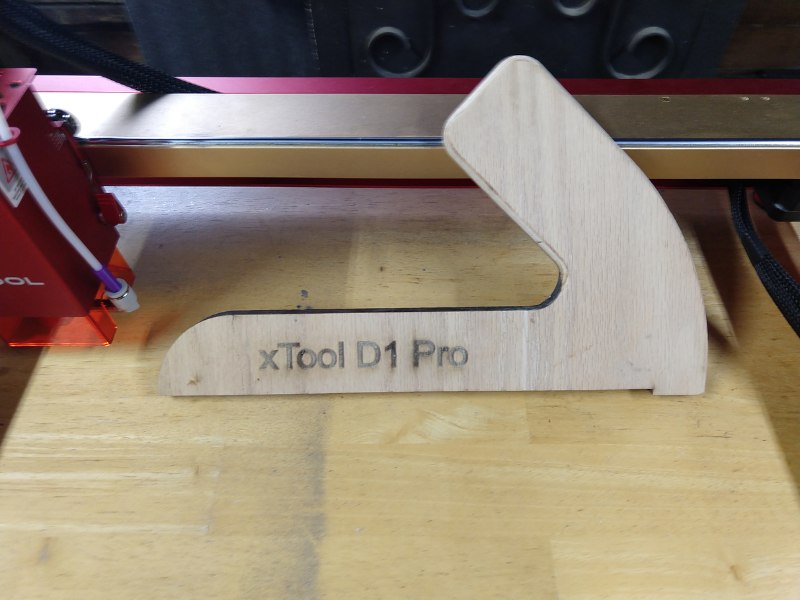
But, as you can see, it comfortable sliced through the wood with clean cuts and, because of the DIY air assist, barely any charring. It was a really professional cut. And the letters laser engraved on the push block came out great: it can still engrave super accurately.
Though, there is obviously a LOT of smoke when you’re cutting through material – especially thicker material like from this table saw push block. So be prepared for that.
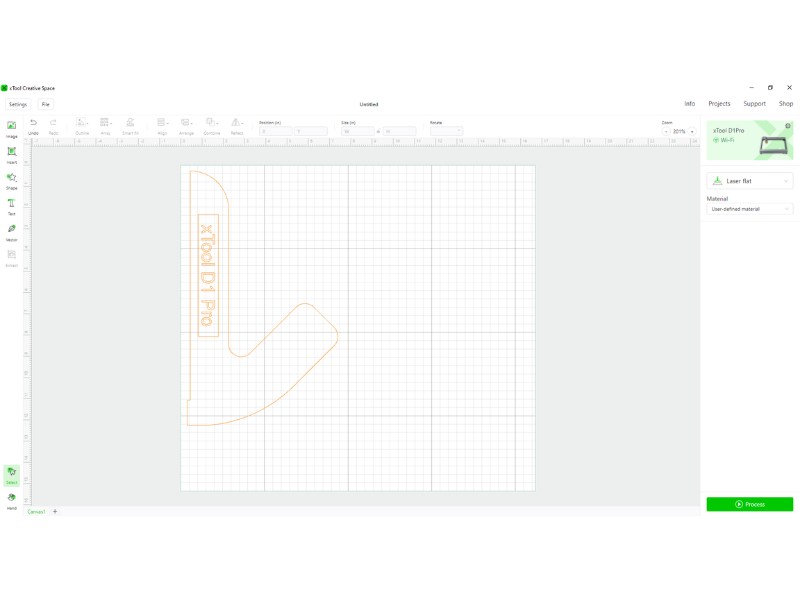
I designed the file on Fusion 360 and used xTool’s XCS software to start the cut (I explain this in more detail in the software section later on).
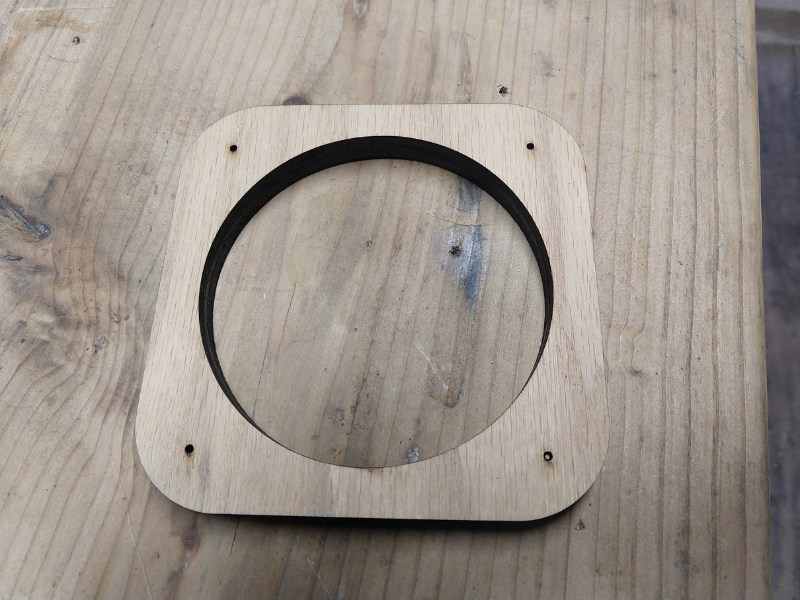
I also designed and made a mount for an exhaust vent fan, that was just laying around. The main circle cutout was smooth – literally, check the picture, you won’t see any jagged lines or imperfections – and it could still handle the very small holes for the mount. The xTool D1 Pro 20W can handle large projects, and small precise ones.
Laser Engraving Tests
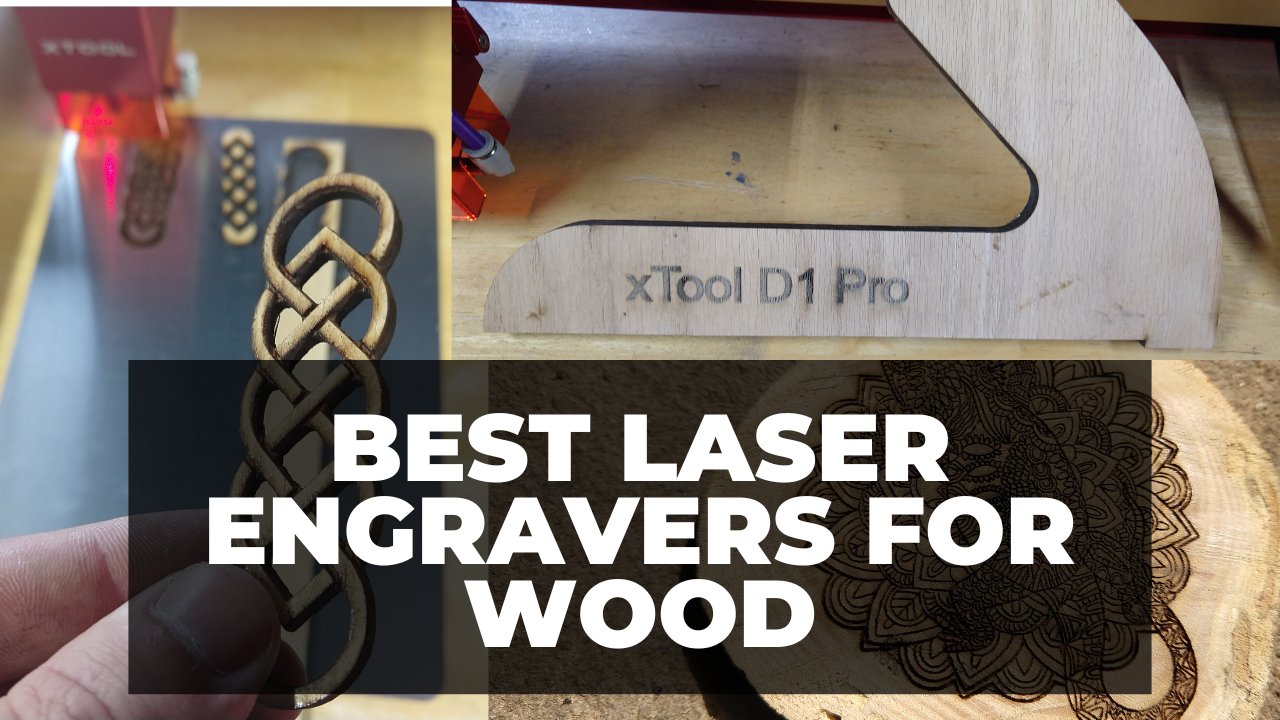
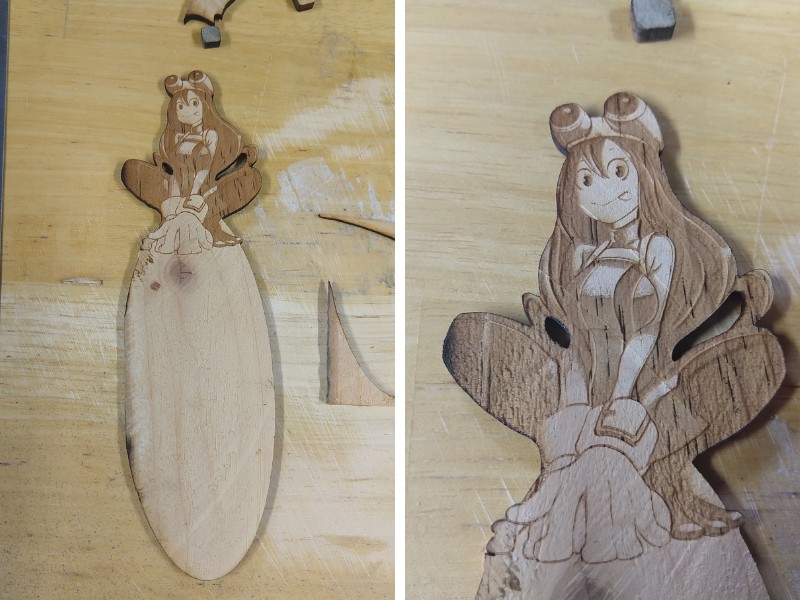
I also engraved a bookmark for my daughter with Tatsuma from My Hero Academia, which I think also came out well.
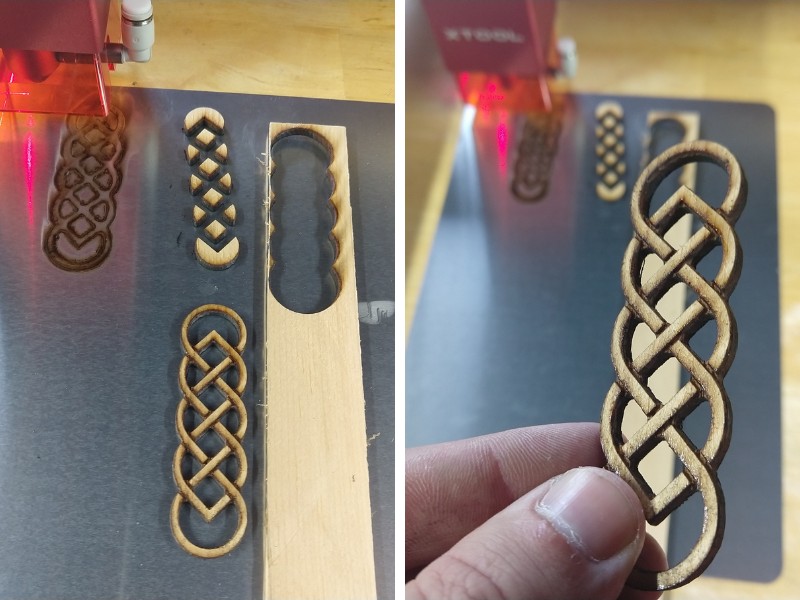
Then, I laser cut a second bookmark, with a celtic knot pattern on it, for my youngest daughter.
Beyond this, I also tried a precise line engraving on some wood I had laying around to check whether it could pull clean lines even on a tiny drawing. I just used an offcut, and the surface wasn’t super smooth either, so it was a challenging engraving.
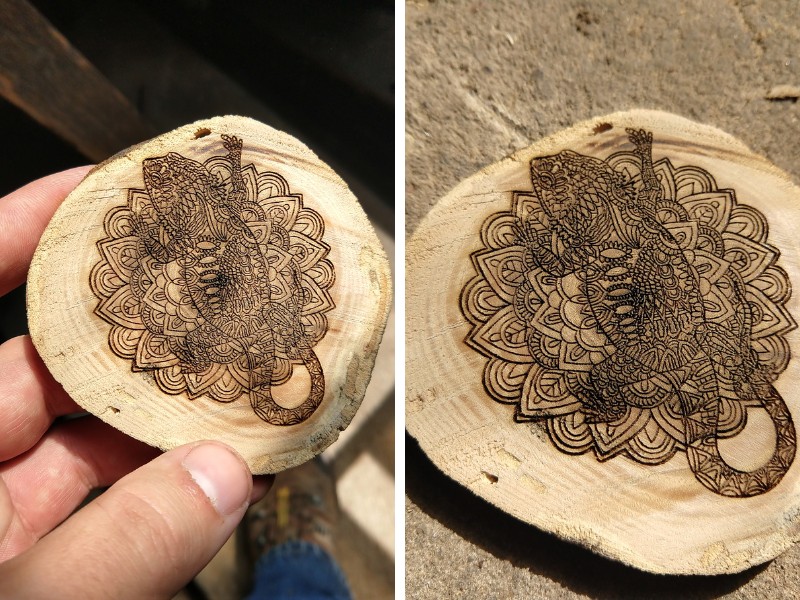
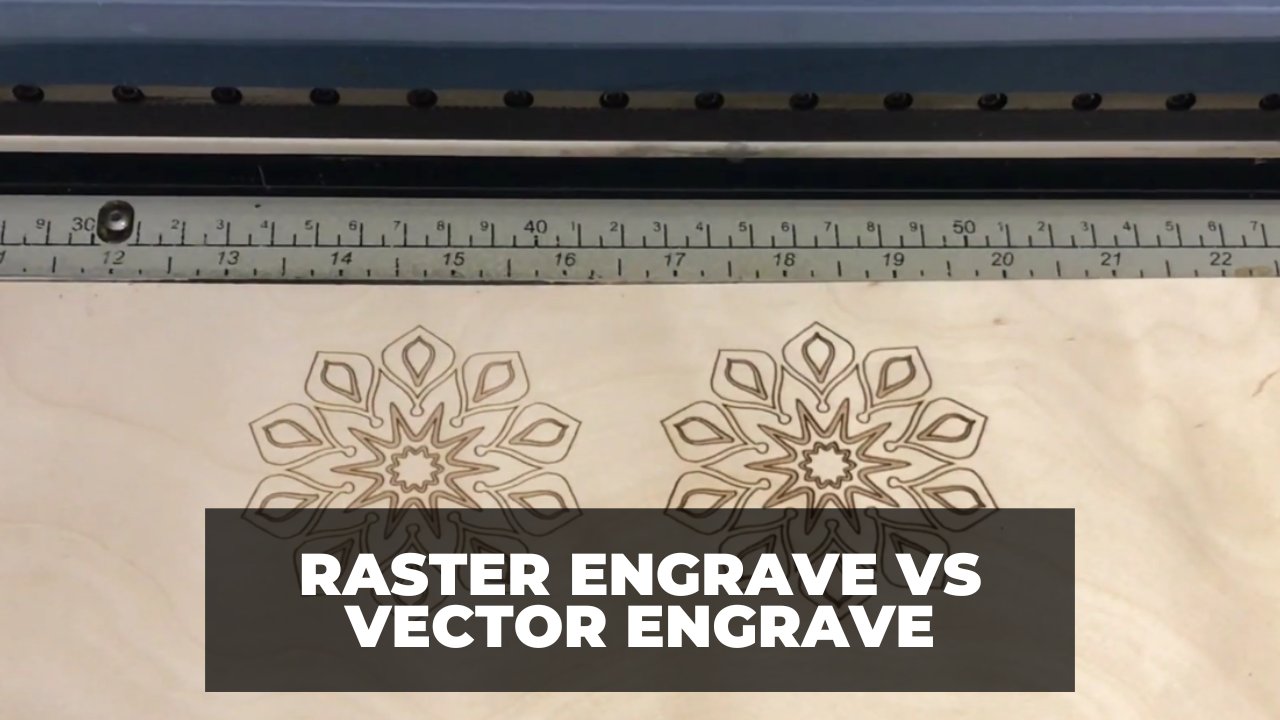
I engraved a coaster with a bearded dragon on a flower/mandala engraving for my son, and it came out really well overall, so while the standard xTool D1 Pro 10W is fine for engraving, you can still pull off precise artwork on wood and other materials with the 20W laser.
3D Print and Laser Project
For this next project I got a bit more ambitious. I’ve never seen any examples of this before, but I tried it out anyway.
I basically 3D printed the Batman logo, and also cut the same logo out of a wooden coaster using the xTool laser. Then, I pressed it in with a vice as an inlay.
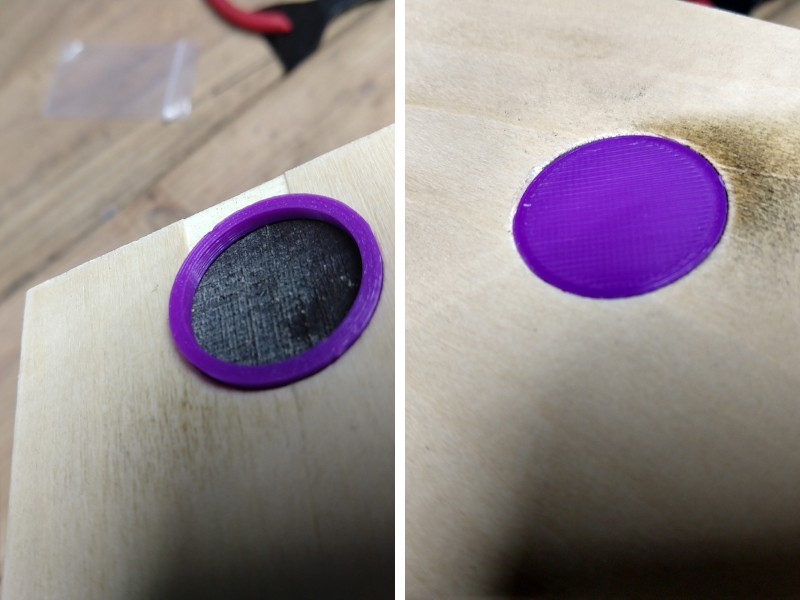
First, I cut a feature in a standard piece of wood. Then, I 3D printed the same shape on my 3D printer, and pressed it in as an inlay.
I had two different filaments lying around: standard black PLA, and glow-in-the-dark filament, so I printed one in each color. Having laser cut the Batman logo, I had this:
Then, having tested the inlay idea with the standard circle, I tried pressing the Batman logo I also 3D printed using glow-in-the-dark filament to create a luminous Batman logo piece. And it worked!
Working Area
- 430 x 390 mm
- Can be extended to 936 x 432 mm with the extension kit — Available here
By default the xTool D1 Pro 20W has 430 x 390 mm working area, slightly larger overall than its rival, the Ortur Laser Master 3 (400 x 400 mm).
Though, we never got that close to using the entire working area during our test anyway. This is more than enough for all but the largest raster engravings, but just in case size really does matter, you can also buy the xTool extension kit.
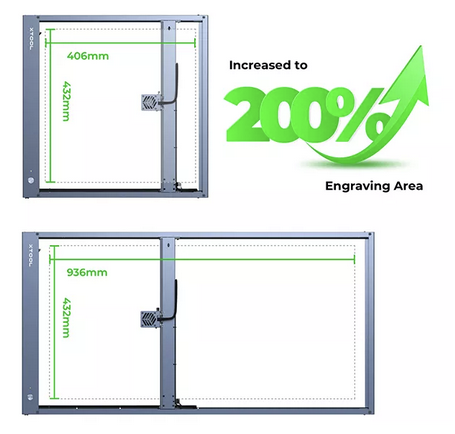
The extension kit costs $179 and is compatible with the xTool D1, and D1 Pro (10W and 20W), and increases your working area to an incredible 936 x 432 mm. It’s pretty simple to assemble to, but we didn’t get it for our laser – the ease of assembly is what we’ve heard from others.
Speed
- 400mm/s
- Faster than competitors like the OLM3
Both the xTool D1 Pro 10W and 20W run up to 400mm/s, which is one of the fastest maximum speeds of any desktop diode laser. Over a minute, that’s 24000 mm.
This is ideal for faster engraving of larger images with contrasting greyscale areas, as the 20W power means you can still create dark tones even when moving the laser head quickly. If you’re wanting to make money from your laser, this will up your output, and if you just want it for home, then it still doesn’t hurt to get through engraving projects quicker!
To compare, the Ortur Laser Master 3 runs at up to 20000mm per minute, so it’s 20% faster.
Material Compatibility
- Woods, leather, acrylic, metal (engraving), card and paper, ceram (engraving), fabric
The xTool D1 Pro 20W can comfortably cut through 10mm basswood, and other plywoods like cherry and pine. We were able to slice through thick wood for our push block project.
You can also slice through acrylic, though we haven’t tried any acrylic-specific cuts yet. xTool say it can cut through 8mm thick acrylic in a single pass though.
You can engrave metals like anodized aluminum with ease – but you don’t necessarily need a 20W laser for that. We’ve comfortably engraved metals on 10W lasers like the Ortur LM3, and the Snapmaker 10W laser add-on in our workshop, so this isn’t necessarily a shouting point. xTool have precise settings for metal business cards, and jewelry on their site.
For the full details, you can check out xTool’s own material settings recommendations for each material type and thickness here.
Rotary RA2 Pro Add-on
- Costs an extra $287-319 – Available at xTool here
Rather than going down the low-cost rotary roller route, xTool go the Snapmaker direction in creating a high-quality solid metal rotary chuck for precise engraving.
The downside however, is that it’s much more expensive than Ortur’s rotary roller (under $100), with the xTool RA2 Pro rotary module costing $319 normally – though as we speak it’s on sale for $287.
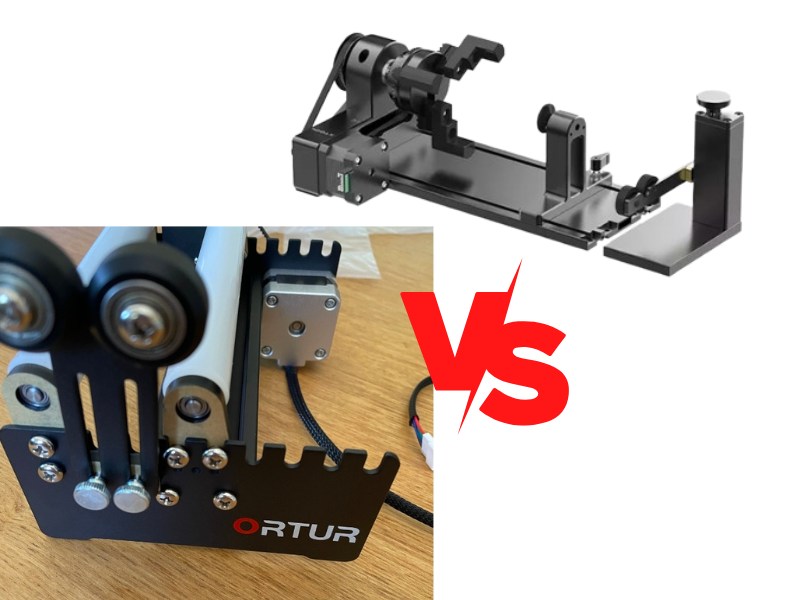
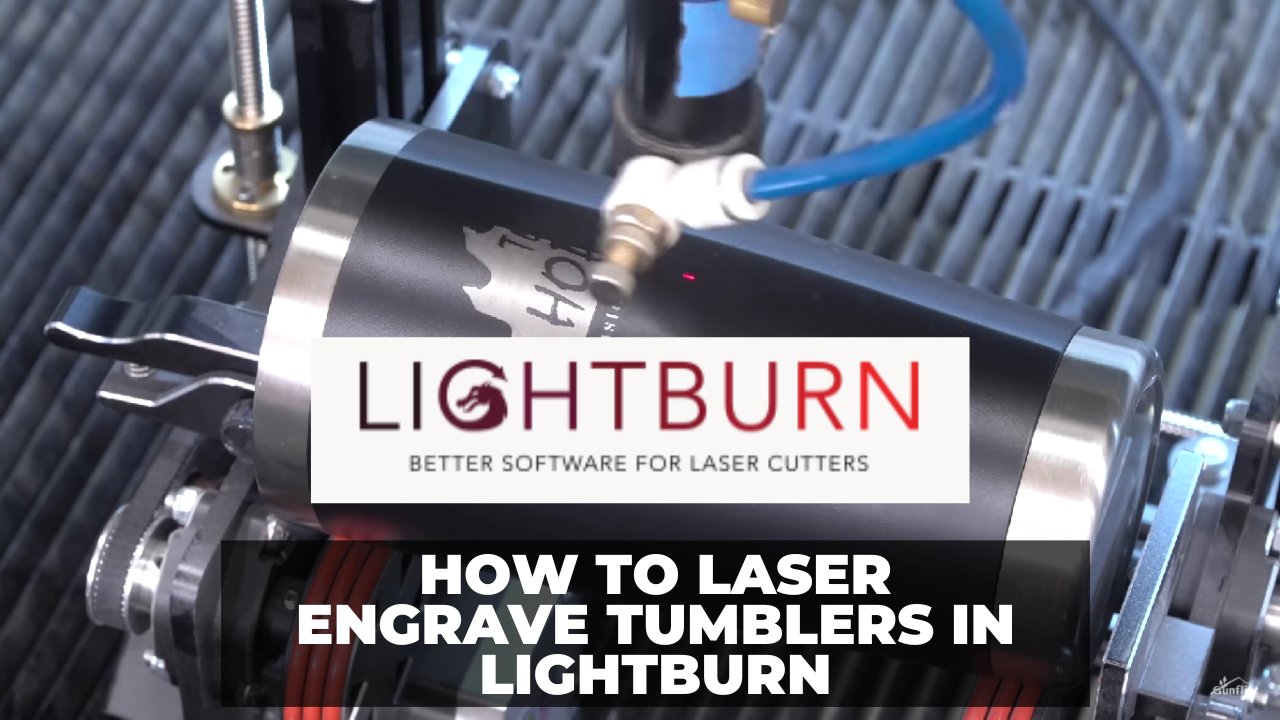
This attachment is probably your biggest moneymaker though, and opens up your possibilities for etching on stainless steel tumblers (xTool also sell these, or you can buy them elsewhere online).
These can be bought cheaply, don’t take long to engrave, and can easily be sold with the custom design for $20-25+. So, you earn back the $300-ish very quickly on your investment.
Other Attachments
You have many options for augmenting your laser cutting experience with the xTool D1 Pro 20W.
We actually created our own DIY air assist, so we didn’t try their paid add-on, but I have linked to all of their attachments and accessories below so you can read more on their site about any you might be interested in.
- 1064nm infrared laser module
- Honeycomb working panel set
- Air assist
- Enclosure
- Extension kit
- RA2 Pro Rotary
- Smoke purifier
Build Quality
This is where xTool shine, in my opinion. Some reading will already know this, but Makeblock / xTool don’t just make diode lasers for desktops, they also create high-tech CO2 lasers, such as their Laserbox 40W CO2 laser.
xTool have experience building powerful yet compact lasers, and they use that expertise they’ve learned over the years to pack the xTool D1 Pro 20W with the best build quality of any diode laser.
And, this is despite the build quality of other lasers really improving in recent times. To again give an example of the Ortur Laser Master 3, which we’ve also tested (and still have in our workshop!), the xTool just feels that little bit more premium.
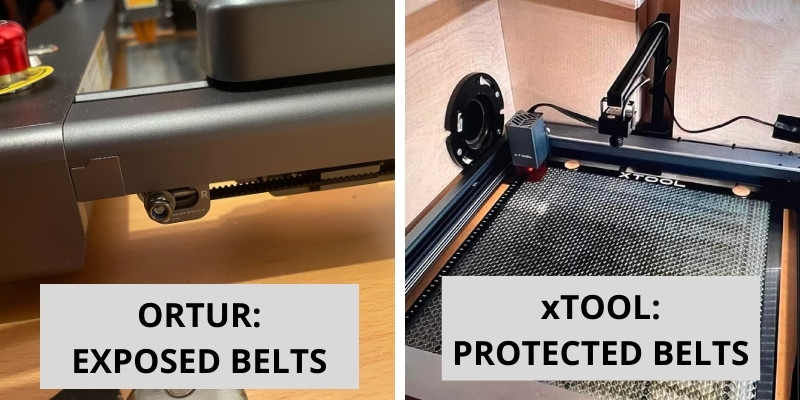
An example is in the belts that pull the laser gantry. The Ortur LM3’s belts are slightly exposed underneath, whereas the xTool encloses them, a slight difference that gives you a feel for the thought and extra premium build of the D1 Pro.
Honestly, it’s a 5/5 for build quality.
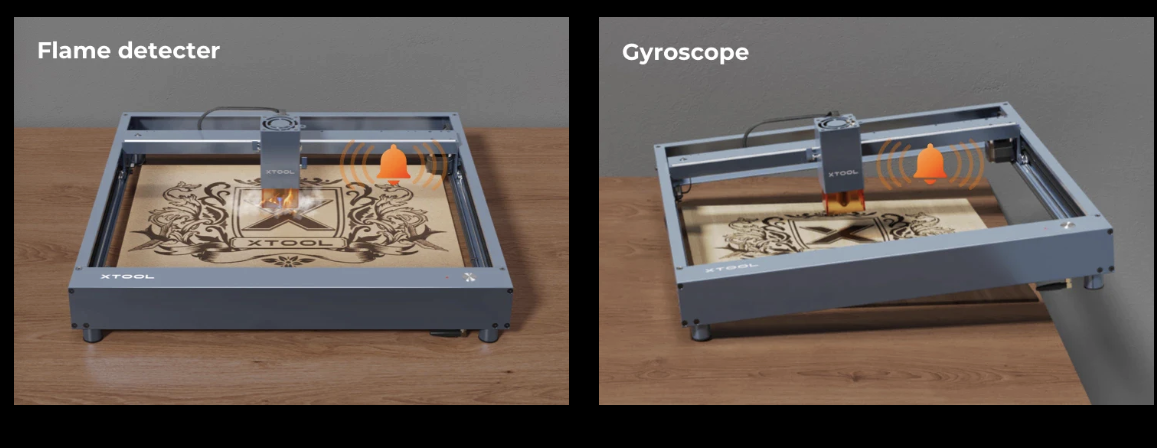
Safety Features
- Flame detector
- Gyroscope detects if jogged
xTool have also put efforts to ensure safety on the xTool D1 Pro 20W. In fact, for us in our particular hands-on test and review, the safety settings might be a little too frenetic.
Sometimes, though there was no imminent fire threat, the xTool’s fire detector would set off, stopping the job. I’m sure this would have been fixable with a tweak, but keep this in mind for your laser cutting and engraving.
There’s also a gyroscope feature that detects if the xTool machine is being moved around or is unstable, pausing the job instantly. This is useful in case it’s accidentally hit off of your desktop, or jogged in any other way.
Connectivity
- Wifi (badly placed)
- USB
- SD card
You have both online and offline options for sending files to the xTool to cut and engrave.
Honestly, I’m old-fashioned and stuck in my ways, and I don’t mind directly connecting a laptop to my lasers via USB (though for CNC routers I want to be away from the debris and dust so I’ll take WiFi 😂). You can also connect via SD card.
But, if you’re a WiFi fan, you can do that too, as the xTool D1 Pro 20W has a WiFi-connectable part you screw in.
However, it’s placed really badly! It’s basically underneath the bottom-right corner of the machine where the on button is, and it doesn’t make sense to me. A better placement would be anywhere on the top of the machine, as if you’re sliding a thin piece of plywood underneath the machine to position it, you naturally hit the WiFi antenna.
However, this is really a very minor issue, and doesn’t affect performance at all.
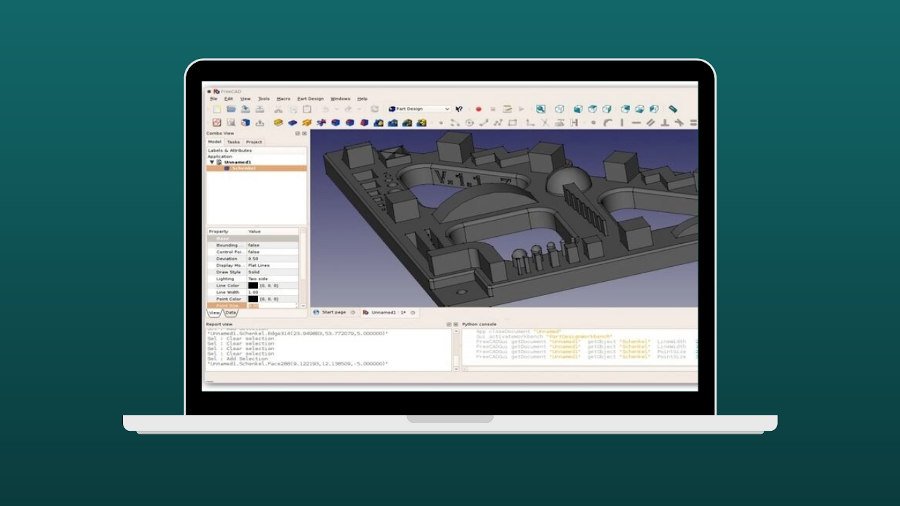
Software
- Uses their in-house XCS software
- Also compatible with LightBurn
xTool use their own XCS software which works well with all their lasers, but it is also compatible with LightBurn.
I wanted to try XCS out. So, for the push block you saw earlier in the review, I designed the original model in Fusion 360, before importing it into XCS. XCS was simple to use and to import designs into, and as you can see from the final laser cut results, it came out really well!
Fusion 360 design process:

Using XCS software:
But, thankfully, the xTool is also compatible with LightBurn which saves a lot of time learning anew.
If you haven’t used LightBurn before, trust me, it’s great. If you’re on a Mac, it’s also basically your only option, as LaserGRBL is Windows-only. As a Mac fanboy, LightBurn is a lifesaver, and also means I can use the xTool easily.
Summary
In our opinion, the xTool D1 Pro 20W is bthe best diode laser cutter around, though it’s also one of the priciest.
It’s better than the Ortur LM3 and other competitors, and if you have the money and you need a more powerful and faster 20W laser, we highly recomend it.
xTool D1 Pro 20W
Available at:
xTool D1 Pro FAQs
Can xTool D1 Cut Vinyl?
Although xTool D1 can cut vinyl (PVC), it’s best not to cut PVC with your laser. PVC releases hydrochloric gas when laser cut. The gas damages the laser optics and corrodes the metallic parts. Therefore, xTool D1 can cut thin vinyl, but you shouldn’t do it for the laser’s sake.
Can You Engrave Food with xTool D1?
Yes, xTool D1 can engrave many foods. The results vary depending on the food and the laser settings. The xTool D1 Blue Laser is better than the infrared laser for food engraving. So, although xTool D1 is not a specialized food engraver, its properties are very close, allowing it to engrave apples, bananas, etc.
Can xTool D1 Engrave Color?
xTool D1 can engrave color on some metals. Steel and titanium produce the best color marks. xTool D1 can also alter some plastics’ shade. Although MOPA fiber lasers are best for color-marking metals, xTool D1’s high frequency and high power allow it to produce colors that CO2 or low-power diode lasers can’t.
Can xTool D1 Engrave Plastic?
Yes, xTool D1 can engrave most plastics. xTool D1 can engrave acrylic, Polyethylene, Polypropylene, and Polyethylene Terephthalate. Although ABS is awful for engraving, xTool D1 can mark ABS to alter its shade without engraving it. xTool D1 can engrave PVC, yet it’s best not to do it since PVC releases toxic gas.
What Controller Does xTool D1 Use?
xTool D1’s latest upgrades use the GRBL controller. xTool’s controller is Arduino-based, and Makeblock has upgraded the firmware to GRBL to make xTool D1 (and D1 Pro) compatible with Lightburn. Although xTool D1’s new firmware is GRBL-compatible, you can’t directly choose “GRBL” in Lightburn. Instead, you should use xTool’s configuration file.
Is xTool Made in China?
Yes. xTool is developed by Makeblock. The company was founded in 2012 in Shenzhen, China. They launched the xTool brand in 2021, but xTool is a branch of Makeblock. Therefore, xTool lasers are made in China, but popular around the world. Laserbox is another Chinese laser cutter from Makeblock before they launched xTool.
Is xTool D1 G Code?
The new xTool D1 firmware is compatible with GRBL, so the new xTool firmware uses g code. However, you can’t use G code senders like UGS to control xTool D1. Only Lightburn and XCS can send xTool D1 g codes. The firmware has a configuration file that only Lightburn recognizes.
Other xTool laser reviews:
Related Articles:
- xTool vs Snapmaker: Which is Best for You?
- xTool vs Glowforge
- How does the xTool D1 Pro 5W stack up vs the 10W and 20W versions?
- Which is best: xTool D1 vs xTool D1 Pro