Ortur are known for making some of the best affordable laser engravers on the market. We’d know, we’ve owned both the Laser Master 2, and the Ortur Laser Master 2 Pro – and they were both excellent.
So, with the Ortur Laser Master 3 having just been released, we had to try it to see how the brand-new version performed. Overall, I think it’s one of the best laser engravers under $1000 you can buy – rivaled only by the xTool D1 Pro, which we compare it in-depth with in this article.
Our Ortur Laser Master 3 review tests this budget laser engraver in performance, and we also tried out some of the most popular accessories, so you can decide if you want to upgrade your laser with these, too. We tested the YRR rotary laser module for engraving on curved surfaces, the air assist, and the honeycomb table with an aluminum plate.
Ortur Laser Master 3
Available at:
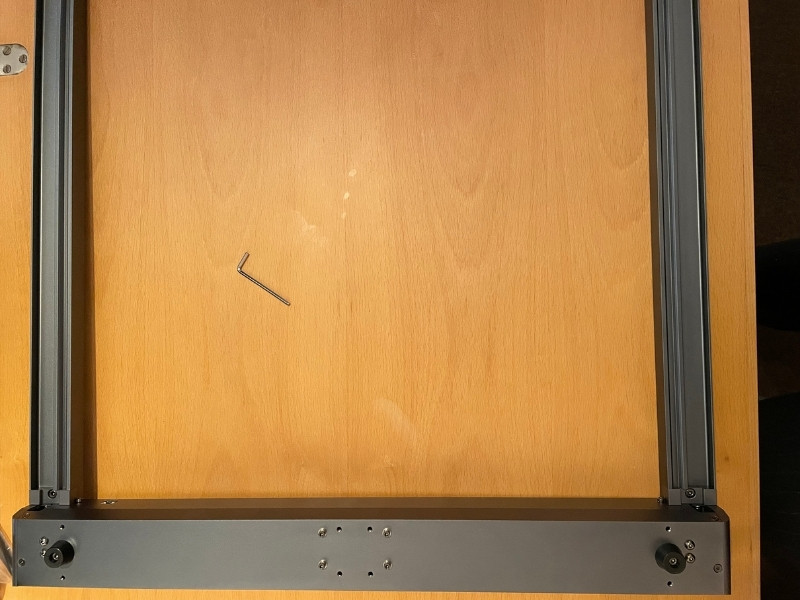
Unboxing and Assembly
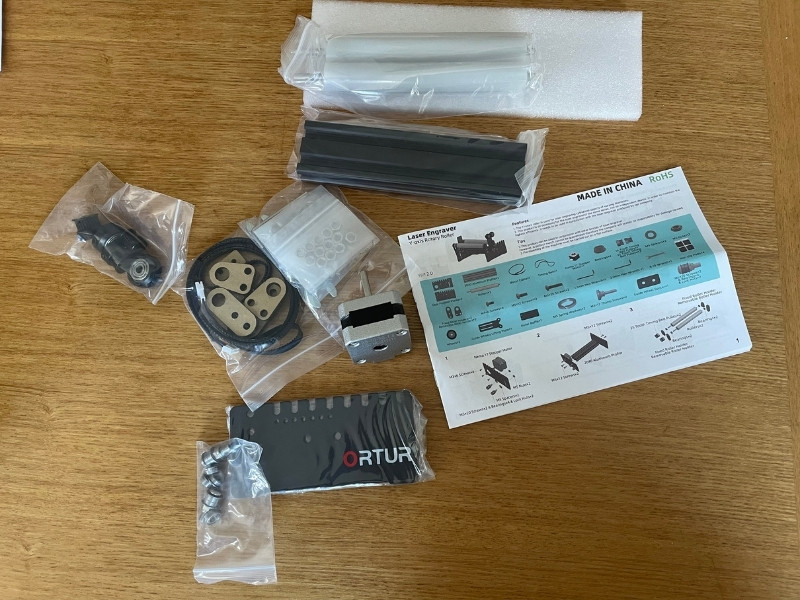
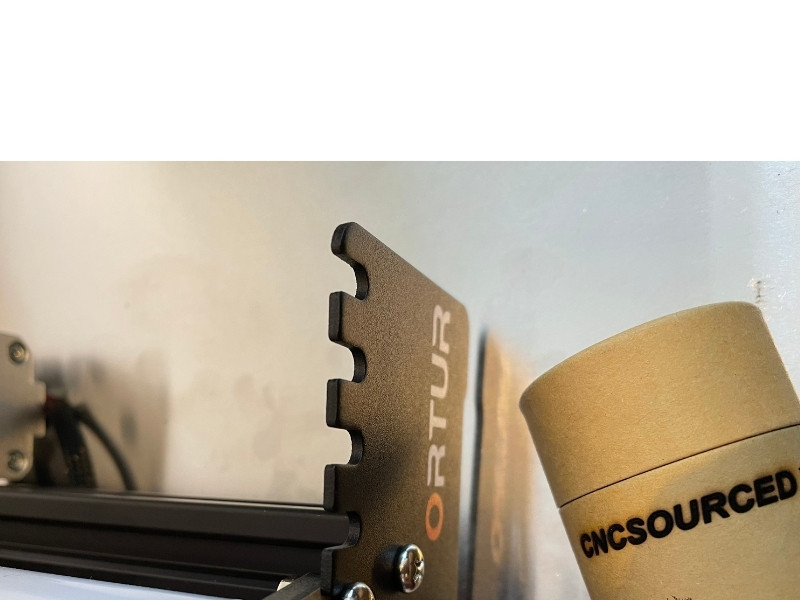
The Ortur Laser Master 3 comes compactly packaged, weighing 6.5kg in total – significantly less than most desktop 3D printers which routinely weigh 13 to 16kg.
This is still heavier than the Ortur Laser Master 2 Pro however, which weighed around 4kg, owing to the Laser Master 3’s newly fortified metal chassis for better stability.
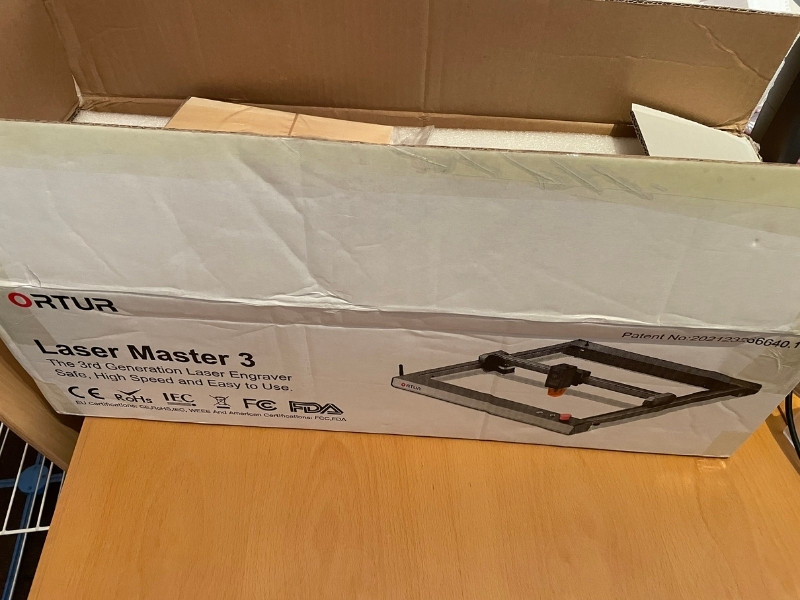
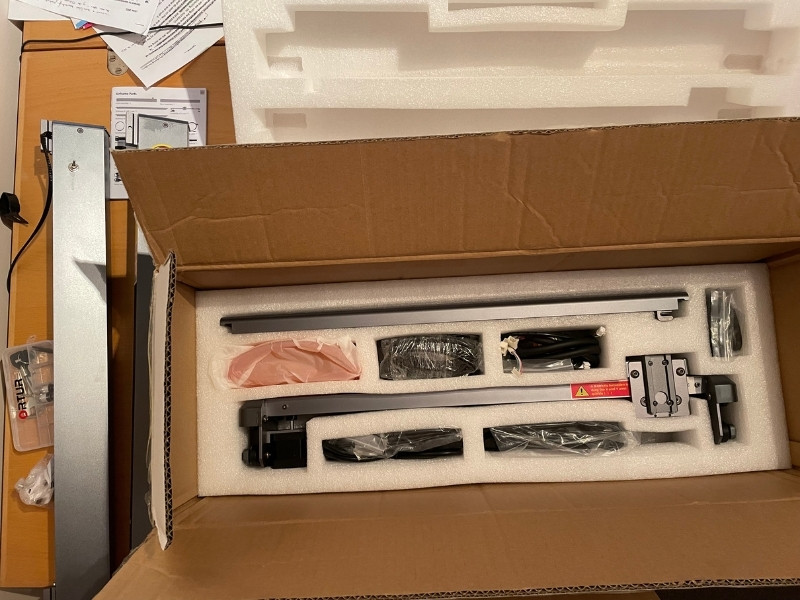
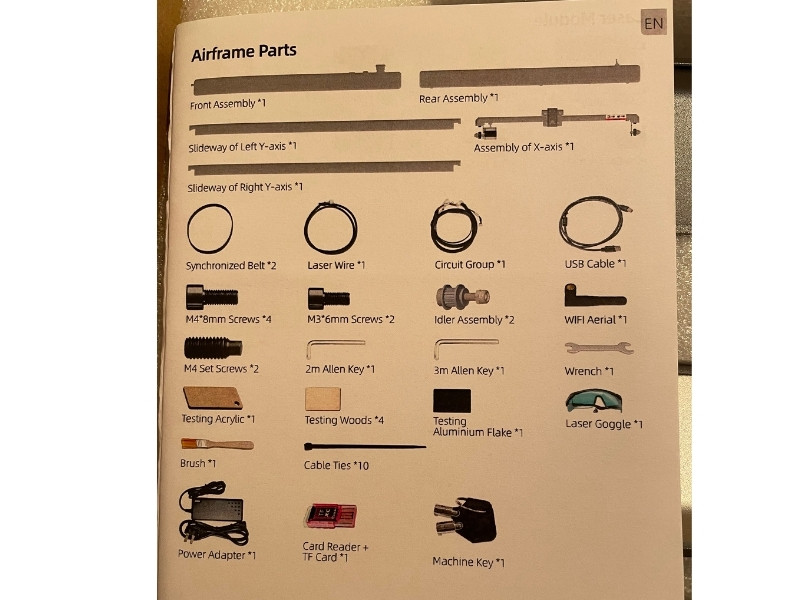
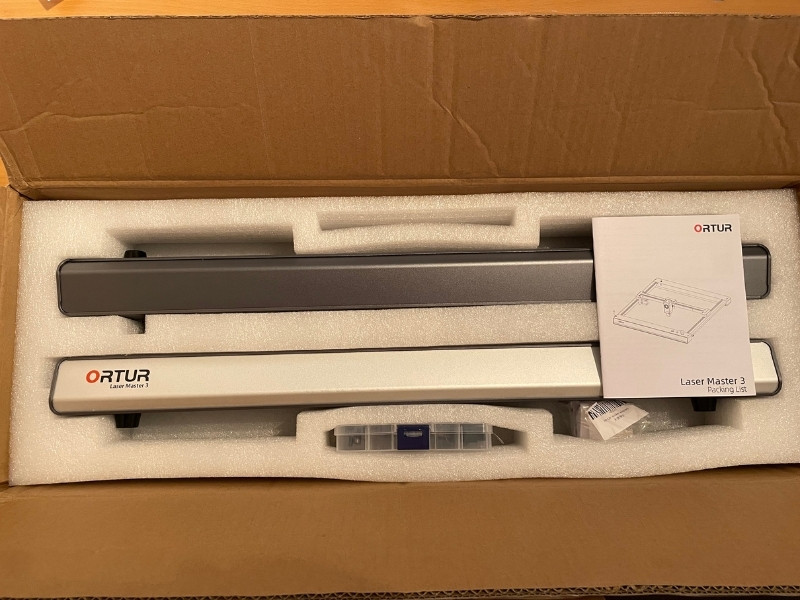
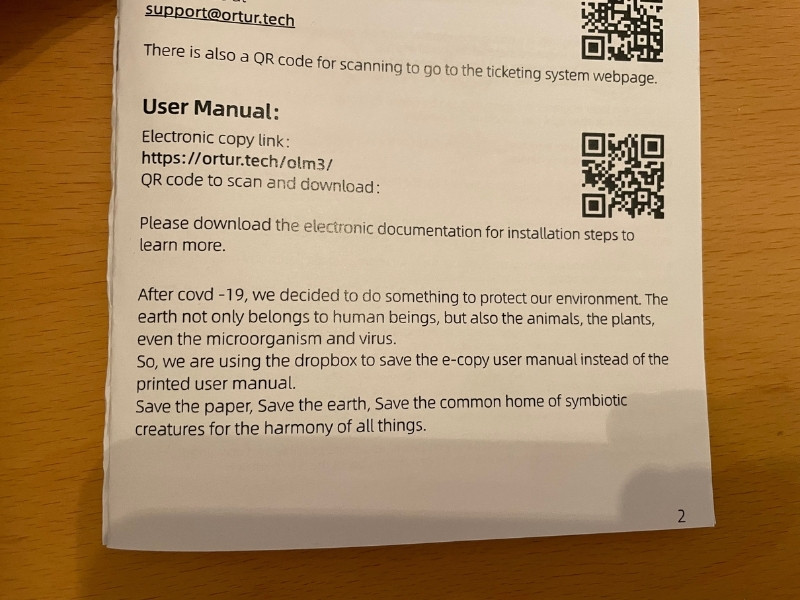
The Ortur comes with a Packing List handbook, detailing the parts list in every language. However, it doesn’t come with paper instructions – Ortur say that they have eliminated the paper instruction manual to protect the environment, so you need to access it via their website.
We’re happy to see companies prioritizing reducing their use of paper, but if you don’t have a reliable internet connection, this might be frustrating.
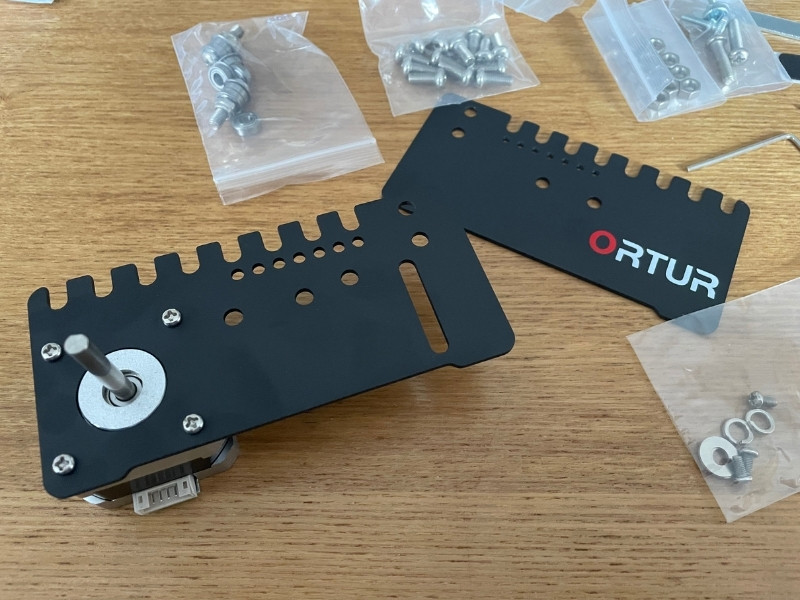
The assembly time was around 30 minutes, though the first step is difficult to do if you’re on your own. You thread a wire through the left side chassis piece, which makes it difficult to match it to put the 4x8mm nut through – but the rest is really easy.
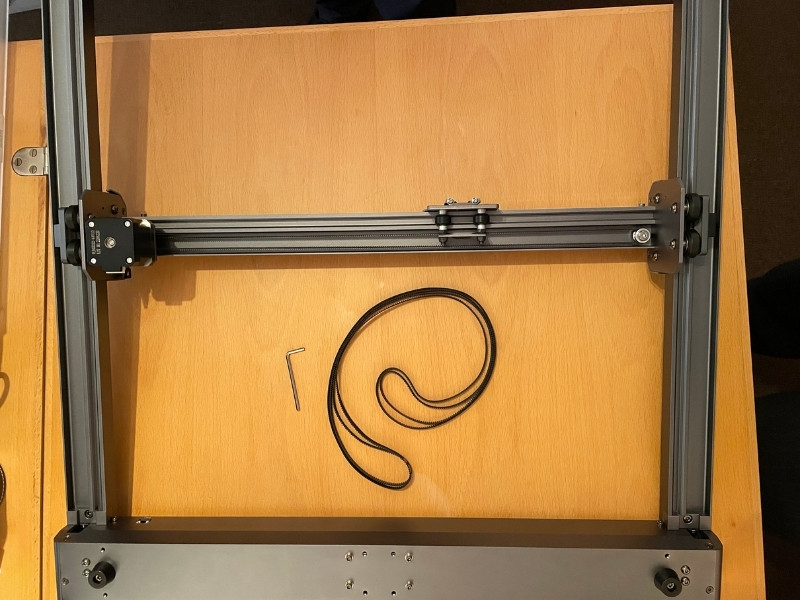
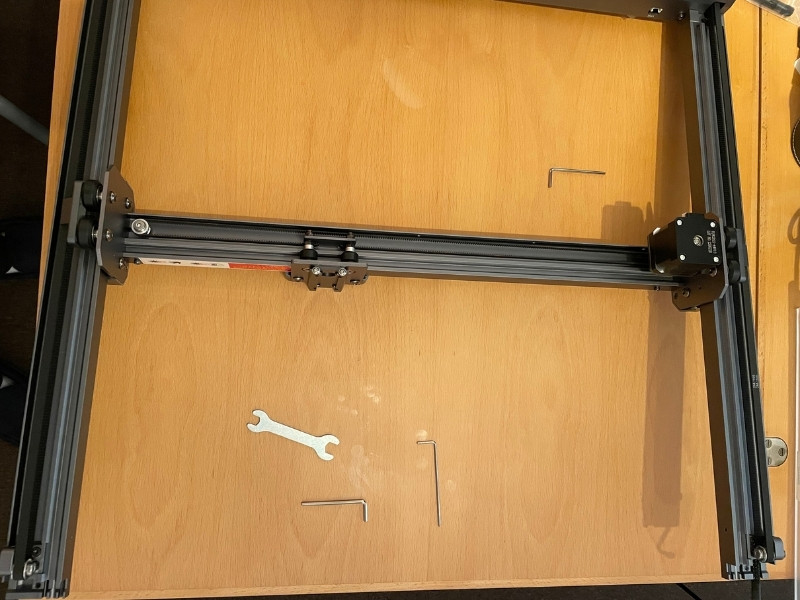
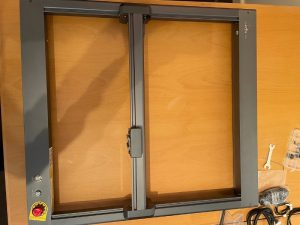
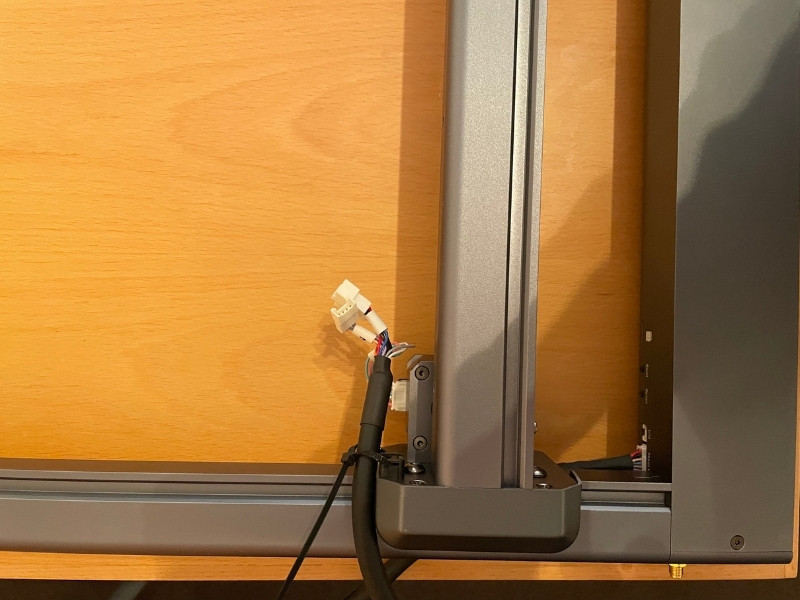
They’ve made it even simpler to build than the Ortur Laser Master 2 Pro, with a more intuitive system to build the chassis and belts, and the wiring mainly is better organized.
Once I turned it on, I updated the firmware, which you may also need to do. You can download the firmware from Ortur’s site, and then you just need to turn the machine on and press the Reset button to prepare the laser for a firmware update, and then move the files over when it is connected to your PC.


First Laser Tests
As with all desktop laser engravers, you get a few test pieces of material to calibrate and test out the engraver before you move on to bigger and more complex projects.
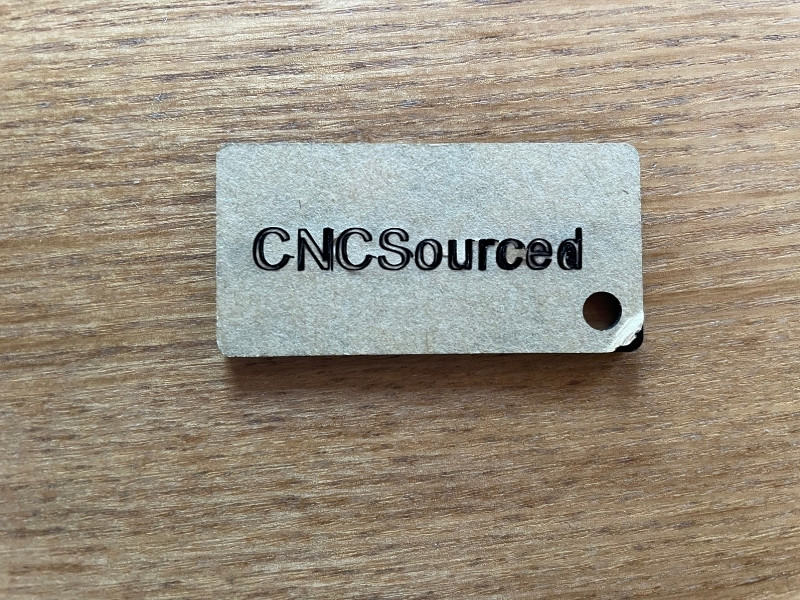
We first tried engraving on the wood test pieces – they are around 85 x 50 mm, so you can’t get any great detail, but we started with something simple: the CNCSourced logo. It features a black background, so it’s a good way to test the deep black contrast, as well as small and thin lettering for our tagline, which tests how precise and accurate the Laser Master 3 really is.
The settings trialed were:
- 100mm/s, 20% power
- 100mm/s, 50% power
- 100mm/s, 75% power
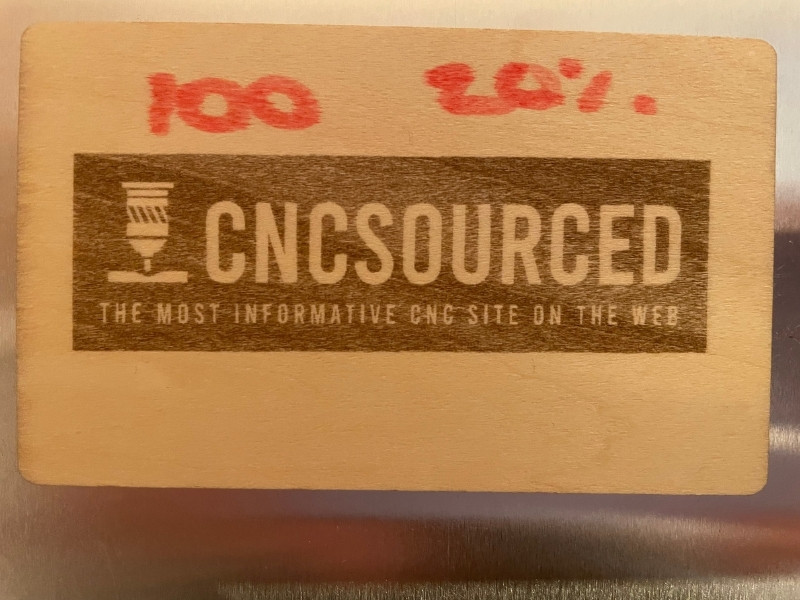
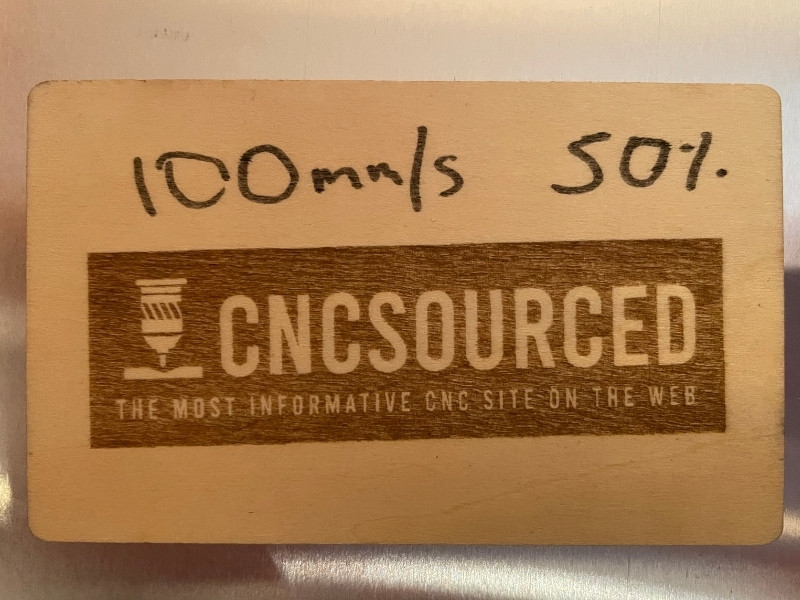
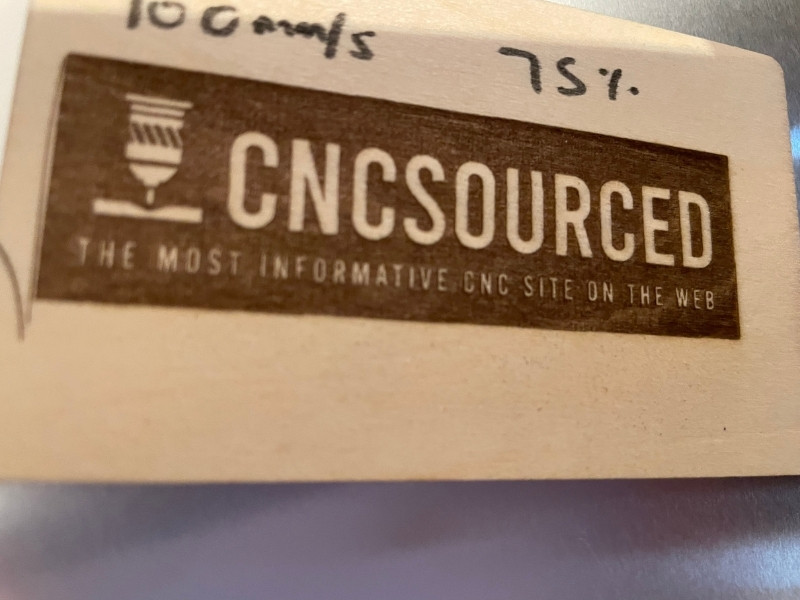
75% power provided the best results by far, with a darker and deeper engraved background, but without any burning on the intricate letters on the tagline, retaining the sharp negatives of the unlasered letters. Any higher power and I feel htis could have affected the quality of those small letters.
Ortur Laser Master 3 Laser Cutting Tests
Basic circle laser cutting
The next test was how effectively it could cut through the material. While we used 3mm plywood later in this test, we started on the test piece. At first I tried a very basic circle shape cutting out of the wood test material, with the following settings:
- 60mm/s speed, 80% power, and 3 passes.
The first 3 passes didn’t cut through, so I tried again. This also didn’t quite finish it, so I ran it again – for a total of 9 passes. These 9 passes still only took 1-2 minutes though, so it’s still very quick to cut.
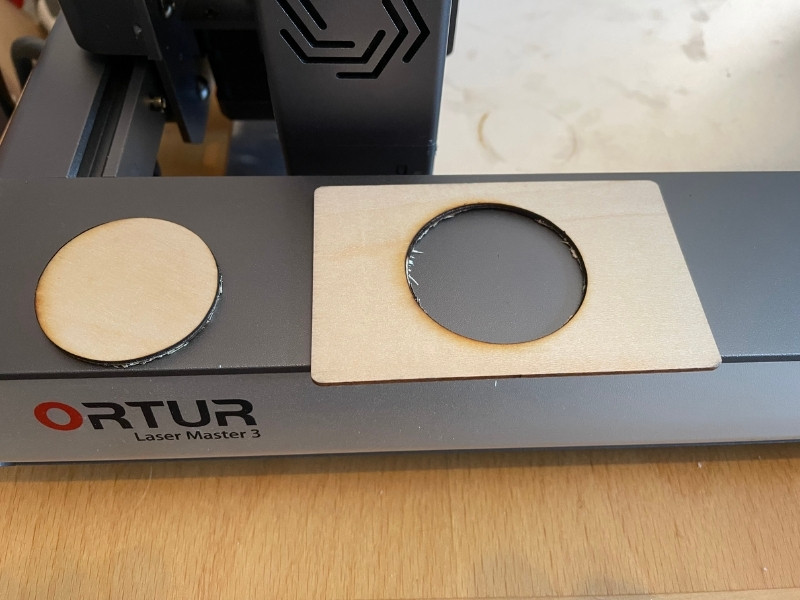
The better thing would have been to slow right down to 20mm/s, but I wanted crisp edges without any charring so I was more risk-averse with my cutting. Nevertheless, the Ortur Laser Master 3 passed the test, cutting easily right through the test piece of thin wood.
Laser cutting and engraving a coaster
I then tried to create my own custom coaster from scratch. I found a png file of Arsenal FC, a football (soccer for Americans) team, and set that to engrave at 50mm/s and 80% power for a darker, deeper engraving, as well as creating a new circle pattern in Lightburn around it, to cut out around the logo.
For the cut I used 20mm/s and 87.5% power and 3 passes.
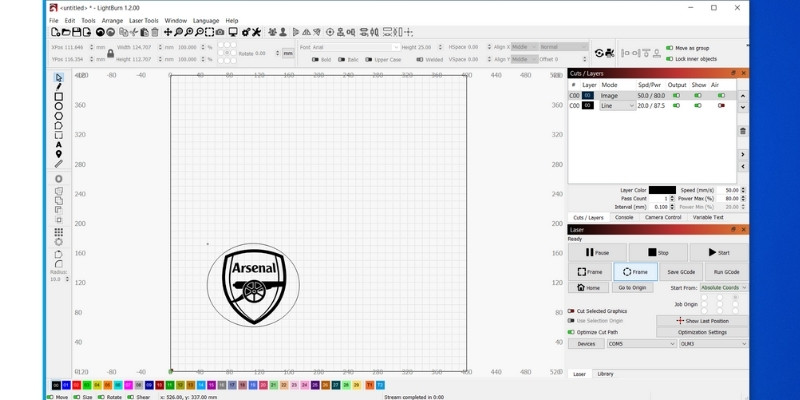
The engraving took around 15 minutes (it would have been fine done faster, but I liked how the deeper-set darker engraving looked), and to get a clean cut it took more than the 3 passes, but the entire cutting probably took less than 4-5 minutes. I could have gone higher power and slower speed – I would recommend 10-15mm/s – but I was just being risk-averse with my first laser projects on the Ortur Laser Master 3.

Ortur Laser Master 3 Laser Engraving Tests
With our test on the thin wood material that came with the Ortur LM3 finished, I tried a larger engraving on 0.3mm basswood sheets.
I tried the same Polywhirl pokemon image we engraved on hard wood in our Twotrees TTS-55 laser engraver review, to compare the two.
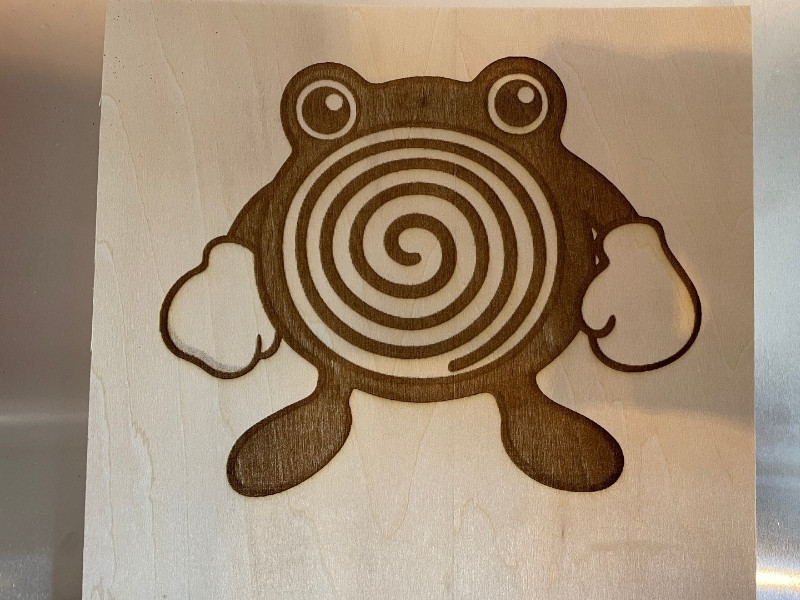
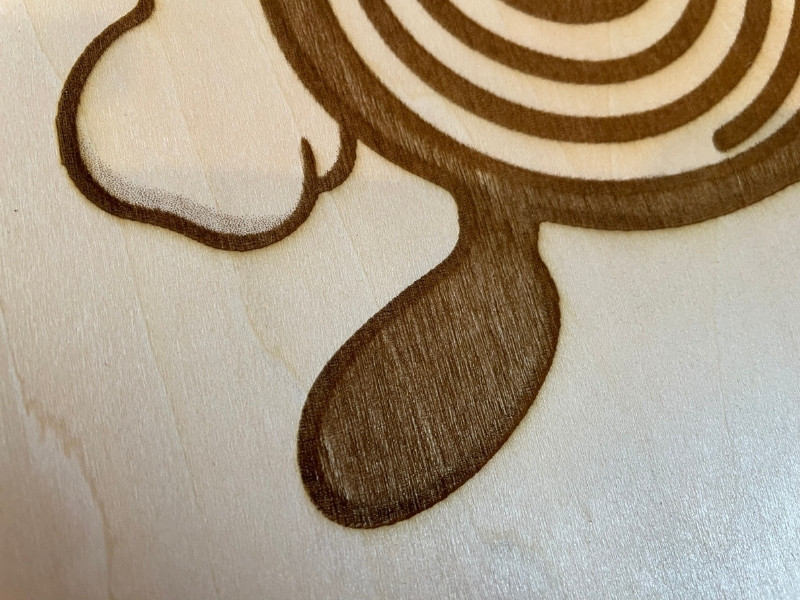
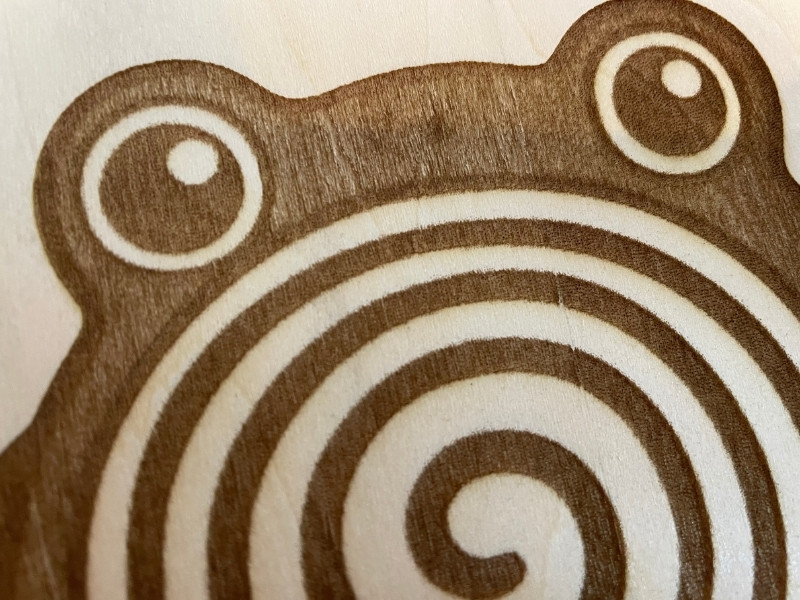
The engraving was done at 50mm/s speed, 80% power and just one single pass. It took around 50 minutes, and I think the results looked great. It wasn’t a very high-contrast image, but you can still make out the differences between the Polywhirl’s outline and the shaded blue inside, as well as the darker areas around the eyes and hands.
Acrylic Cutting and Engraving
Acrylic is trickier to cut than wood as there’s more trial and error in the settings, and it’s more difficult to tell how far through you’ve cut for ascertaining the number of passes. We engraved on two of the test pieces that came with the Ortur Laser Master 3, which were around 0.1mm and 0.3mm thickness black acrylic.
The laser works well with acrylic – it has no problem engraving or cutting into it. The thicker piece was cut almost all the way through in 5 passes at 15mm/s at 87.5% power – just one more pass would have cut through. But, I made the mistake of slightly jogging the piece, so I had to be content with the almost-cut acrylic keychain! But it would have cut through the last part with no trouble at all – which is great to know, as acrylic keychains and other fun acrylic pieces make fantastic sellable pieces.
I also want to laser cut a few small acrylic pieces to function as armor for some antweight RC robots I’m planning to build, so being able to easily cut through 0.3mm and 0.4mm acrylic is great for this. I’ll update this when I’ve spent more time cutting acrylic, but it’s most definitely capable of cutting through, and doing it quickly.
I also tried a basic acrylic engraving, and it worked fine. You can engrave in seconds, and depending on the material you’ll get different effects. If you’re engraving clear acrylic or other certain types, the process is slightly different, but just do your research first.
Design
This is the best-designed Ortur Laser Master yet. The Laser Master 2 Pro improved on the 2, with the tank track-looking side a better-looking and more effective way of keeping the wiring in one place (and not triggering the emergency stop by getting in the laser’s way).
The aluminum chassis feels well-made, adds stability and therefore precision, and overall just looks nicer and more professional. I much prefer the steel metal look to the previous black acrylic look of the Ortur Laser Master 2 Pro.
And, while it may not directly impact the design, the placement of the emergency stop button on the right-hand side next to the power button is good ergonomic design and improves safety.
Working Area
Both the Ortur Laser Master 2 and 2 Pro also had 400 x 400 mm working areas, which is much larger than most desktop lasers.
To put that into perspective, we recently also tested the Two Trees TS3, which is a professional laser cutter in the next price range above the LM3, which has a smaller 300 x 200 mm work area – though it is enclosed, which affects size.
The actual machine encompasses 580 x 550 x 180mm, and during the build you screw in two 3x6mm screws to prevent the laser head ever hitting the edge of the chassis and potentially damaging itself.
Performance: Speed, and Cutting & Engraving Quality
Cutting & Engravity Quality
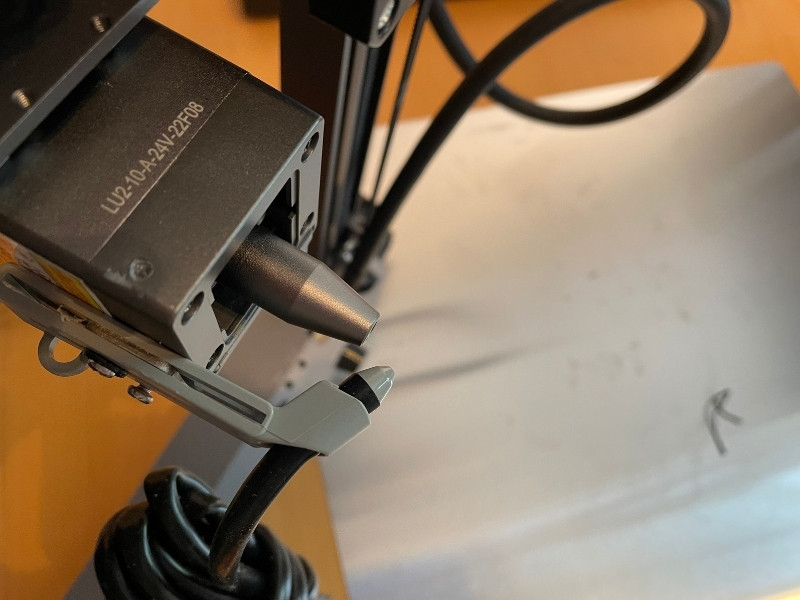
With a focal spot size of 0.05 x 0.1mm, the OLM3 brings delicate details at 0.01mm.
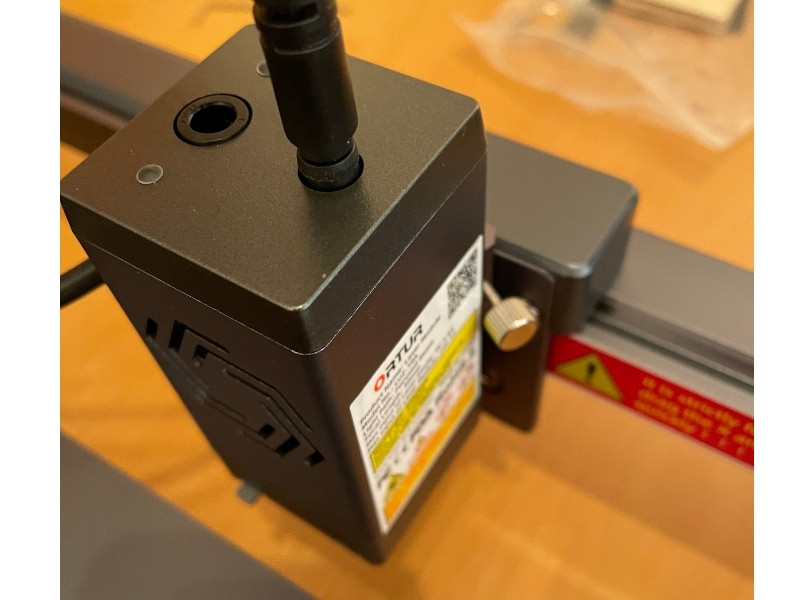
Whereas the previous Ortur Laser Master 2 and Pro used a single less powerful 5.5W diode laser, the Ortur Laser Master 3 boosts this to 10W.
It does this in the same way that Snapmaker harnessed when they released their High-Power 10W attachment: by combining two 5W lasers together to output 10W power.
Ortur have overhauled both their laser combining technology (in combining the lasers into one 10W laser) and their laser spot compression technology (for better precision).
The results are deeper and faster cutting – for example, the Ortur LM3 can cut through 30mm thick acrylic sheets, and 20mm pine board. This includes 12mm wood cutting in a single pass, as well as single-pass 10mm acrylic cutting.
Laser Module
The laser module itself is designed to be super light – it’s only 235 grams. This keeps it stable, keeps it cool and prevents overheating, and it keeps high-power laser delivery very consistent.
Motherboard
The Ortur Laser Master 3 comes with the latest ESP-Pro-v2.4 motherboard, and is designed to have bi-directional I/O interfaces. The motherboard communicates with other machine components, and with the bi-directional interface, can report back to the motherboard for updating their current state – giving you more flexibility and environment control than ever before.
The OLM3 contains a newly improved 11th gen laser motherboard to handle the increased laser power and maintain it throughout your project. The extra power prevents any overheating or excessive noise, as well as keeping everything stable and consistent.
Speed
One of the major selling points of the Ortur Laser Master 3 is the 20,000mm/min max speed. Some other lasers say you can reach these speeds, and technically you can, but without adequate laser power, you’ll barely make an impression on the material. With the Laser Master 3, you can still create detailed and contrasting greyscale engravings at this speed.
For reference, 20,000mm/min means engraving a 100×100 mm image in around 10 minutes. Most desktop engravers that hover at around the 6000mm/min speed would take 30 minutes or more for the same engraving.
Material Compatibility
With the Ortur Laser Master 3, you can engrave:
- Wood
- Acrylic
- Leather
- Metal (stainless steel, aluminum, etc)
- Ceramics
- Fabric
- Food
- Tinted glass
- Paper and cardboard
- If you have the YRR rotary roller: cylindrical items like rolling pins and bottles
Accessories and Upgrades
We’ve split our review into the Ortur laser upgrades that we used for this test, as well as other available upgrades that we didn’t test.
Accessories we used:
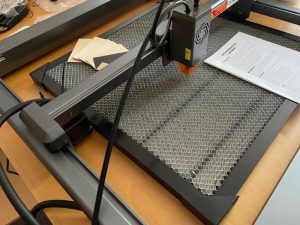
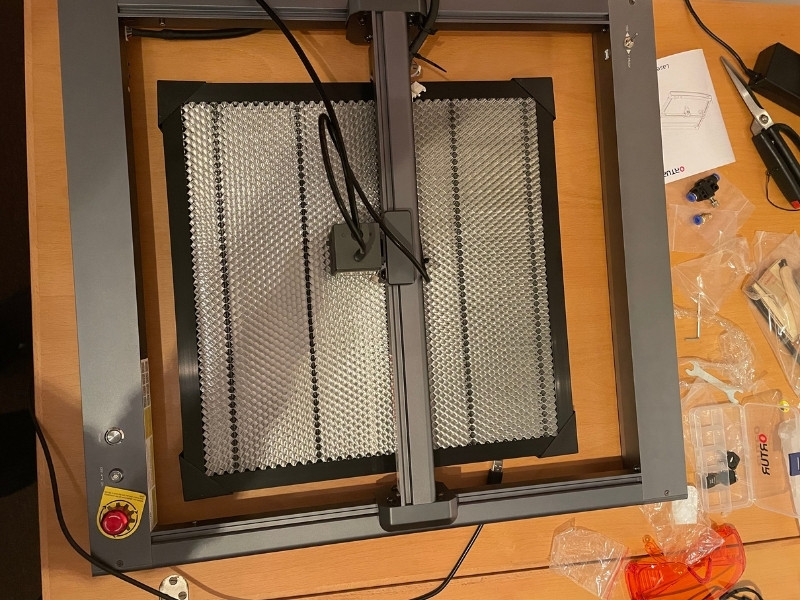
Laser Engraving Honeycomb Bed Table
- Price: $129.99 — Available at Madethebest here / Amazon here

Open area laser engravers without an enclosure need a surface underneath them to prevent you burning marks on your workshop desk. Some use a sacrificial block or other homemade DIY solution – we used a large spare tile from a redecoration when testing the Ortur Laser Master 2 Pro.
But in comparison, using a specially designed honeycomb table (like you see in enclosed engravers) just made the laser engraving and cutting process so much simpler. It’s also perfectly even – homemade options can be slightly uneven surfaces, which can have a tiny (yet non-zero) effect on overall performance.
If you have the extra hundred dollars, go for a specially designed honeycomb bed for your laser engraving workshop.
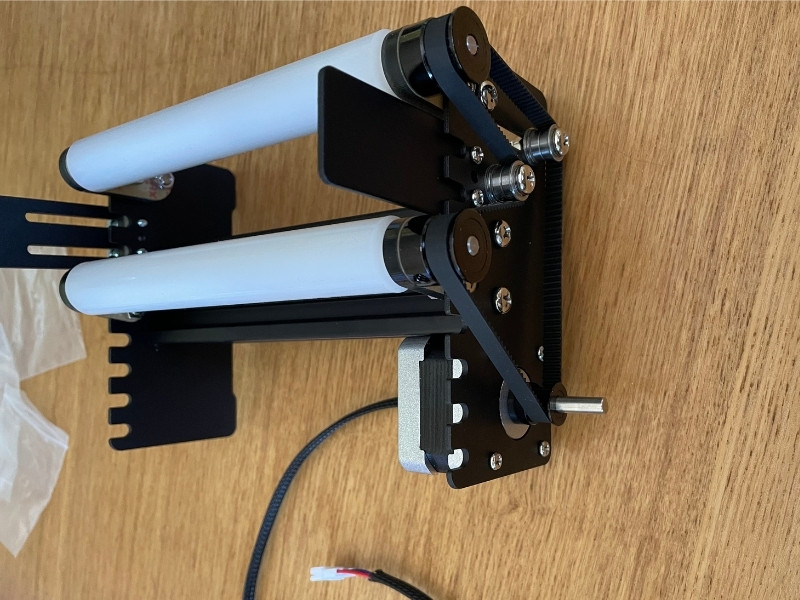
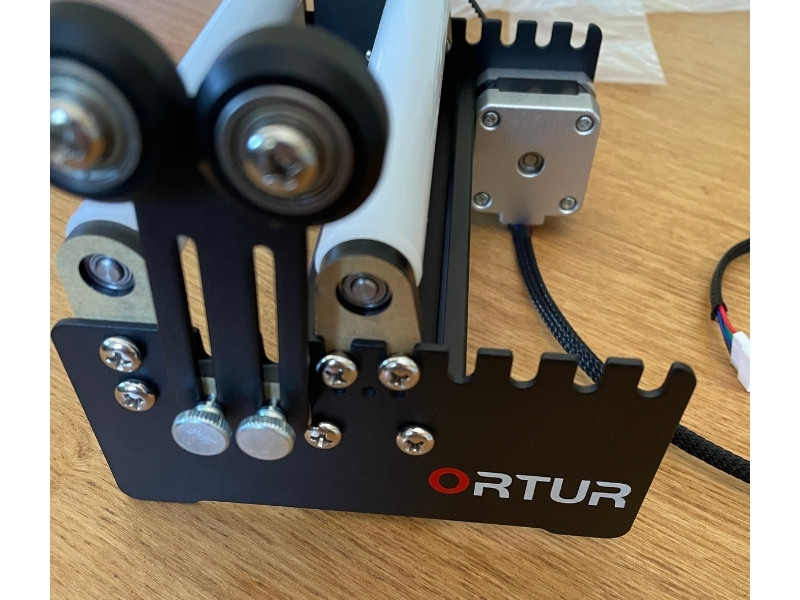
YRR 2.0 Rotary Roller
- Price: currently $79.99, usually $99.99 — Available at Madethebest
We highly recommend this Ortur Laser Master 3 accessory if you’re planning on engraving anything round, like glasses, bottles or beakers, gift cases, or anything else.
We’ve already tested the 4-axis rotary roller for the Snapmaker 2.0, and were really impressed with how easy it was to use. Naturally, when buying an accessory you build from scratch, and that isn’t designed specifically for one use (it’s also a chuck vs a roller), it’s a better experience, but considering the YRR 2.0 rotary roller costs under $100 vs the Snapmaker’s $649, it’s an absolute bargain.
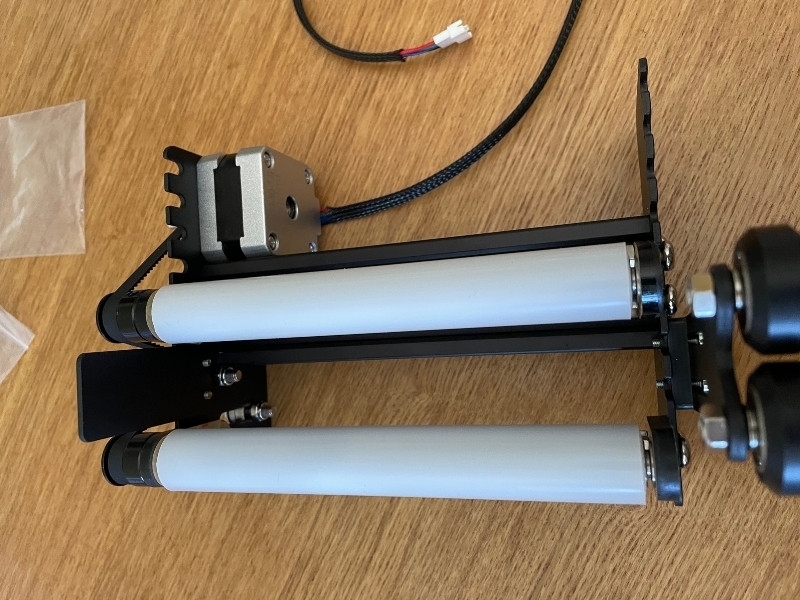
The setup was okay – it’s not super simple, but also not super complex. The more complex part is getting it setup with the Ortur Laser Master 3 to test – there is a guide with the instructions for use with LaserGRBL, but we set it up with LightBurn.
For setting it up with LightBurn, we recommend you watch this video – it was really helpful for us.
We only briefly used the rotary roller; all we did was the same test as we did on the Snapmaker: a small dotted engraving to test contrast, and a very small CNCSourced logo engraving. We plan to try more on glass in the future, and will update this article when we’ve done more.
If you want to engrave anything cylindrical like beakers or glasses – it’s the best option you’ve got for the lowest price, and these pieces are like money printers on Etsy!
Air Assist
- Price: $89 — Available at Madethebest here / Amazon here
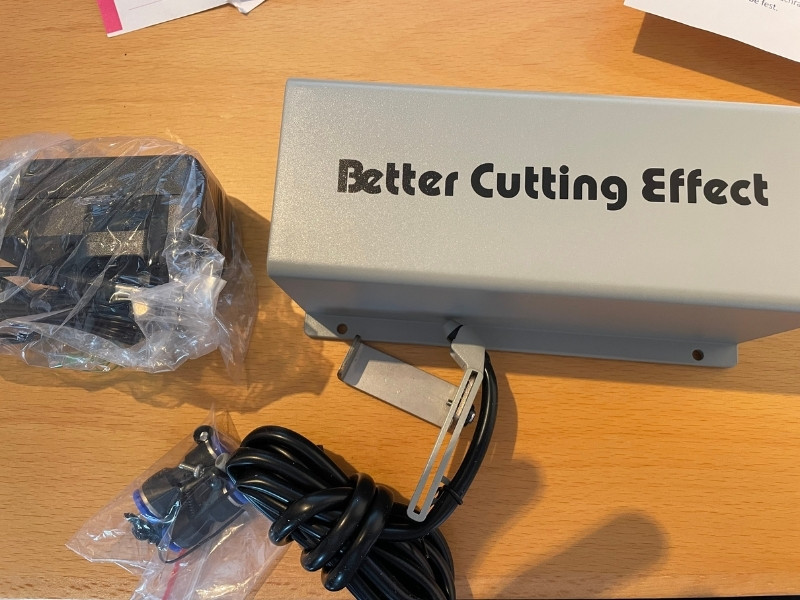

We also used an air assist and pump kit with the Ortur Laser Master 3. This isn’t made by Ortur, but fits with their lasers. Well, it should do – I think our air assist was built slightly off, because we had to bend the metal bar outwards to fit around the Laser Master 3’s laser head.
Still, we attached it and made it work. It’s a high-quality kit that for deeper cuts is a godsend. Basically, to put it short, an air assist helps dissipate heat from the laser so that it isn’t as concentrated on your wood or other material you’re cutting, preventing the black charred marks on the corners and sides of your cuts, and also reducing the chance of any fires. It can also help you make deeper cuts more quickly.
Read more: the benefits of adding air assist to your laser
Accessories we didn’t use:
Metal enclosure
- Price: $329.99
The enclosure keeps the light and fumes well away from you, and if you’re a serious hobbyist you should think about this accessory. It’s the most expensive upgrade however.
The metal enclosure is great for safety due to the sturdy metal structure. It also has exhaust fans that maintain high airflow and reduce noise, along with the exhaust pipe for redirecting fumes. It’s also easy to carry with the side handles, making it more portable – and ideal for storing your Ortur laser if you’re ever moving between workshops.
Z-height adjuster
- Price: $65.99
Makes it much easier to adjust the laser head’s height with the height adjuster that you install on top of the laser head. This makes for far easier and more precise focal length calibration, as well as increasing your moving range of 57mm with the laser, allowing you to engrave thicker materials.
Software
The Laser Master 3 is compatible with the following laser software:
- LaserGRBL – for Windows only. If you’re on MacOS, we recommend LightBurn instead, as LaserGRBL is not compatible.
- LightBurn – this is a paid option, costing $40. However, we still recommend LightBurn highly, and used it for this test. It’s also the best choice if you’re on a Mac and can’t use LaserGRBL.
- Laser Explorer – the app is available on Android and iOS devices, and connects to your phone so you can send photos you’ve just taken to be engraved.
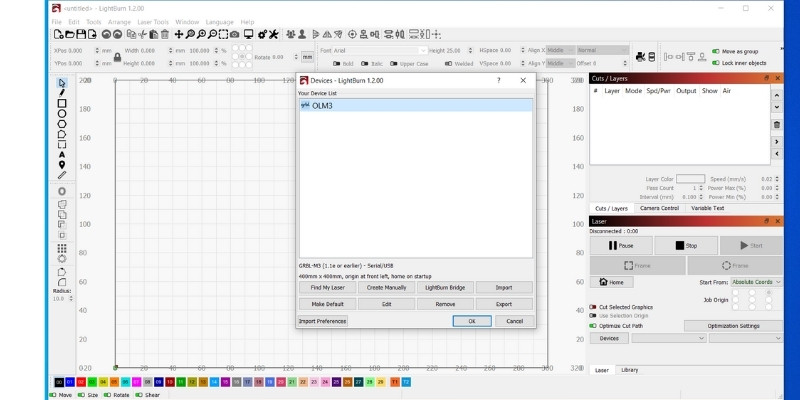
We used LightBurn, but LaserGRBL is a great option, and if you want to send projects to the OLM3 via the app, you can download the Laser Explorer app.
It’s easy to connect the Ortur Laser Master 3 via LightBurn. For us on Windows, it automatically detected the laser so we could add it, and it automatically added the size profile (400 x 400 mm) and front-left starting point.
For Mac users, you may have to add the profile manually, but LightBurn is generally reliable on Mac.
Connectivity
One of the main benefits of the Ortur Laser Master 3 is how widely connectable it is.
Not only can you connect to Lightburn or LaserGRBL by USB, but you can also connect via the laser Explorer app on your iOS or Android smartphone.
While I’m personally old-fashioned and like manually connecting, it is really cool to be able to send over any pictures you’ve taken, or any other designs quickly from your phone and engrave them straight away.
The LM3 also has WiFi connection (you plug the aerial into the side of the machine when you assemble it) for connecting to the webserver in the machine’s firmware. Any laptop or iPad that can launch a browser can connect to your network to control the laser engraver.
The connecting options are:
- USB
- SD card
- WebUI
- FTP
- Laser Explorer app
Safety
The Ortur Laser Master 3 comes with 7 built-in safety features:
- Safety Lock (Keep the Key, Professional Use Only)
- Active Position Protection
- Sloping Position Protection
- Exposure Duration Detection and Limitation
- Voltage and Current Safety Control System
- Host Computer Watchdog
- Emergency Stop Switch
The emergency stop switch is a great safety addition, and comes with the Ortur Laser Master 3 as standard. Some see it as a premium addition, for example our Snapmaker 2.0 3-in-1 3D printer doesn’t come with an emergency stop button – you have to pay extra for it. If you ever run into trouble, just slam the button and your project will immediately stop.
The safety lock doesn’t let you activate and use the OLM3 unless you unlock it with the key. And there are various other safety features that show the OLM3 to be a safety-focused laser engraver.
Difference between Ortur LM2/Pro and LM3
They have the same working areas, but:
- The Laser Master 3 offers 20,000mm/min speed, versus the Laser Master 2 Pro’s 10,000mm/min.
- The OLM3 has 10W power from two 5W lasers, whereas the LM2 Pro has half the power, at 5W. This makes it better for engraving on tough materials like aluminum and other metals, as well as making for faster and deeper cuts on wood and acrylic.
- Laser Master 3 can cut 30mm-deep acrylic and 20mm-thick wood, whereas the LM2 Pro cuts around 12mm wood and 10mm acrylic.
- The Laser Master 3 is connectable via WiFi, you can send images to engrave via the Laser Explorer app, and via SD card or U disk. The LM2 Pro is only connectable via USB.
- The LM3 has an upgraded metal aluminum chassis. The LM2 Pro is mostly black acrylic, and the standard Laser Master 2 was even less well-protected.
- The LM3 has an upgraded motherboard.
You can read more about the differences between the Ortur Laser Master 3 and the Ortur Laser 2 Pro here.
Ortur Laser Master 3
Available at:
Where to buy the Ortur Laser Master 3
You can buy the Ortur Laser Master 3 at:
Ortur Laser Master 3: Full Specs
| Working area | 400 x 400 mm |
| Machine size | 580 x 550 x 180 mm |
| Weight | 6.5kg |
| Engraving speeds | 0 to 20,000mm/min |
| Laser wavelength | 455 ± 5 nm |
| Spot size | 0.05 x 0.1 mm |
| Precision | 0.01 mm |
| Laser power | 10W |
| Max cutting depth | 30mm acrylic, 20mm pine board |
| Compatible materials | Wood, acrylic, metals, ceramic, paper, card, and more. |
| Motherboard | OLM-ESP-PRO-V.2.4 |
| Motors | 2x 42×60 Y XL stepper motors |
| Connectivity | via WiFi, USB or SD card, iOS/Android app, U-disk |
| Effective light output | LU2-10A (9500 – 10500mw) |
| Software connectivity | LightBurn, LaserGRBL, or Laser Explorer |
| Compatible file formats | JPG, PNG, BMP, SVG, and more |
| Warranty | 12 months |
Other tests:
- Ortur Laser Master 3 vs xTool D1 Pro
- TwoTrees TS-55
- TwoTrees TS3 review
- Longer Ray 5 laser engraver review
- Snapmaker 2.0 CNC review
- Snapmaker 2.0 10W high-power laser review