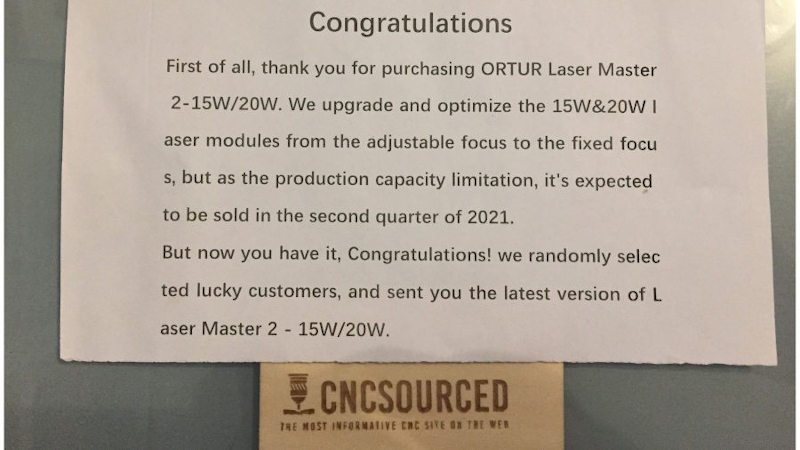
The Ortur Laser Master 2 is one of the best low cost laser cutters around, and has become one of the most popular DIY hobbyist laser kits for ambitious makers worldwide.
You don’t get loads of extra features that optimize your cutting for you, so a fair amount of trial and error is required. However, with its low price and large work area the Ortur Laser Master 2 ushers in a new era of accessible laser cutting, and once you’ve found the right settings for you, is very effective.
We have since tested the Ortur Laser Master 2 Pro and the Ortur Laser Master 3
Ortur Laser Master 2 Specs: Speed, Work Area, Weight
- Ortur Laser Master 2 price: $220-390 — Available on Gearbest here / Available on Amazon here
- Or: Ortur Laser Master 2 Pro: $449 — Available at Ortur here
- Ortur Master 2 work area: 400 x 430 mm
- Ortur laser speed: up to over 3000mm/min
- Weight: 3.5kg / 7.7lbs
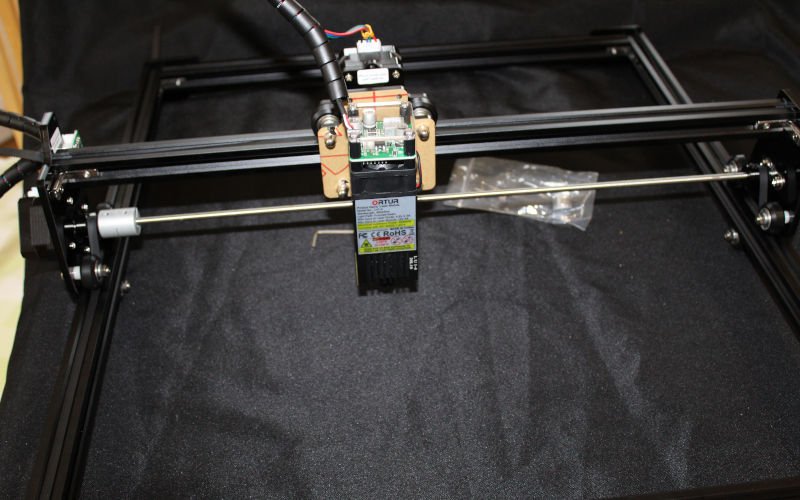
Building the Ortur Laser Master 2
There are 7W, 15W and 20W types of the Ortur Laser Master 2, depending on how much power you need. We believe this review covers all well as it not only covers the power required for certain projects, but the general set-up, connecting, software and tips and tricks.
First of all, the Ortur Laser Master 2 is light and portable, weighing under 4kg in total. Even for beginners to laser cutting, assembly shouldn’t take more than 45 minutes. If you’re good at DIY you’ll probably be able to finish assembling the Ortur Laser Master 2 in under 20 minutes.
It comes mostly assembled, with the only parts to be assembled being the ones that would make the laser cutter far too large to ship efficiently. You just need to screw each side of the frame together to form the sturdy square base, screw the three legs and the Ortur interface on, tighten and attach the belts on each side, screw the X motor and laser module, and attach the wires to each point.
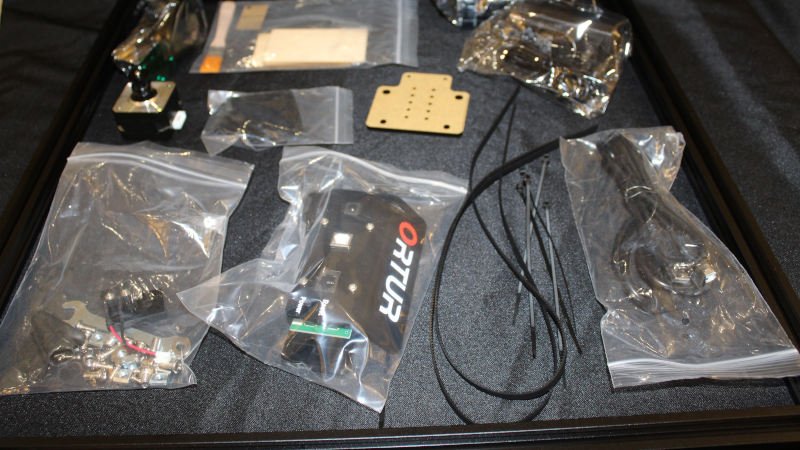
The instructions are easy enough to follow, and even if you do struggle, there are a variety of other guides online that’ll take you through building the Ortur Laser Master 2 in even more detail.
Nothing is particularly difficult, and the only mildly tedious parts came from having to unscrew one side and reposition the belt because it had changed position slightly during a further assembly step. Redoing this took less than two minutes, and overall we definitely class the Ortur Laser Master 2 as easy to build.
We recommend, if you don’t already have this set up, to use a large sacrificial material block you don’t mind ruining with a clearly marked and gridded pattern, especially for smaller designs and cuts. For engraving this is less crucial as you won’t be cutting through material, but for cutting it’ll save the surface your laser cutter stands on from being ruined.
The grid on the block also makes it much easier to line up your designs. This is especially useful if you’re using smaller blocks of material, such as the 90mm-tall plywood slabs we used, as even small errors in material placement can ruin your material if your design spills over the edge.
Software and Preparation: LightBurn or LaserGRBL
For free laser cutter software, Ortur recommends LaserGRBL. The instructions come with an in-depth guide to setting up the Laser Master 2 with LaserGRBL. However, LaserGRBL only works with Windows, so if you’re a Mac or Linux user you’ll need to instead use LightBurn.
LightBurn is a premium laser cutting software, but only comes with a 30-day free trial. It’s easier to use and cut with, and comes with more features, but a license beyond that 30-day period costs $40. This $40 gets you an unlimited license for up to 2 machines, and free updates for a year.
LightBurn is your best option for Mac or Linux OS, but it’s simplicity and user-friendliness makes it great for Windows, too. Ortur also include detailed instructions for setting up the Laser Master 2 in LightBurn for laser cutting. We used LightBurn for our Ortur Laser Master 2 review.
Unlike 3D printing software like Cura where there are standard settings for most common 3D printers that are pre-installed, CNC software like LightBurn are not quite as advanced. You can either manually enter the Ortur’s 400 x 430 mm build area and select Front and Centre for the origin, or select the connected Ortur laser cutter within LightBurn’s search menu to connect the laser cutter automatically.
You will have to select your own custom settings which require some experimentation based on the material you’re cutting, and choose your laser power settings and number of passes based on your desired results.
Safety
As the Ortur Laser Master 2 does not come with any kind of enclosure or cover, instead being an open air laser cutter, you are directly exposed to both the laser’s light and power, and the fumes without any filtration.
The Ortur Laser Master 2 comes with protective glasses to prevent any eye damage from the laser or debris, which must be worn at all times. Ideally it’s still best to leave the room while cutting or engraving any materials, and definitely keep the active machine away from any colleagues, friends or family.
Ortur Laser Master 2 Review: Testing Cutting & Engraving
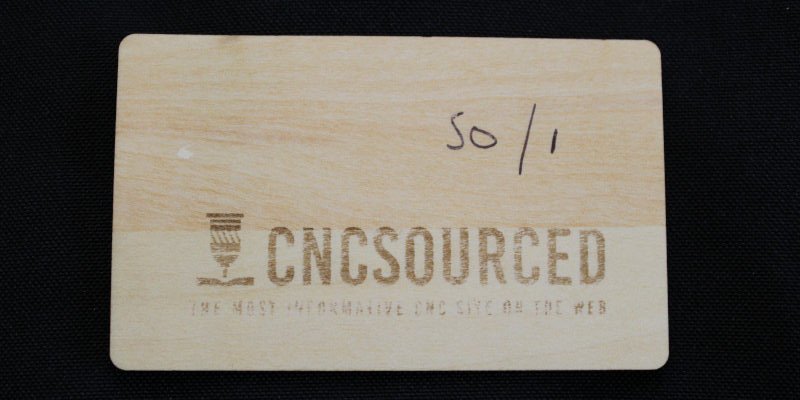
For our first attempt we started conservatively, testing the results for 50% laser power and just a single pass of the laser. We were using plywood which was affected somewhat by the glue between thin wood layers, and tested engraving our logo on to the wood.
The results were a washed out engraving with zero depth — the only effects were discoloration right on the surface, and no material was cut into to create depth.
We therefore tried again, upping the laser power to 75%, and again just one pass of the laser. The results were much better, with a deeper and darker engraving that contrasted more heavily with the plywood.
However, the intricate parts such as the tagline under the logo and the smaller aspects of the drill illustration to the right were less sharp, and there were a few areas of the letters where the engraving was not solid.
We tried again at 75% power but with a second pass of the laser.
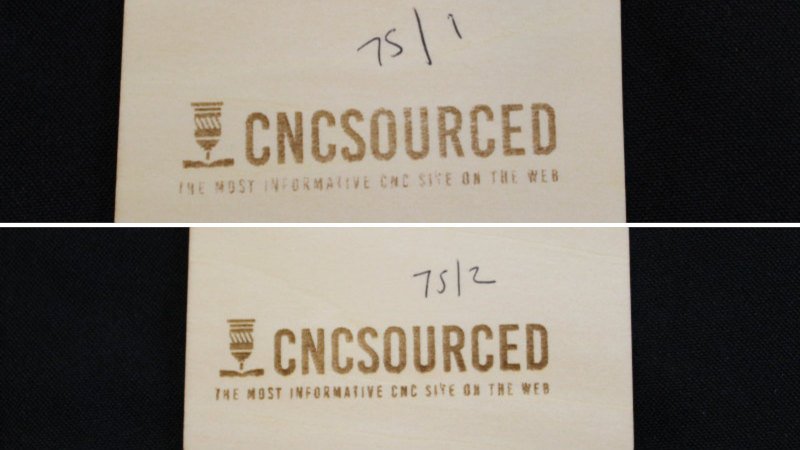
This created a much better result, seen most notably in the most intricate areas, making everything pop and contrast much better with the rest of the material. The engraving was etched more deeply into the plywood, and even the intricate letters underneath and the drill illustration were sharp and legible.
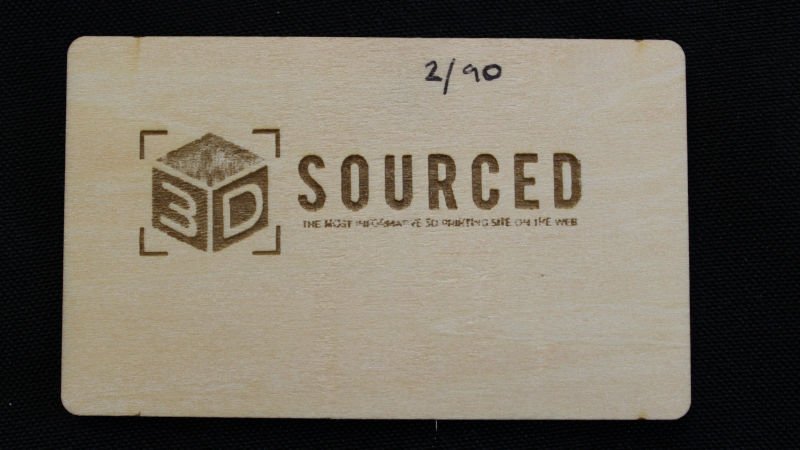
We then tried engraving the logo of our 3D printing site, 3DSourced. The results impressed us, the corners were sharp, the three visible sides of the cube were visibly different shades based on the light source, and the darker parts were deeply cut in to create a darker engraving.
We used 90% laser power and two passes, and noticed with the rise to 90% power brought a much deeper cut into the plywood and a more contrasting finish. With better optimization of the laser, we believe the smaller tagline would have been far crisper, and in later tests found it to be capable of great resolutions.
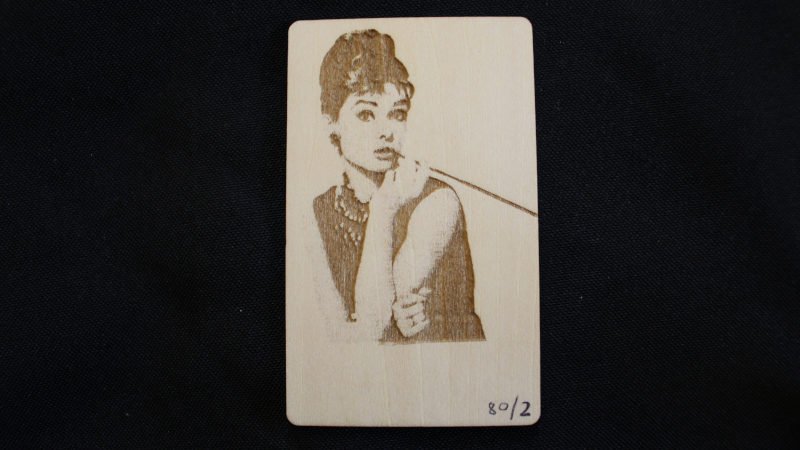
We then upped the stakes and difficulty for the Ortur Laser Master 2 in our review, and tasked it with engraving a black and white photo of film icon Audrey Hepburn. We used 80% laser power, 100mm/s speed, and two passes of the laser.
The resulting engraving is instantly recognizable as Audrey Hepburn. When considering the entire image is just 80 x 50 mm, and within this small features such as the eyebrows, eyes and lips were crisp and sharp, the Ortur Laser Master 2 is most definitely an accurate laser cutter for the price.
Overall, the Ortur Laser Master 2 impressed us with its engraving abilities.
Ortur Laser Master 2 Advantages
- Great value cutter and engraver: for just over $220 (less than $200 for the 7W version) it is precise, powerful and versatile.
- Large work area: the 400 x 430 mm area is more than enough for all but the largest CNC projects. For anything larger, check out our 4×8 CNC router ranking.
- Easy to assemble: even beginners could build it under an hour, and most can in under 30 minutes.
- Built-in safety features: the Ortur Laser Master 2 has a built-in sensor which detects when the machine is knocked or moved, automatically switching itself off. If you ever disconnect it, it’ll stop automatically.
Disadvantages
- Requires trial and error: you will have to experiment with laser speeds, multiple passes, and laser power percentage in order to find the best settings for your chosen material. There are no presets for materials, and you’ll also want a gridded sacrificial block to help you place materials correctly for well-placed cuts and engravings.
- Open work area: no filtration or enclosure system could create health and safety issues. Ortur say this laser cutter is not suitable for children under 14.
- No free software for Mac and Linux users
Ortur Laser Master 2 Specs In Full
- Price: $220-390– Available on Gearbest here / Available on Amazon here
- Work area: 400 x 430 mm
- Laser speed: up to over 3000mm/min
- Weight: 3.5kg / 7.7lbs
- Materials: woods, card, leather, acrylic, glass, and more.
- Software: LaserGRBL or LightBurn
- Type: Laser cutter DIY kit
- Company based: China
- Laser cutter manufacturer: Ortur
- Laser type: cutter and engraver
- Connectivity: via USB (and to Mac via USB C adapter)
- File types compatible: BMP, JPG, PNG, DXF, NC, and more
- Laser quality: around 300px/inch / 0.81um
Other laser tests:
- Snapmaker 2.0 CNC and laser test
- Ortur Laser Master 3 test
- Ortur vs xTool lasers
- Longer Ray 5 laser test