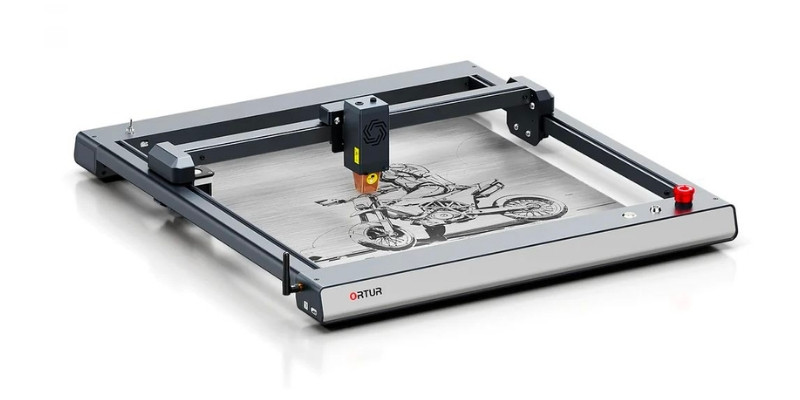
A year ago, the Ortur Laser Master 2 Pro reigned supreme as the best budget laser engraver around. Then xTool released the xTool D1 Pro, a 10W laser with a better build quality, more power, a slightly larger work area, and more.
To counter, Ortur have recently released the Laser Master 3, equaling the xTool D1’s 10W power, as well as adding a metal frame, while overhauling the safety features and connectivity options.
They’re the two best diode laser engravers under $1000, but out of the Ortur Laser Master 3 vs xTool D1, which is best?
I own and have tested both the Ortur LM2 Pro and LM3, and I also have the xTool D1 Pro in my workshop (I also have the new CO2 xTool P2, but we’re not comparing that!), so I’ll evaluate them for you here based on my hands-on testing.
Quick Summary: xTool D1 Pro vs Ortur Laser Master 3
The xTool’s better build quality, slightly larger work area, and tailored accessory range make it a better deal for me.
But, the Ortur LM3 boasts great safety features, is naturally compatible with LaserGRBL, and has an interesting Laser Explorer app for operating the laser on your phone (xTool also has an app, though).
TOP PICK
xTool D1 Pro
Available at:
GREAT ALTERNATIVE
Ortur Laser Master 3
Available at:
Here are the Ortur Laser Master 3 vs xTool D1 Pro quickly compared over each area:
- Power: even, both 10W (but xTool offers 5W, 20W and a brand-new 40W option)
- Assembly time: both around 30-45 minutes
- Build quality: xTool D1 – protects the belts within the frame and uses high-quality steel rods and wheels. Ortur LM3 has exposed belts.
- Work area: xTool D1
- Speed: xTool D1 is 24000mm/min, Ortur LM3 is 20000mm/min
- Accuracy: even — both 0.01mm movement precision
- Connectivity: even, both have WiFi, an app, USB connectivity
- Calibration: both lasers have a very similar tool for calibrating the laser head
- Software: even
- Accessories: both have a similar wide range of accessories
- Rotary add-on: Ortur – cheaper rotary attachment (xTool’s RA2 chuck rotary build is better quality, it’s more expensive)
CNCSourced is reader-supported. When you buy through links on our site, we may earn an affiliate commission. Learn more
Laser Power
| Laser | Power |
|---|---|
| xTool D1 Pro | 5W, 10W, 20W, 40W available |
| Ortur Laser Master 3 | 10W |
Both the Ortur Laser Master 3 and the xTool D1 10W offer 10W laser power. They use the same dual laser systems with two 5W lasers combining to create a total of 10W power output.
Depending on your needs xTool also offer 5W, 20W and 40W options. The 5W option is best for just engraving materials like leather, metal wood and some ceramics, whereas the 20W version can cut 6mm+ sheets of basswood in a single pass, as well as 5mm acrylic sheets – ideal for small business ventures.
Other variations available include:
- xTool D1 5W — Available at xTool store here
- xTool D1 20W — Available at xTool store here
- xTool D1 40W — Available at xTool store here
xTool also claim their 10W laser is as powerful as a standard 15W laser, but that’s a separate statement.
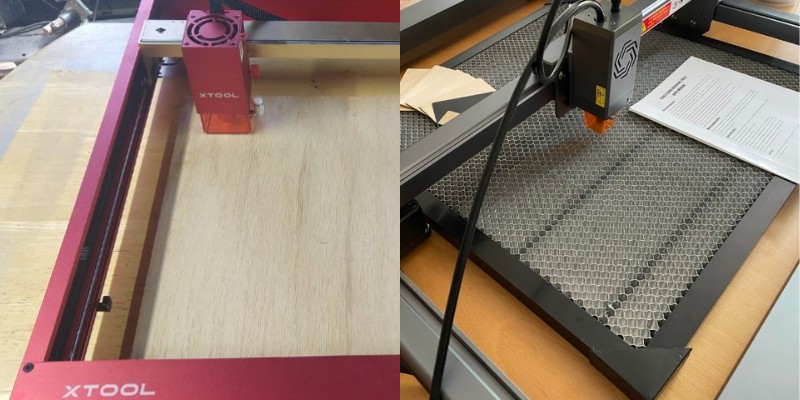
We’ve tested the Laser Master 3 and it confidently chews through 5mm acrylic and 3mm basswood sheets, while the xTool D1 Pro can do the same (xTool say they are able to cut through 6mm basswood in one pass).
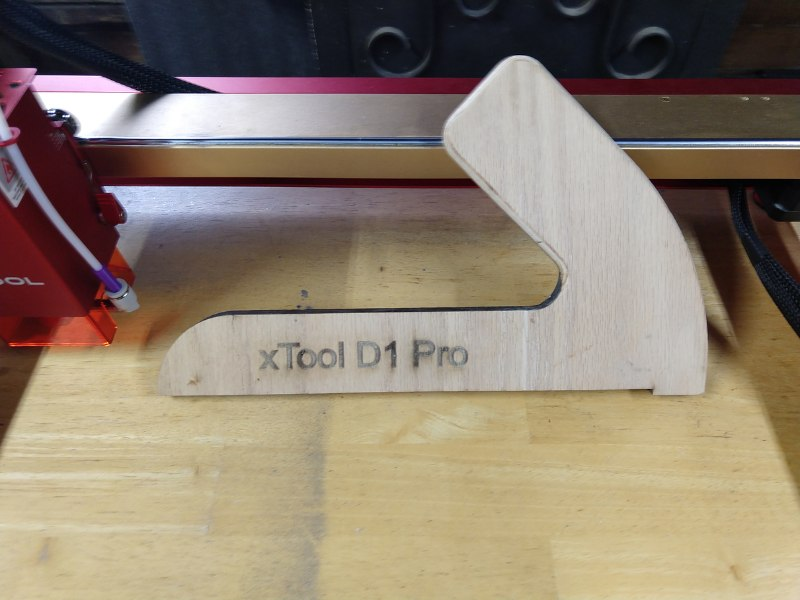
I used the 20W version of the xTool D1 Pro to cut through this plywood to create this push block below. You can read my full review of the xTool D1 Pro 20W here. Though, this doesn’t count for comparing the two 10W versions.
Both can mark metals with coatings, like stainless steel and anodized aluminum. However, remember that diode lasers are not ideal for metal engraving, and if you’re seriously looking to etch metal, you’ll need to spend more on a fiber laser engraver.
Assembly
| Laser | Assembly |
|---|---|
| xTool D1 Pro | 30-45 minutes |
| Ortur Laser Master 3 | 30-45 minutes |
Both the Ortur Laser Master 3 and xTool D1 are easy to build, taking around 30-45 minutes to assemble, even if you don’t have much DIY or laser experience. Gone are the days when you’d have to source custom parts for yourself to build a DIY laser machine.
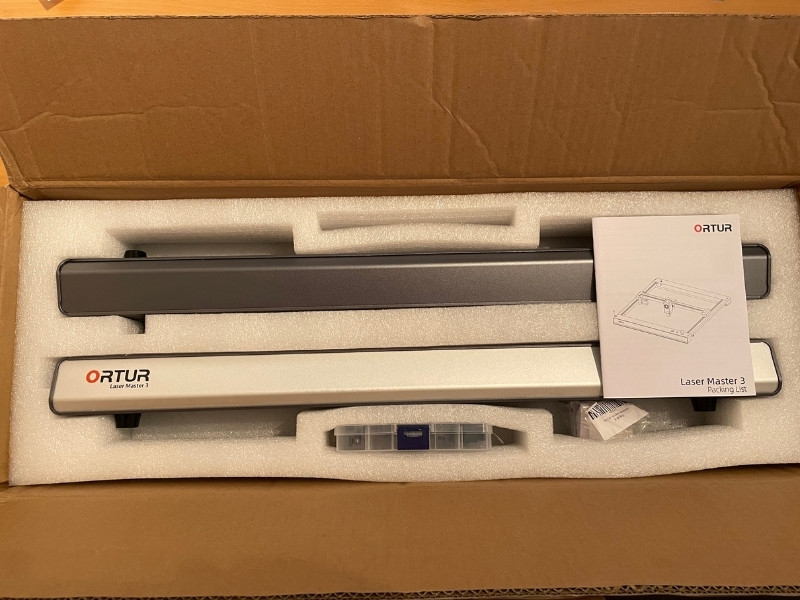
They take similar times to build because they’re basically pretty similar overall: four main chassis parts, belts, rods, wheels, and a gantry that holds the laser in place.
There’s a few finicky parts, for example the threading of one of the wires through the chassis piece to connect to the other side when I built the Ortur Laser Master 3, and you’ll benefit from a second person to steady the frame as you screw a few bolts in, but it’s doable alone in safely under an hour for both.
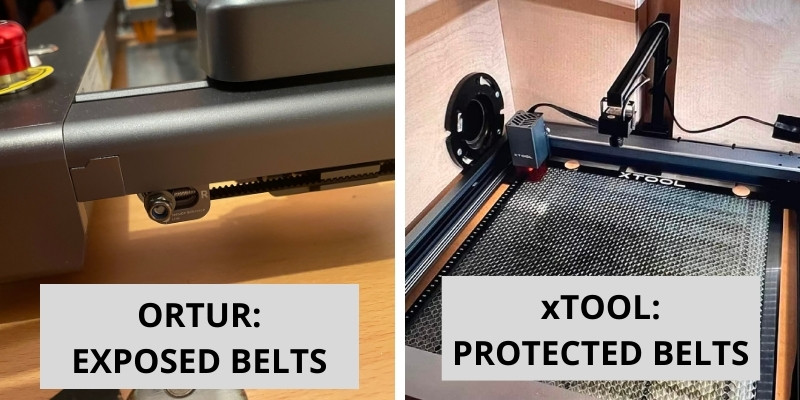
Build Quality
The xTool overall feels like a better quality build. The sturdy steel structure and frame are taller and wider, and features high-quality steel wheels and rods for smoother and precise laser movement.
Another factor is that the xTool frame protects the belts within the frame, just in case anything were to come into contact with the belts while laser engraving a project. The Ortur LM3 belts are exposed underneath the side chassis frame – though they are still well out of the way.
The Ortur Laser Master 3 is still well-built – and is one of the best-quality builds of any diode laser around. But, I think the xTool is the highest-quality build of any diode laser engraver.
Working Area
| Ortur Laser Master 3 | xTool D1 Pro |
|---|---|
| 400 x 400 mm | 432 x 406 mm |
The xTool D1 Pro has a slightly larger work area than the Ortur Laser Master 3. And, the extension kit makes it larger than the extended Ortur LM3.
In addition, the xTool D1 Pro has an optional extension kit accessory you can purchase for an extra $159.99 that increases working area to an incredible 936 x 432 mm. You can purchase it on the xTool store here.
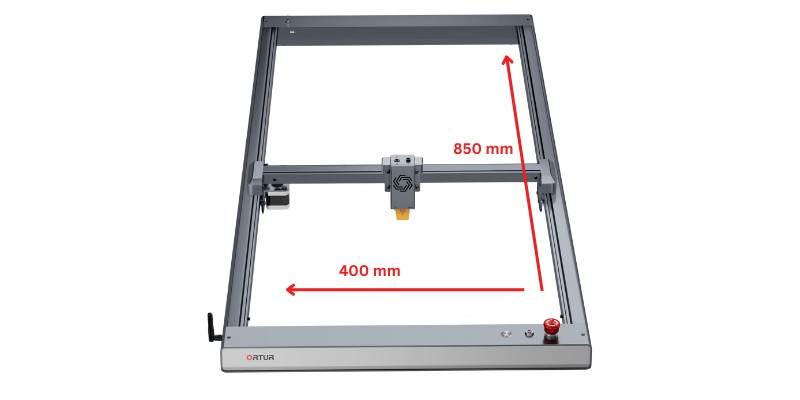
When I first wrote this comparison in August 2022 there was no extension kit for the Ortur LM3. However, as of mid 2023 there is now an extension kit, extending the Y-axis to 400x850mm. It is available on the Ortur store for $159.99.
Overall: xTool wins in both standard and extension kit working area.
Speed
| Laser Model | Maximum Speed (mm/min) |
|---|---|
| xTool D1 Pro 10W | 24,000 |
| Ortur Laser Master 3 | 20,000 |
| Ortur Laser Master 2 Pro | 10,000 |
The xTool D1 Pro offers 24000mm/min speeds, which is faster the Ortur Laser Master 3’s 20000mm/min.
Both are far faster than the previous generation lasers, and this is just one of the many differences between the Ortur Laser Master 2 Pro and the OLM 3.
Both Ortur and xTool lasers run at speeds where they can still create high-quality engravings.
Some worse-quality lasers say they can run at high speeds, but the real quality is poor due to a lower-powered laser.
So, when you see 10000mm/min or 20000mm/min, you can be confident that you can create high-quality contrasting portrait images and other engravings at that speed.
Naturally, though, cutting requires slower speeds on both lasers.
Accuracy & Precision
| xTool D1 Pro | Ortur Laser Master 3 | |
|---|---|---|
| Precision: | 0.01mm | 0.01mm |
| Spot size: | 0.08 x 0.08 mm | 0.05 x 0.10 mm |
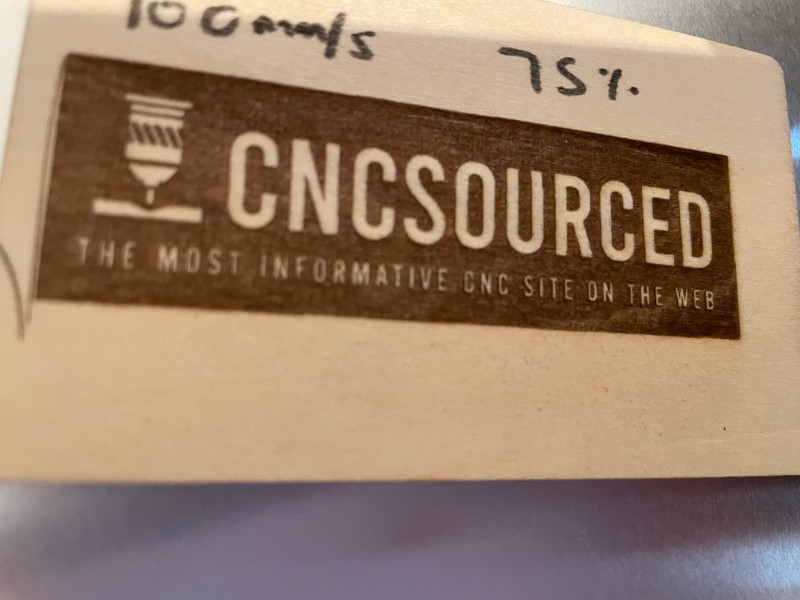
Both the Ortur Laser Master 3 and xTool D1 Pro have 0.01mm motion precision – meaning they can create very intricate details on even the smallest elements of your engraving design.
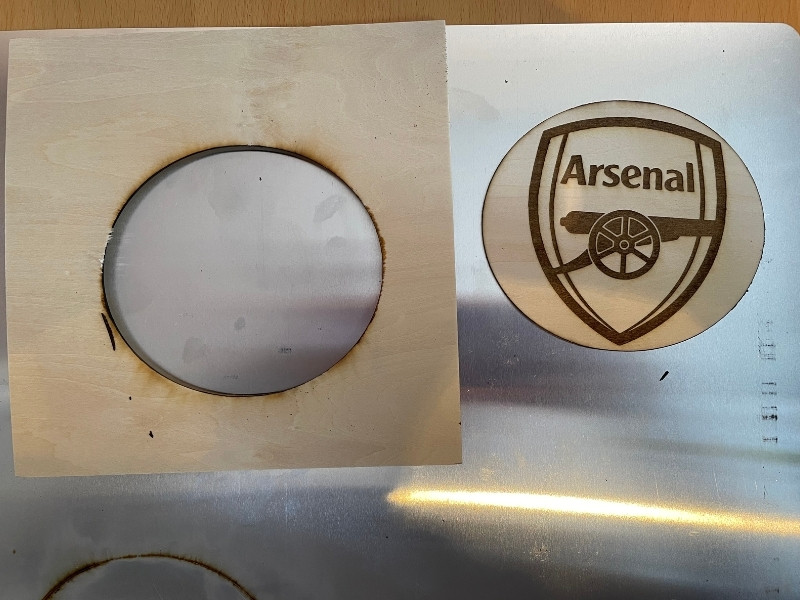
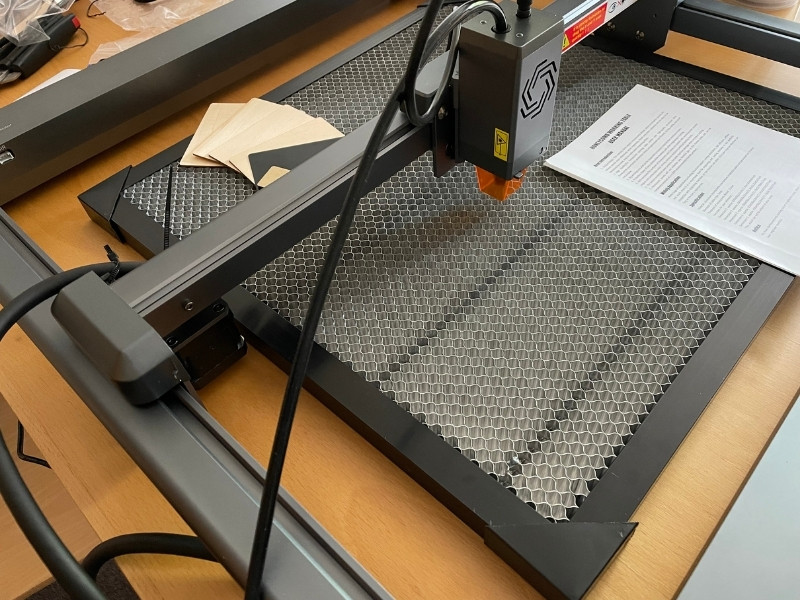
For example, when I engraved the CNCSourced logo as a test on the Ortur LM3, you can see how small the letters on our tagline are.
Yet the Laser Master 3 tackled them with no issue. And, depending on whether you prefer the Ortur or the xTool, you get the same 0.01mm precision.
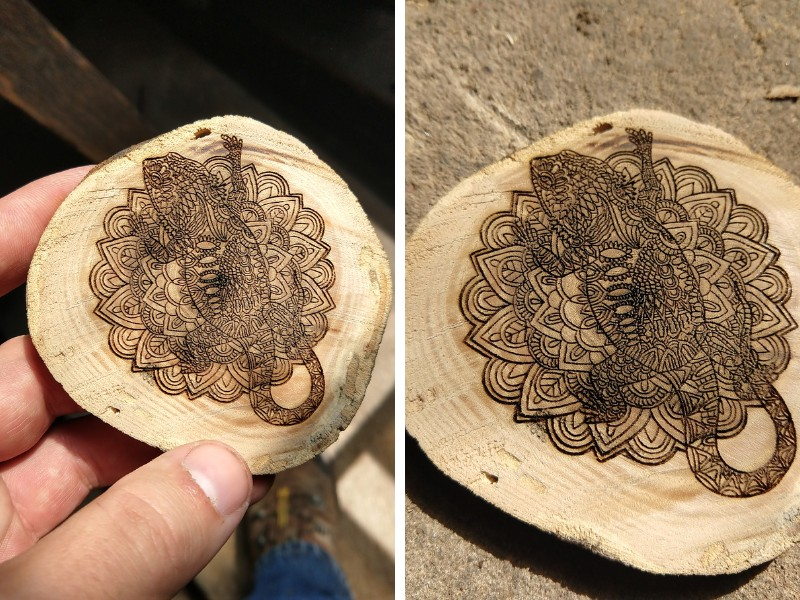
There are slight differences in the laser spot sizes. The Ortur Laser Master 3 has a 0.05 x 0.10 mm spot size, whereas the xTool D1 Pro has a 0.08 x 0.08 mm compressed laser spot size.
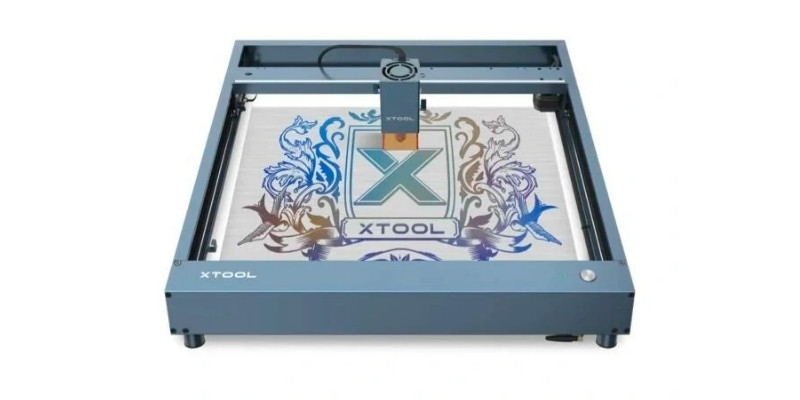
The xTool managed to engrave this very precise design on a coaster during our first few tests:
Connectivity & Compatibility
Where both laser engraving machines shine is in how versatile they are: they’re the most connectable lasers I’ve ever used.
For starters, most cheap laser engravers don’t have WiFi. Both these have it, and you can print wirelessly from an app, as well as via SD card or USB.
You can connect to the xTool via:
- USB
- Wifi
- App
You can connect to the Ortur via:
- USB
- SD Card
- U Disk
- App (called Laser Explorer)
- WiFi / local wireless server connection
Both machines are also compatible with MacOS or Windows, as well as smartphones via their respective apps.
Calibration
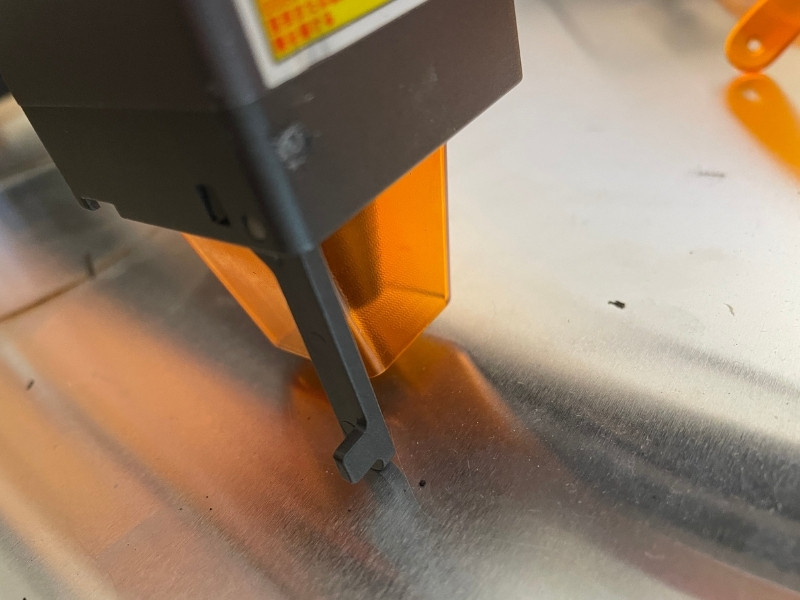
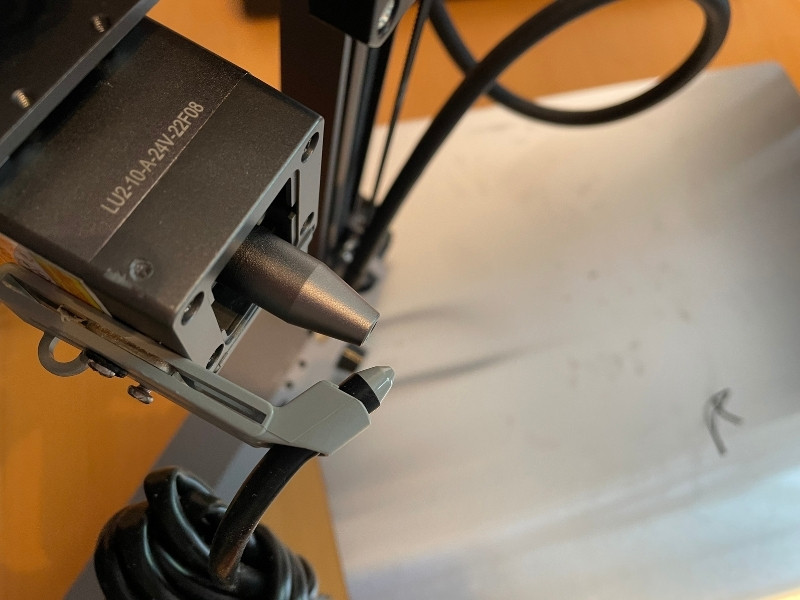
Both the Ortur and xTool lasers have a very similar mechanism for calibrating the laser head. There’s a pull-down mechanism on the laser head that extends directly underneath your laser, slightly longer than the orange laser protector that prevents light from damaging your eyes.
Simply adjust it so that the calibration mechanism is just touching the surface you want to cut or engrave, and you’re ready to go!
This is far easier than some of my previous lasers. For example, my Ortur Laser Master 2 had a metal cylinder part that you placed underneath the laser head. It wasn’t as stable, and if you lost it your calibration setup was ruined — which is much easier to do since the calibration part isn’t part of the laser head itself, like with the LM3 and xTool D1 Pro.
Safety
The Ortur has a wide range of safety features, and we’re really impressed with the Laser Master 3’s focus on safety.
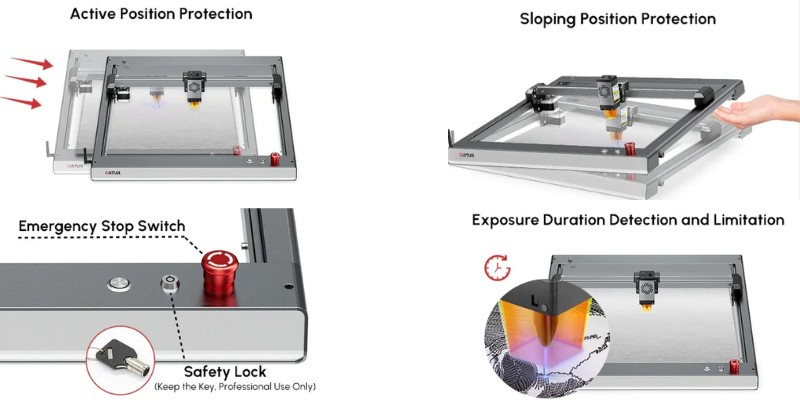
The Ortur Laser Master 3 has 7 different safety features:
- Safety Lock – you can lock the Ortur LM3 so that you can only turn it on with a special key
- Active Position Protection
- Sloping Position Protection – if the machine is moved, rotated or lifted upwards, it will aturomatically stop
- Exposure Duration Detection and Limitation
- Voltage and Current Safety Control System
- Host Computer Watchdog
- Emergency Stop Switch – the emergency stop button in our opinion is better than the xTool’s. It’s clearer and separate from the on button.
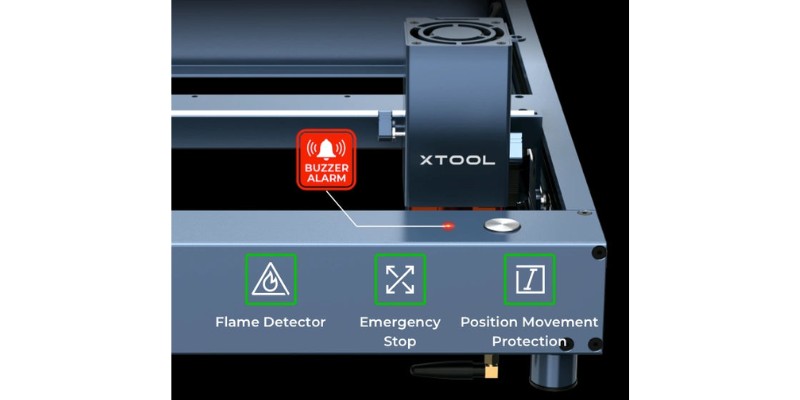
The xTool D1 Pro boasts two main safety features: gyroscope detection, which is basically the same as Ortur’s sloping position protection in turning off if the laser is moved while working, and flame detection, which emergency stops if it detects flames or excessive heat.
Ortur do a great job of selling the Laser Master 3 as a safety-first machine, and we are impressed with their focus in this area. The laser ships with glasses to cover and protect your eyes too (so does the xTool) and both lasers have protective orange covers to filter out some of the harmful laser light.
Software & Apps
There’s no better or worse for software out of these two lasers – it’s purely down to personal preference.
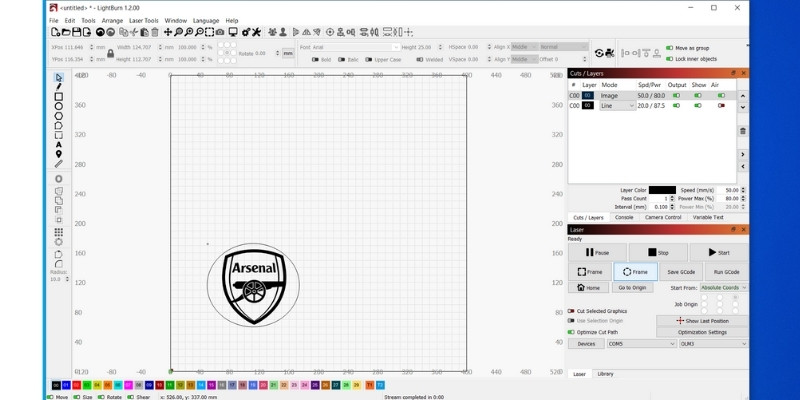
The Ortur Laser Master 3 is compatible with Windows via LaserGRBL or LightBurn, or if you’re on a Mac you’re restricted to just LightBurn. I used LightBurn on a Windows laptop and it connected instantly, but on Mac you may have to add the machine’s profile yourself.
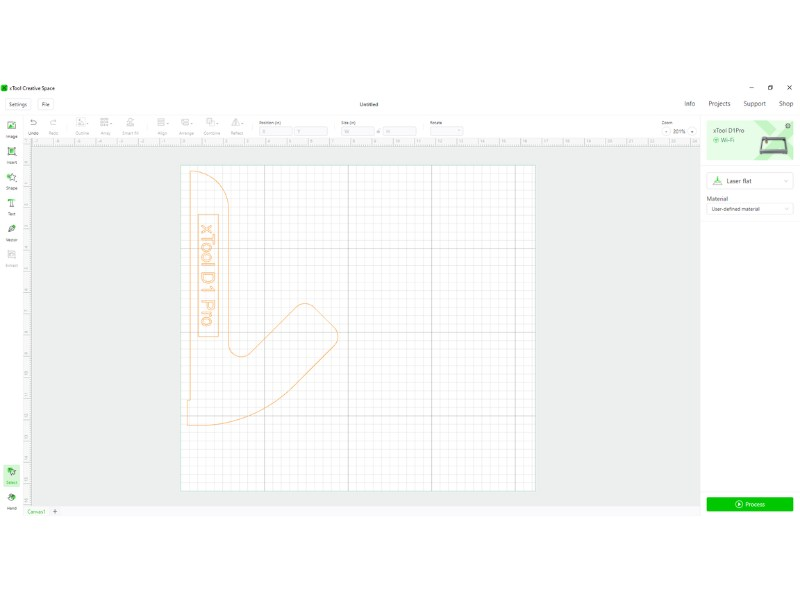
xTool have developed their own in-house laser software, XCS, or xTool Creative Space. It’s surprisingly user-friendly, with easily adjustable settings for speed and power, as well as making it really easy to create your own custom shapes for cutting or engraving.
It’s ease of use reminds me of Snapmaker Luban software when I was reviewing the Snapmaker 2.0 A350, but xTool’s software is arguably better. Though I haven’t yet used XCS for rotary 4-axis engraving, which Snapmaker Luban is fantastic for.
If you’re used to using LightBurn however, you can still do that. You’ll just need to follow these instructions.
Both lasers also have a mobile app. I’ve spent a fair amount of time with Ortur’s Laser Explorer and it’s a well-built and intuitive app. It comes with a range of free-to-use designs and icons that you can easily resize and send wirelessly to your laser, and it’s compatible with all Ortur and Aufero lasers. I personally prefer using a PC though.
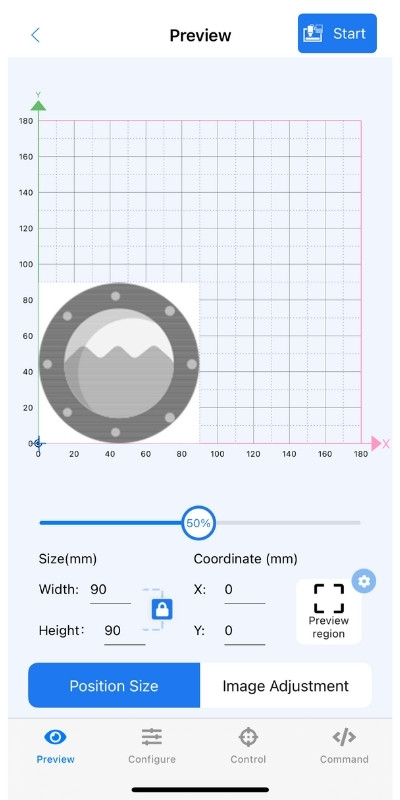
You can also send images for engraving, and it uses cleverly coded AI tools to ensure perfect results almost every time. xTool have the Laser Box app, which performs similar functions.
A major plus to both is that they’re available offline. As great as Glowforge lasers are for small businesses and hobbyists with their easy-to-get-started build and slick design, being restricted to the cloud means you have to be connected to the web at all times. For more, check out our article on xTool vs Glowforge.
This restricts where you can use the laser, and if you have an issue with your WiFi, you’re out of luck. Both the Ortur Laser Master 3 vs xTool D1 Pro are good in this regard.
Accessories
Air Assist
| Laser | Air assist add-on? |
|---|---|
| xTool D1 Pro | Yes |
| Ortur Laser Master 3 | Yes (Until recently there was not one made by Ortur) |
xTool offer a branded air assist accessory for $159, but it’s often on sale for $139.
Ortur has recently started selling their own Laser Air Pump 1.0, but I used a standard air pump for $99 from Amazon and it worked well – and it appears to have been designed around Ortur lasers.
I would have bought Ortur’s own version, but they did not sell this when I got my LM3 delivered, so I bought the off-brand Amazon one and I’m happy with it.
Enclosure
| Laser | Enclosure add-on? |
|---|---|
| xTool D1 Pro | Yes |
| Ortur Laser Master 3 | Yes |
Both the xTool D1 Pro and the Ortur Laser Master 3 have specially designed enclosures.
xTool offer offer a foldable and smoke-proof enclosure for the xTool D1 Pro, costing $179.
Ortur go down the more premium route, with a sturdier metal enclosure that costs more.
Extension Kit
| Laser | Extension kit? | Extended working area |
|---|---|---|
| xTool D1 Pro | Yes | 936 x 432 mm |
| Ortur Laser Master 3 | Yes | 850 x 400 mm |
xTool currently offer an extension kit for the xTool D1 Pro, which increases your laser working area from 432 x 406 mm, to 936 x 432 mm, an enormous area. The kit costs $199 but is often on sale to $159.
Ortur’s extension kit does not make the laser as large, reaching a total cutting area of 400x850mm.
Platform / bed
Both Ortur and xTool offer a surface to protect your workbench or station from being damaged by the laser.
Ortur sell a laser engraving platform designed especially for their lasers (and Aufero lasers), which costs $159 (currently on sale for $129).
xTool instead sell a honeycomb panel kit, which performs the same function – preventing your laser from damaging your table. It costs $159 (currently on sale for $139).
Both work well, but I actually use a non-branded aluminum honeycomb table available on Amazon for $129 which also works well if you’re looking for an alternative.
Rotary Accessory
| Laser | Rotary accessory? |
|---|---|
| xTool D1 Pro | Yes |
| Ortur Laser Master 3 | Yes |
Both lasers are compatible with rotary accessory options for engraving curved objects like beakers, bottles, glasses and mugs – but each has executed differently.
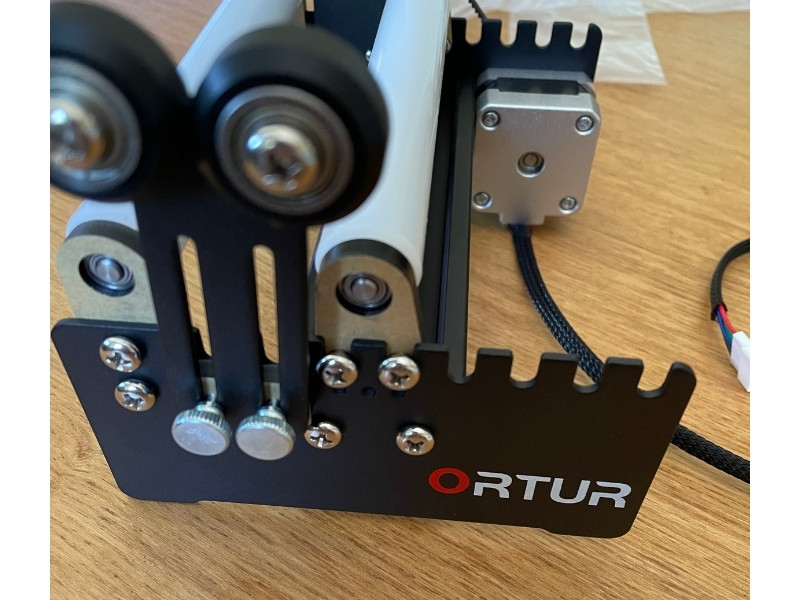
Ortur go down the budget route, with a $99 YRR rotary roller kit that takes around an hour to assemble, and it’s more complex to use. My rotary kit shown below is the YRR 2.0, but Ortur have since released newer and more premium kits.
You need to unscrew and re-screw a few parts depending on how wide your engraved object is so that it fits on the two rollers, so there’s more manual work involved. Still, for $99 it’s the best value rotary upgrade around.
Ortur’s new range of rotary attachments includes:
- Ortur Y-axis Rotary Chuck – $179.99
- Ortur YRR 2.0 Rotary Roller – $79.99 (this is the one I have)
- Ortur YRR 3.0 Rotary Roller – $99.99
xTool go down the more premium route, with a $299 RA2 roller chuck design that can adjust to hold rings, glasses, mugs, and more for engraving. It’s a more premium and better built kit, and best for precise and professional results – but it costs $200 more than Ortur’s YRR roller kit.
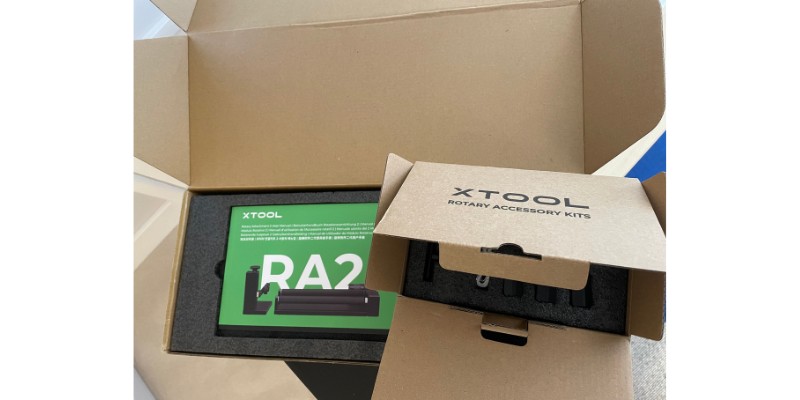
It takes roughly the same time to put together, but I much prefer it. It’s much better for doing precise rotary engraving, and feels very similar to Snapmaker’s rotary add-on, but it’s half the price.
Price
| Laser | Price |
|---|---|
| xTool D1 Pro | $699 |
| Ortur Laser Master 3 | $699 |
Both the xTool D1 Pro and Ortur Laser Master 3 cost around $699 currently. However, both say they are usually more expensive, at around the $849 mark, so watch out for any early launch sales ending and pick one up before then if you can.
You can buy your preferred laser at the following stores online:
- xTool D1 Pro — xTool store here / Amazon here
- Ortur LM3 — Ortur here / Amazon here
Should You Buy the Ortur Laser Master 3 or xTool D1 Pro?
Overall, I would choose the xTool D1 Pro, for the slightly faster speed, lightly larger work area, and better quality parts and frame. It’s just a bit better in every way, and feels like a more premium, well-made product.
But, these are the two best diode lasers under $1000 in our opinion, so whichever choice you make, you’ll be more than happy with.
TOP PICK
xTool D1 Pro
Available at:
GREAT ALTERNATIVE
Ortur Laser Master 3
Available at:
Related posts:
- Ortur Laser Master 2 Pro review
- Ortur Laser Master Upgrades
- Ortur Laser Master 3 review
- Best Alternatives to xTool
- Best Cameras For xTool D1 Pro
- Best xTool Projects You Can Make
- Best laser cutters and engravers
- Best laser cutter and rotary attachment combos
- xTool D1 vs D1 Pro: Which is the Better Laser Cutter
- xTool D1 Pro 5W vs 10W vs 20W: The Differences Explained
- xTool D1 Pro vs Atomstack X7 Pro/X20 Pro [Comparison]