The best DIY laser cutters offer similar power and precision as prebuilt machines, while saving you money. The main issue is pre-assembled lasers are difficult to ship, and so you can save money by shipping them in pieces.
For most users, I’d recommend the xTool D1 Pro for the best balance between performance, price, and ease of use.
It comes with automatic focus and other advanced features for a smoother cutting experience than other DIY options on the market.
This article is split into two sections: the best laser engraving kits you can buy and build within an hour, and completely DIY kits you’ll need to source all the parts for.
Quick Overview
- Ortur Laser Master 3
- xTool D1 Pro: TOP PICK OVERALL & best under $1000
- Creality CR-Laser Falcon
- Snapmaker 2.0 AT: Best for 3D printing, CNC and laser cuting
In this guide, I’ll share my top recommendations from the DIY laser cutters and engravers I’ve tested based on my hands-on experience. I’ll cover their strengths and limitations – from work area to wattage – so you can make a confident choice.
The Best DIY Laser Cutters to Buy
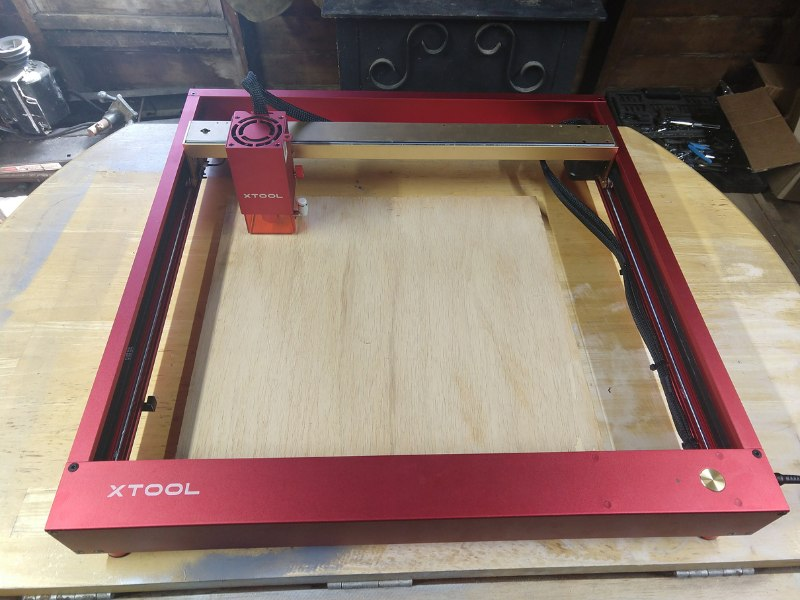
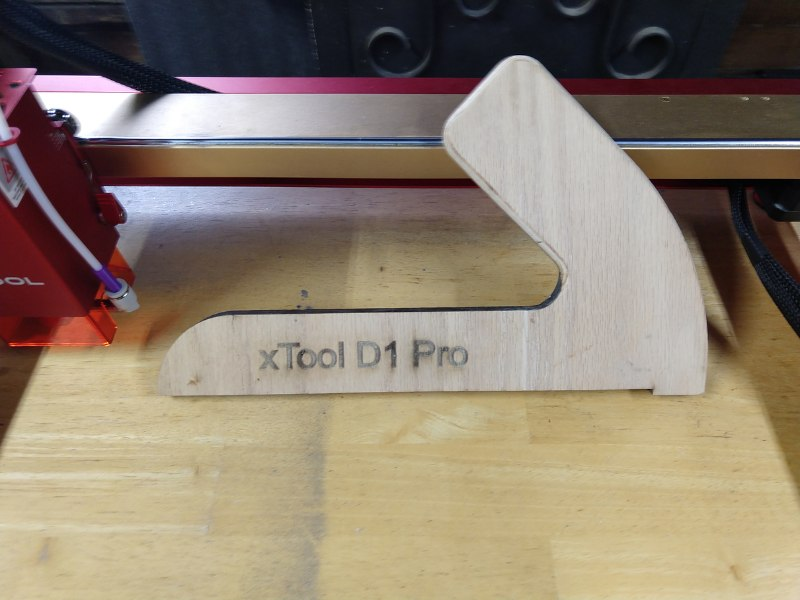
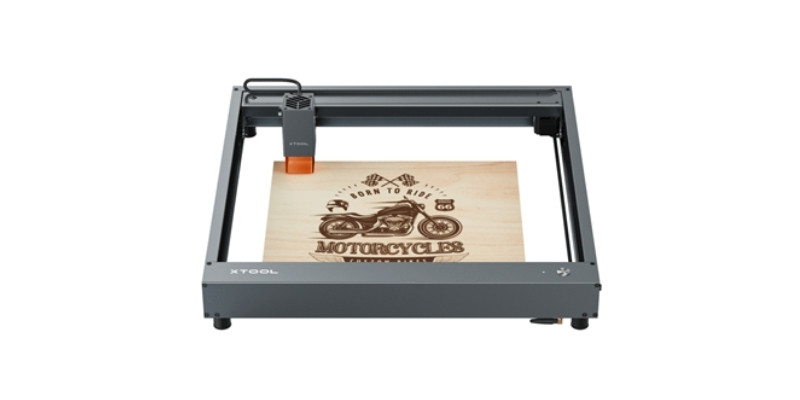
1. xTool D1 Pro 10W – Best DIY Laser Under $1000
- Price: $699 — Available at xTool here
- Working area: 432 x 406 mm
- Assembly Time: 30 minutes
- Power: 10W (5W, 20W, and 40W options also available)
Pros
Best Diode laser on the market.
The frame and parts are steel and high-quality.
Quick to assemble.
Great work area.
Cons
No air assist included, will cost extra.
The xTool D1 10W is the best diode laser in our opinion, and the best DIY laser engraver under $1000. If you pick it up for around $700-800 it currently sells on the xTool store for, you can even add the RA2 rotary attachment and have a 4-axis kit for engraving glasses and beakers for just under $1000!
You can save a few hundred dollars and get a standard xTool D1 or an Ortur Laser Master 2 Pro – both are great DIY lasers under $500 – but we advise spending a couple hundred dollars more and opting for the xTool D1 Pro, it’s a big upgrade.
The frame and parts are steel and high-quality, with protected belts and steel rods and wheels to ensure smooth movement and accurate precision. It only takes around 30-45 minutes to assemble, too, so you can get engraving quickly after you get it.
The xTool D1 10W uses dual 5W lasers to create the end result of 10W power, using the same tech as the Ortur LM3 and Snapmaker’s 10W laser add-on.
But if you don’t need 10W power, you can buy a 5W version for $200 less and stick to mostly engraving, or the upgraded 20W version for single-pass 0.6mm+ basswood or acrylic sheet cutting. There’s now even a 40W version you can buy as a separate accessory.
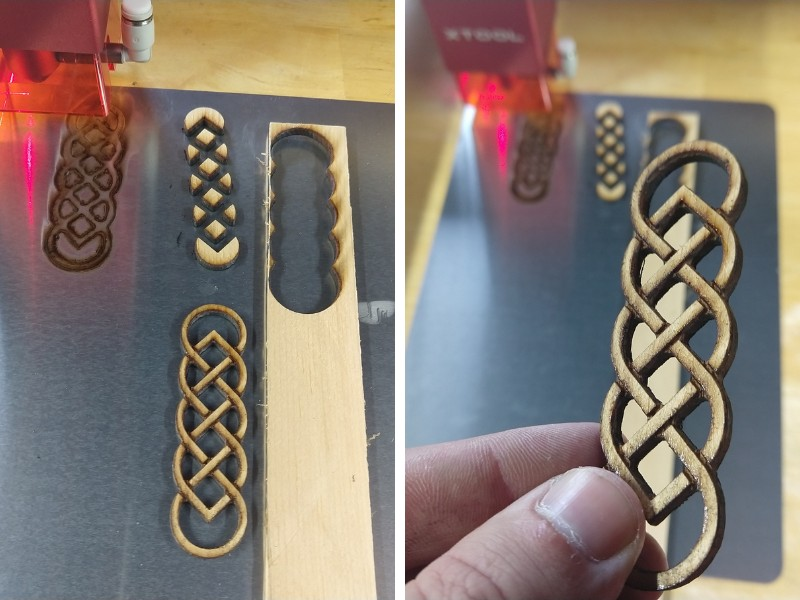
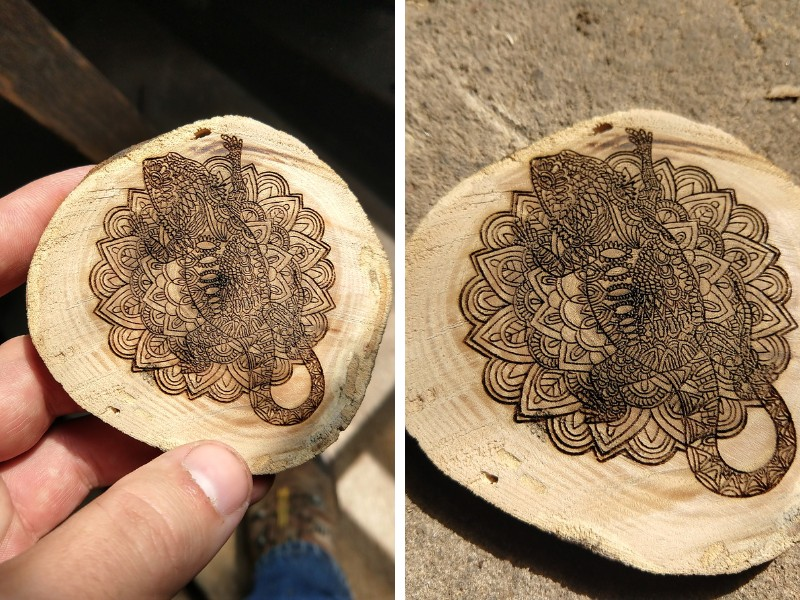
I personally went for the 20W version even though it costs a few hundred dollars, but the extra power and speed were worth it for me. For example, here’s some of the projects we cut during our review:

Other variations available include:
| Model | Where to buy |
|---|---|
| xTool D1 5W | Available at xTool store here |
| xTool D1 20W | Available at xTool store here |
| xTool D1 40W | Available at xTool store here |
The work area is great for a DIY laser cutter — slightly larger than the Ortur, and much larger than many cheaper lasers. You can even buy an extension kit on xTool’s store that takes your work area up to an incredible 936 x 432 mm for enormous engravings.
It’s accurate (0.01mm precision, 0.08 x 0.06 mm spot size), reliable with the sturdy frame and steel wheels and rods and protected belts, and safe. The XCS software is really user-friendly and intuitive, but you can also use it with LightBurn instead, or via our smartphone with the Laserbox app.
In our opinion, the xTool is the best DIY laser under $1,000. You can also read my full in-depth review of the xTool D1 Pro 20W.
And if you need even more power, go for the 20W version (we did!)
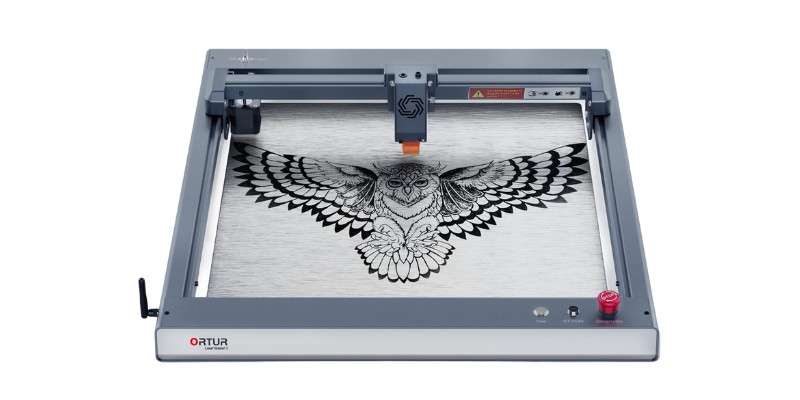
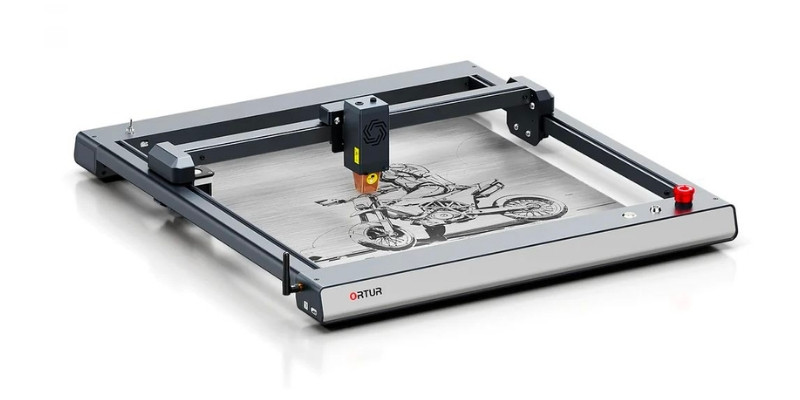
2. Ortur Laser Master 3
- Price: Check price at Ortur store here
- Working area: 400 x 400 mm
- Assembly time: 30-45 minutes
- Power: 10W or 20W
Pros
Engrave up to 20,000mm/min
Choose from 10W or high quality quad 20W laser
Can assemble it in 30 minutes
Operate via mobile with the Ortur Laser Explorer app
Cons
20W option is quite expensive
The Ortur Laser Master 3 is a great mid-range DIY laser cutter that’s an upgrade on Ortur’s popular Laser Master 2 Pro.
Available with a 10W or 20W laser (the 20W kit costs $500 extra, but does come with a free air pump), this laser is capable of reaching really impressive engraving speeds of up to 20,000mm/min.
For reference, that’s twice as fast as cheaper DIY lasers like the Creality Falcon, and it also faster than the OLM2 Pro’s 15,000 min. The OLM2 maxes out at 10W, so with the OLM3 you also have the option of the more powerful 20W model. You can read more about the OLM3’s improvements in our OLM3 vs OLM2 Pro comparison.
I’ve personally run my own test of the Laser Master 3, and it only took 30 mins to get up and running. For beginners, this may take a little bit longer, due to the first step being slightly difficult on your own. This is because you need to thread a wire through the left side chassis piece, which makes it a bit tricky to then put the 4.8mm nut through.
However, aside from that it’s really easy, and Ortur provides a video guide to ease you through the process. The assembly time is a bit longer than the likes of the Creality Falcon and MathRose A5 due to the OLM3 having a less modularized design, but it’s still one of the easier machines I’ve worked with.
The OLM3 is particularly impressive if you use it with the 20W module, as this uses COS packaging technology to combine four 5W laser diodes into a fine, highly efficient beam.
With this DIY laser, you can cut 8mm acrylic and 10mm plywood in a single pass. It also boasts an ultra-fine compressed spot of 0.08 x 0.08 mm, which makes it very precise and suitable for more intricate engravings as well as cutting. The 10W module has a slightly different 0.05 x 0.1mm spot.
According to the Ortur website, you can also achieve no less than 380 different shades when engraving stainless steel with the 20W module, so it’s a great option if you want to experiment with different color laser engraving.
Other benefits include the quick focus stick for easy focusing, the laser-filtered viewing window that lets you monitor your work while protecting your eyes, and the built-in cooling fans and airflow-guided blinds that help extend the laser’s working life.
Although the OLM3 is a strong DIY laser that presents good value, I still think the xTool D1 Pro is a superior choice overall.
While they’re of similar size and setup time, the D1 Pro is faster (24,000 mm/min compared to the OLM3’s 20,000 mm/min) and far more customizable DIY kit, with an extension kit and infrared laser module two things that the OLM3 can’t offer.
Ortur's YRR Roller add-on is under $100 for low-cost beaker or glass engraving, and the laser itself is great value for 10W power.
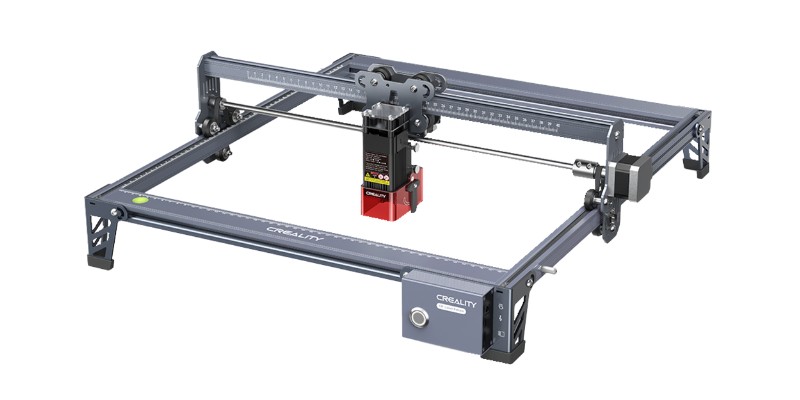
3. Creality CR-Laser Falcon
- Price: Check price at Amazon here
- Working area: 400x415mm
- Assembly time: 15-20 minutes
- Power: 10W
Pros
Good value for money with a decent working area
Impressive precision
Very easy to assemble
Cons
Limited to using a 10W laser unless you go for the more expensive Falcon2
Another budget DIY laser cutter we like is the Creality CR-Laser Falcon, with great specs despite being cheaper than alternatives.
This is a 10W laser with a working area of 400 x 415 mm, so it’s a very similar size to many more expensive options. It has a 0.06 x 0.6 mm compressed spot laser, which is actually finer than that used in the Ortur Laser Master 3 and provides fantastic accuracy. Creality also states that it can cut up to 12mm woodboard in a single pass.
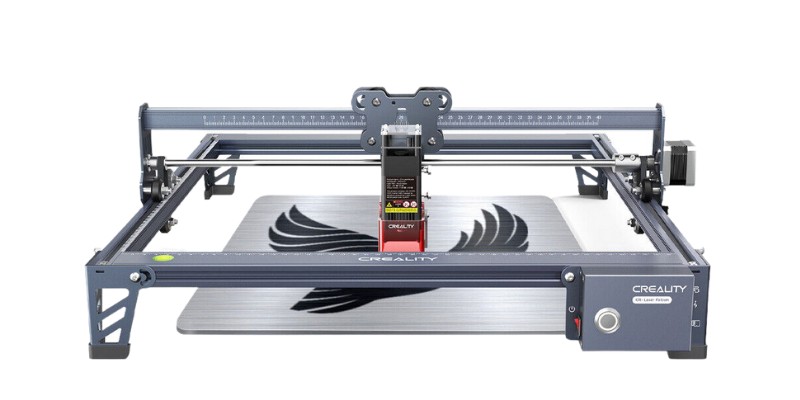
Its power and accuracy make it ideal for small-to-medium-sized projects, such as small home decorations and models, clocks, and personalized phone cases.
The Creality gallery even showcases some laser-engraved leather shoes. It’s also large enough to accommodate guitar bodies and other products of a similar size.
One of the best things about this laser from a DIY standpoint is its modular design, which makes it quicker to assemble. In fact, you can get the Creality Falcon up and running in just 15-20 minutes.
All you need to do is:
- Connect the frame and gantry
- Thread the belt through
- Secure the belt with the nuts and bolts provided
- And attach the feet to each side (remember to thread the belt through the rear feet before securing them
Then, just slot the laser onto the mounting bracket, screw it in, connect the control wire and laser shield, then connect the power to the control unit and you’re good to go. Creality provides a helpful video guide to take you through the process.
The downside in comparison to the likes of the LM3 and D1 Pro is that you’re limited to 10W in power. It also has a max engraving speed of up to 10,000mm/min, which isn’t bad for a budget machine, but is much slower than the 24,000mm/min speed of the xTool D1 Pro.
Bear in mind also that, unlike with the D1 Pro, Creality doesn’t provide custom software, so you’ll need to use Lightburn or LaserGRBL.
If you like the look of the Falcon but want more power, there’s also the Falcon2, which is available with a 22W or a 40W laser module. These options are more suitable for intensive cutting jobs, and also for working with stainless steel and other metals.
Creality also offers a 5W laser module if you want to save some cash and are only interested in working on smaller, low-intensity projects. But I don’t recommend a 5W laser – go with 10W minimum,
There are also various add-ons available for the Falcon, including an air assist, honeycomb bed, protective enclosure, and a rotary roller for engraving cylindrical objects.
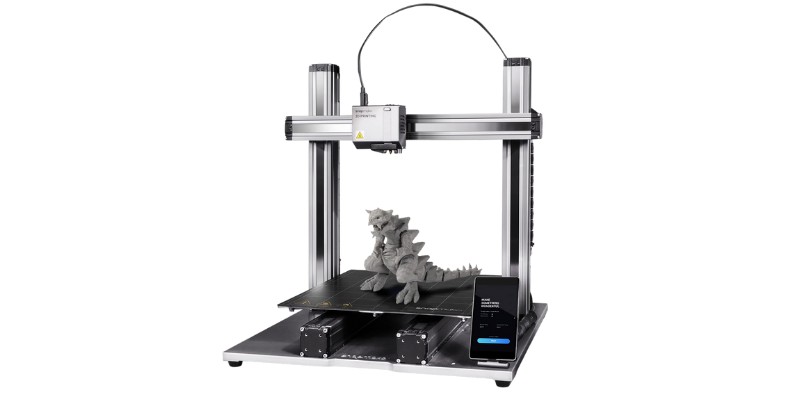
4. Snapmaker 2.0 – 3 in 1 DIY Laser Cutter, CNC Router & 3D Printer
- Price: Check price at Snapmaker here / Available on Amazon here
- Working area: 160 x 160 mm, 230 x 250 mm, or 320 x 350 mm
- Assembly Time: 1 hour
- Power: 1.6W or 10W
Pros
Laser cutter, 3D printer, and CNC router at the same time.
Precise and accurate.
The assembly is fun and easy.
Available in three different sixes.
Cons
Can be very loud.
The Snapmaker 2.0 is one of the most unique and versatile DIY laser cutters we’ve come across. This is because it’s a laser cutter, a 3D printer, and a CNC router all at the same time.
I own my own Snapmaker 2.0 A350 and the 10W high-power laser accessory. When I tested the Snapmaker CNC, I was very impressed with both the engraving precision, accuracy and image contrast quality, as well as with the power of the laser cutter.
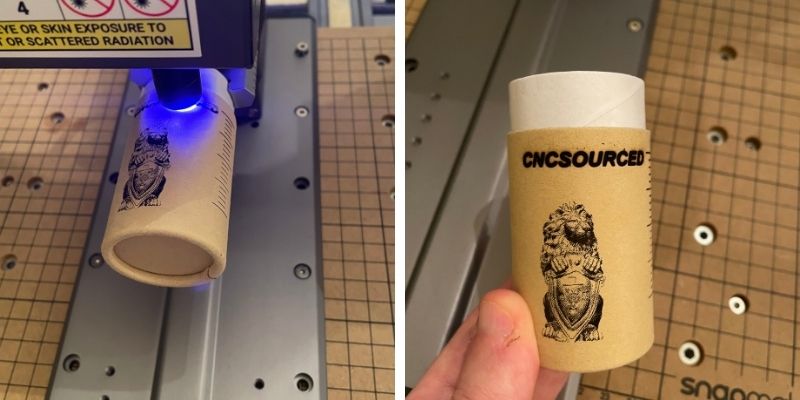
I also used the 4-axis rotary module add-on, which lets you turn material blocks 360-degrees for engraving on rounded surfaces. I engraved the CNCSourced logo and a lion design on this cylinder gift box, which you can see in the image below:
There’s also the fantastic camera capture feature which automatically takes and uploads a picture of the workpiece and uploads it to the Snapmaker Luban software as a canvas. You can then easily engrave the image shown in the software with just one click.
One aspect of this machine that will particularly attract DIY enthusiasts is its modular design. All the ports are standardized, meaning you can customize the machine as much as you like.
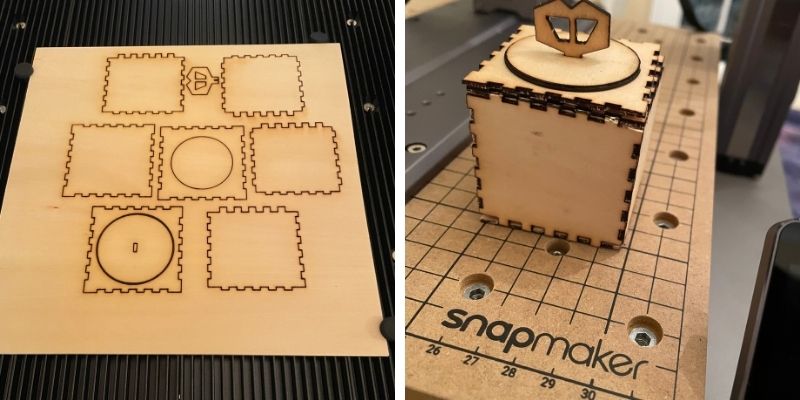
Even without the 10W laser accessory, you can still cut through 1.5mm-thick wood with the standard 1.6W laser toolhead, as you can see in this wooden gift box shown below:
And if you buy the newer Snapmaker Artisan instead, it comes with the 10W laser by default.
Don’t be put off if you’ve never worked with a 3 in 1 machine before – the assembly process takes only an hour and it’s a wonderful experience; you can feel the hours and hours of preparation the Snapmaker team have put into every element.
The boxes and screws and all labeled, the modular screwdriver you screw parts in with is a fantastic design (you’ll understand when you use it!) and all the tools and parts feel high quality.
This DIY laser engraver kit is available in three different sizes – 160x160x145mm, 230x250x235mm, and 320x350x330 – so you can save some cash if you only need a small working area.
Want to 3D print, CNC cut, and laser cut and engrave all in 1? Snapmaker machines are the best 3-in-1 machines around.
Other DIY Lasers to Consider
5. DIY CO2 laser
The options we’ve reviewed so far are professionally manufactured laser machines that require home assembly.
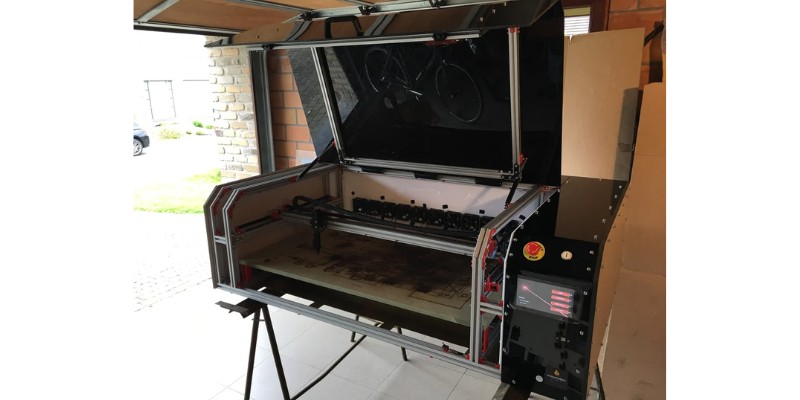
If you want to go full DIY, one of the best builds I’ve seen is this $700 home-made laser by a hobbyist called Owen Schafer.
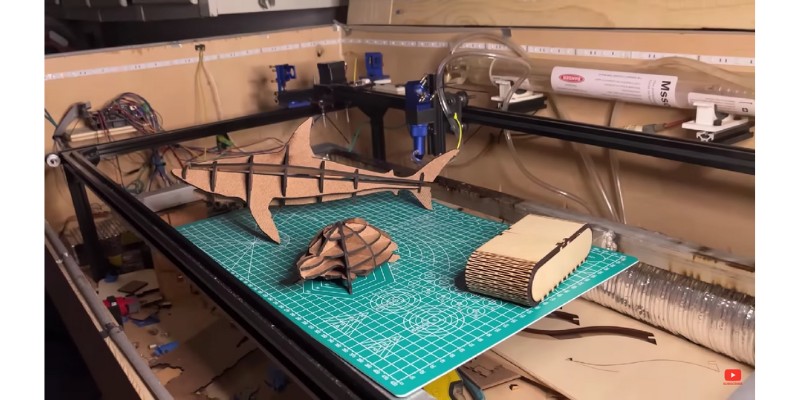
The unique thing about this build is that it gives you a 40W CO2 laser and a large working area at a fraction of the cost it’d be to buy as a complete kit. It covers everything you need for an effective CO2 laser, including an air pump and water cooler, which you often need to buy separately when purchasing kits from manufacturers.
While there are obviously K40 40W lasers now, this is a first for a DIY laser with these specs.
Bear in mind, though, that builds like this can be complex, time-consuming, and require sourcing parts from various places, so it would be quite a challenge for a beginner.
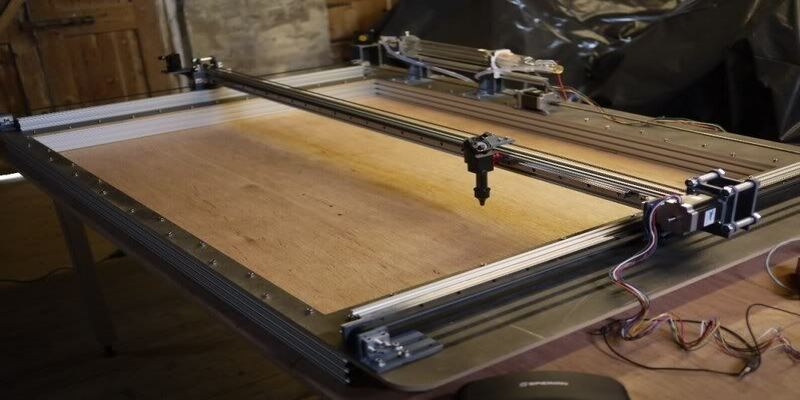
6. Huge DIY CO2 kit
Another option is this DIY CO2 laser build from Instructables. It’s very similar to Owen’s, using a 40W laser with an enormous 1,000 x 600 mm working area, but with a higher cost of around $2,000.
However, it’s very well reviewed by the community, and the maker provides an in-depth written guide of each step, which can be more helpful for building compared to Owen’s video, depending on your preference.
How to Build Your Own Homemade Laser Cutter or Engraver
As the name suggests, a DIY laser cutter is a CNC machine that you build yourself, rather than buying a preassembled, ready-to-use machine. DIY laser cutters can be unassembled kits that you order online and then put together yourself, or they can be built completely from scratch by sourcing each individual part separately.
DIY laser kits you can buy
For DIY laser engraver kits, there’s a variety available online that contain all the parts you need — you just need to assemble the machine for yourself. The main reason that people go with these DIY cutters is that they’re generally cheaper than buying a desktop laser cutter that’s ready to go, as it obviously saves the manufacturers time and the parts can be transported more compactly.
Completely homemade laser cutters and engravers
On the other hand, there are DIY laser cutters that serious CNC hobbyists build completely from scratch by buying each part from different places and then putting them all together. This is a pretty complex task and requires a lot of knowledge of how laser cutters work — and a lot of experience using them.
With this type of DIY cutter, it’s often as much a passion project as it is a way of saving money. Not only do lots of hobbyists enjoy the challenge of building a machine from scratch, but it also means you choose your part quality.
These cutters are obviously a lot more customizable, which is another reason why DIY machines are so popular in the CNC community. Want to make an enormous laser cutter? As long as you’ve got the skills and you can afford the parts, you’re all set!
There are many examples of built-from-scratch laser cutters available on the web. For example, a hobbyist under the username MichielD99 has posted on Instructables a detailed guide of how they created a DIY CO2 laser cutter as a cheap alternative to preassembled machines, while there’s a vast collection of homemade DIY cutters showcased on OpenBuilds.
Software
Whether you’re doing DIY metal engraving or DIY wood engraving, you need to use a laser software package to control your DIY laser cutter. Luckily, there are several good open source options you can use for free, the most popular being LaserGRBL. This is widely used for both DIY laser engraver kits and by people assembling machines completely from scratch.
Alternatively, LightBurn and Mach3 are popular paid software that most DIY laser etching machines are compatible with. Some DIY laser engraver kits also come with offline controllers that enable you to use them without having to connect to a computer
FAQs
How to make a laser engraver at home?
First, you need to acquire all the parts, including a frame, laser module, stepper motors, a controller, power supply, and screws. You then need to assemble everything, which can be tricky and time-consuming for beginners. There are several guides for homemade DIY lasers available online, or alternatively you can buy professionally manufactured kits from laser brands that are much easier to assemble.
What is the cheapest DIY laser cutter?
You can buy laser cutter kits like the Mecpow X3 for as little as $200 on Amazon, which you then need to assemble at home. Although, we recommend the Creality Falcon as the cheapest laser cutter DIY kit to buy, which costs around $340.
Other laser cutter buying guides:
- The best laser cutters for acrylic sheet cutting
- The best laser cutters for cutting wood sheets
- Best leather laser engravers
- Best glass laser engravers
- Best laser engravers for small business owners
- Best open-source CNCs