Key Takeaways
- Laser Marking: A MOPA fiber laser can create different colors on metals and plastics by changing the laser beam properties.
- Color Filling: You can paint the engraved areas manually with a brush or spray paint. You can use masking tape or toilet paper to clean the surface.
- Color Powder: You can use powder paint to create colorful engravings. You need to scatter the powder and melt it with the laser.
- Contrast Methods: You can use laser etching, engraving, or ablation to create monochromatic contrast on various materials.
Lasers are superb for engraving or marking materials. But laser engraving in color takes that versatility to the next level.
You could create color laser engravings on your favorite knife. Or, you could enhance your brand presence by color laser engraving your company’s logo.
In this blog, we’ll cover the best techniques I’ve discovered for color laser engraving over the past few years, as well as a few useful products to make the process easier.
I’ll help you avoid the typical beginner’s mistakes as you learn to up your engraving game – so read on to start adding color to your beautiful designs the right way.
See also: our ranking of the best laser cutters for small businesses
- Key Takeaways
- Types of Color Laser Engraving
- Can You Laser Engrave in Color?
- How Do You Engrave With Color?
- Color Laser Engraving (Marking)
- Best Lasers for Color Engraving
- How to Color Fill Engravings (How to Color Fill Laser Engraved Wood, Glass, etc)
- Laser Engraving in Color Using Color Powder
- Alternative: Single-Color Contrast Techniques
- Can CO2 Lasers Color Engrave Plastics?
- Can You Add Color to a Laser Engraving?
- How Much Does a Color Laser Engraving Machine Cost?
- Summary
Types of Color Laser Engraving
The best methods for color engraving are:
- Fiber laser color engraving (marking)
- Color filling laser engravings
Adding laser engraving color powders is also possible.
Color laser engraving automatically reveals different laser colors on metals, while color-filling laser engravings requires manual painting.
This article explains color laser engraving on metals and plastics. We also explain how to color-fill laser engraved wood, acrylic, or other materials with two distinct techniques. We also show you how to use color powder in your laser engravings.
Can You Laser Engrave in Color?
Yes, color laser engraving is possible with MOPA fiber lasers. Also, you can manually paint designs by color-filling laser engravings or by adding color powders to laser engraving. Finally, laser etching and engraving techniques can attain monochromatic contrast for printing purposes.
But, these techniques have different results and applications.
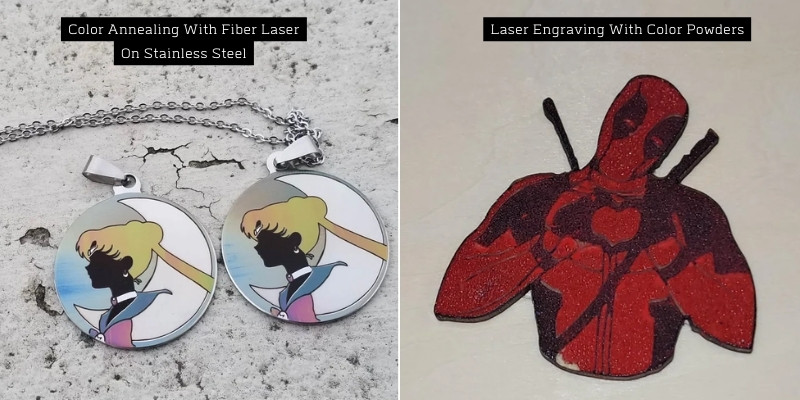
Color laser marking is the only technique where the laser achieves different laser colors without human labor. MOPA fiber lasers can laser engrave in color.
Alternatively, we’ll explain two color-filling techniques and a technique with powder paint to manually create engravings in color.
Etching and engraving techniques like charring and ablation only produce monochromatic contrast. These methods don’t give a color range or much control over the color. So, these techniques are excellent for printing QR codes, dates, and other designs.
Read more: the best fiber laser engravers
How Do You Engrave With Color?
You can use a MOPA fiber laser to color metals and, in part, plastics. Alternatively, you can paint engravings manually by color filling or adding color powder. You can also use laser etching, charring, and laser ablation to get single-color contrast.
Here is a summary of the different color engraving methods and their properties.
| Technique | Multiple Colors | High-Resolution Coloring | Material | Durability | Manual Labor | Application |
|---|---|---|---|---|---|---|
| Laser Color Marking | ✅ | ✅ | Metals, Plastics. | Extremely Durable | 𑁋 | MedicalJewelryAutomotive Aerospace |
| Color Filling Engravings | ✅ | ⛔ | Most Materials | Somewhat Durable | Yes | Art and Hobby |
| Adding Powder Paint | ✅ | ⛔ | Most Materials | Durable | Yes | Art and Hobby |
| Laser Etching | Single Color (But a Couple of Choices) | ⛔ | Most Materials | Durable | 𑁋 | Bar Code, Tracking Information, Brand Logos |
| Laser Charring | ⛔ | ⛔ | Most Materials | Durable | 𑁋 | Automotive, Metal Industries |
We’ll explain each procedure next.
Color Laser Engraving (Marking)
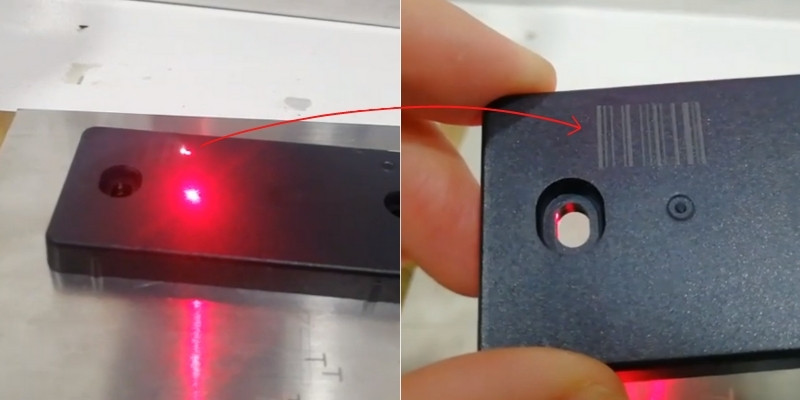
In laser marking, the laser heats the spot until it goes through oxidation and changes color, causing a chemical reaction on the material’s surface.
The laser, therefore, doesn’t engrave the material by creating cavities. The laser merely stains the material’s surface with different colors, retaining its smoothness and texture. However, many call this process color engraving anyway.
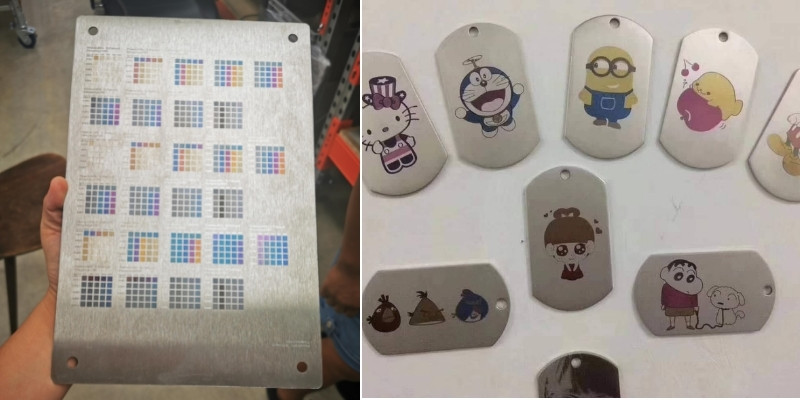
When possible, laser marking is a brilliant method, and has the widest ability to create different colors. Plus, laser coloring has tremendous resolution: it can vary the color in adjacent spots of your design.
However, laser coloring has many limitations. Lasers can mostly only color metals, with varying efficacy. It also requires a MOPA fiber laser.
How Does MOPA Fiber Laser Color Engraving Work?
When the laser concentrates its energy on a spot, the ensuing chemical reaction changes its color. The different metal oxides have different colors.
Numerous colors appear by varying the laser beam’s frequency, pulse width, focal distance, and power.
These variables control the reaction’s energy and temperature, as well as the various oxides’ concentrations. As a result, different colors can be engraved.
MOPA Fiber Laser vs Q-Switching Fiber Laser
MOPA lasers are a more recent invention than Q-Switch lasers. They offer more control over the laser beam’s properties.
One significant difference is that MOPA lasers allow the adjusting of the laser beam frequency. This is vital to producing different colors. On the other hand, Q-Switching fiber lasers have a constant frequency, so they can’t engrave colors on metals.
Revealing different colors mainly depends on changing pulse frequency and pulse width. Therefore, MOPA fiber lasers offer precise control over the laser beam to create numerous colors.
Color Laser Engraving on Metals
MOPA fiber lasers can color mark several metals, but color laser marking stainless steel and titanium offer outstanding results. Steel, chromium-coated metals, and iron are also good candidates for color laser engraving (marking).
Can You Do Color Laser Engraving / Marking on Plastic?
The color laser engraving procedure on metals involves annealing them. Yet, plastics don’t have the same chemical reactions. So, lasers can’t produce similar results on plastic (at the moment).
However, the laser can darken or lighten the plastic’s color to change its shade. So, color engraving plastics are also possible, but the results stay in a similar color range to the original plastic color.
Color laser marking is possible on most plastics including ABS, PVC, Polyethylene, and glass-filled plastics.
Best Lasers for Color Engraving
There are several good lasers that can color stainless steel and other metals on a budget. We introduce two great color laser engravers here.
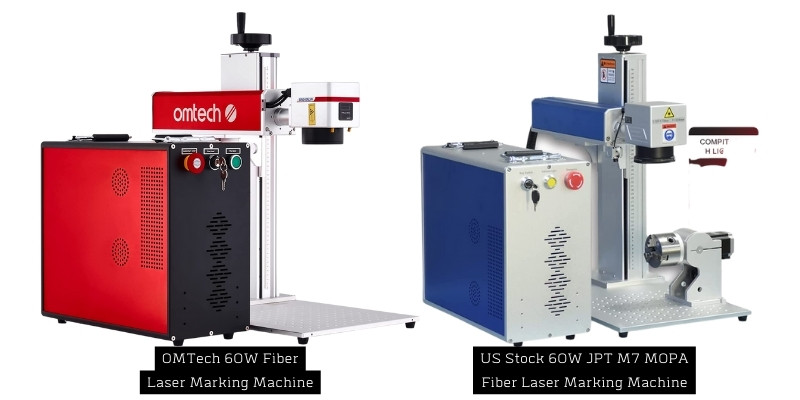
OMTech’s MP series are MOPA fiber lasers capable of color marking metals. Their working area is 6.9” by 6.9”. However, the laser power ranges from 20W to 100W. The 60W MP6969-60 looks attractive at this price!
Another laser with an amazing value-to-price ratio is US Stock’s 60W JPT M7 on Amazon. It has a 60W MOPA fiber laser for color marking metals. Also, it comes with a rotary to mark rings and round stuff. Check out its price on Amazon.
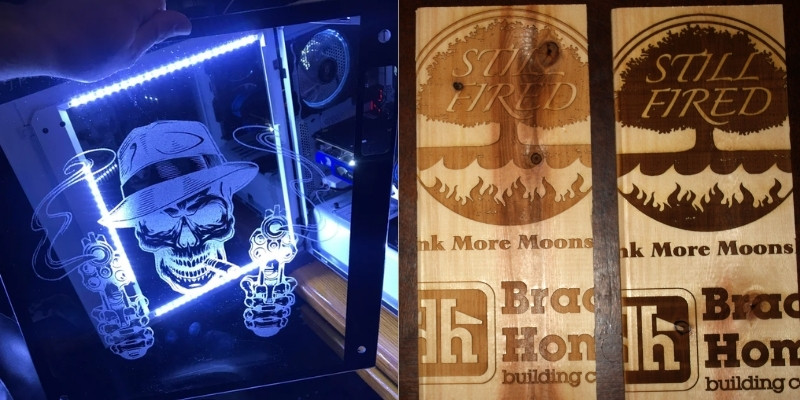
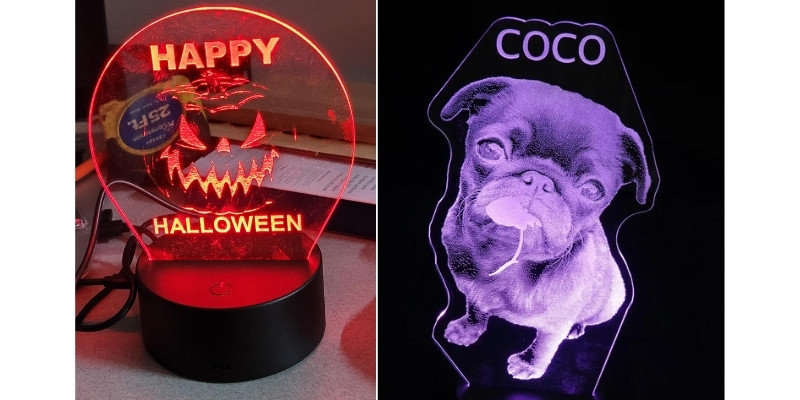
How to Color Fill Engravings (How to Color Fill Laser Engraved Wood, Glass, etc)
We saw that laser color marking only succeeds on metals (and partially on plastics). So, how can we achieve colorful engravings on wood, acrylic, or other materials? We can paint them with color filling.
Color filling the engravings is the best alternative to laser color marking for producing various shades. We’ll also explain its advantages over adding color powder.
Color filling vs color laser marking
We have to get our hands dirty since the laser doesn’t produce the colors.
We can’t vary the colors with great details or high resolution since the brush will paint large areas.
Color filling works on all materials.
Color filling does not require a MOPA fiber laser.
There are two techniques for color filling engravings: using masking tape and wiping with toilet paper.
Using masking tape requires preparing the material’s surface before engraving. So, you can only use this method when you intend to paint the engraving before using the laser. However, you can use the wiping method even on finished surfaces since it doesn’t require preparation before engraving.
How to Color Fill With Masking Tape
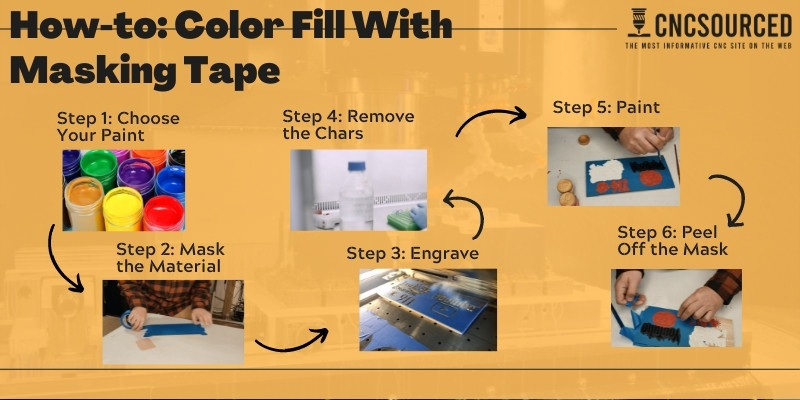
Let’s say you want an engraving of the sun in yellow.
Step 1: Choose Your Paint
You can use any paint that sticks to the material. You can use spray paints as well. Acrylic paints are excellent for wood and acrylic, while vitrail paint is excellent for glass.
Step 2: Mask the Material
Mask the material using masking tape. If you need several bands of masking tape, take care that they do not overlap. Otherwise, the laser beam engraves much shallower in the areas that have two masking layers.
Step 3: Engrave
The engraving will remove the masking tape and the material. The laser exposes the design while the rest of the material retains its masking layer.
Step 4: Remove the Chars
If your laser has charred the engraving, you should remove them. Because painting on chars reduces the paint’s life. The paint won’t stick to the material as well. Plus, if the char scrapes off, it will take chunks of paint with it. Finally, if the paint is thin, chars can slightly darken the paint.
You can use denatured alcohol to wash off the chars. Using alcohol is easier than sanding the chars off.
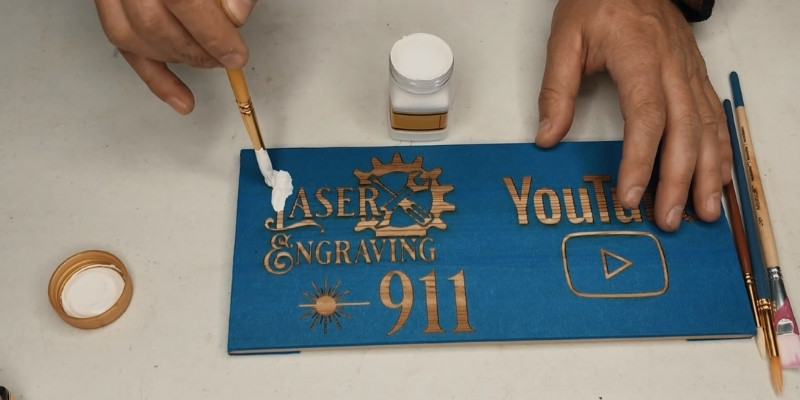
Step 5: Paint
You can use a brush or spray paint to paint the material without worrying that the paint stains areas outside the design. You can also use different colors in different areas. Make sure that you have not left any spot unpainted.
Step 6: Peel Off the Mask
Peel off the mask to reveal your engraving in color.
A Second Method of Color Filling (Wiping)
This method doesn’t require any preparation before the engraving, so you can use this method on any engraving.
This step-by-step process assumes you have your engraving ready. Also, using the right paint, you can use this method on any material.
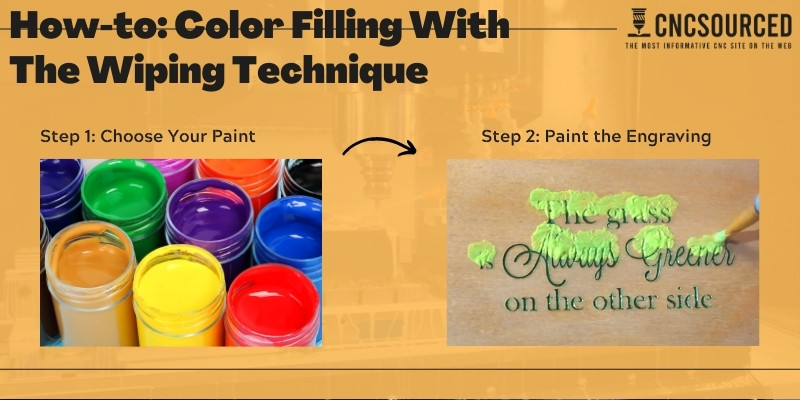
Step 1: Choose Your Paint
In this method, you need paint that doesn’t dry too fast since we’ll be wiping off paint. Acrylic paint works great on wood.
Enamel paints are easy to use on glass. FolkArt Gloss Finish Acrylic Enamel paint is a very good option. It gives a glossy finish and is well-liked by beginners and artists. Also, a set of 12 colors of enamel paint is very popular.
Vitrail paint works great on glass and even metals, ceramics, tiles, Plexiglass, and plastics. It is generally more expensive than acrylic enamel paints. Plus, it took me a little more time to get the hang of it. So, it’s a bit more difficult to handle than enamel paints.
Vitrail paint is extremely resistant to heat and water. It won’t fade by light even if you subject it to years of sunshine. So, it’ll stick to glass forever and won’t ever wash off.
Also, It is not opaque, so expect a transparent paint that permits light through. You will see the liquid move around inside the painting!
You can buy Pebeo Vitrail paints here, but, scroll down and buy these three items together: the red, blue, and green paint.
Vitrail paints are solvent-based. If you don’t like solvent-based paints, you can buy Pebeo’s Vitrea 160 paints, instead since these are water-based.
Step 2: Paint the Engraving
You should not worry about staining outside the engraving’s cavities. The point is to get the paint inside the grooves.
Don’t waste time trying to get as little paint as possible in unwanted areas. Pace is more important than precision. So get the paint inside (and inevitably around) the engraving.
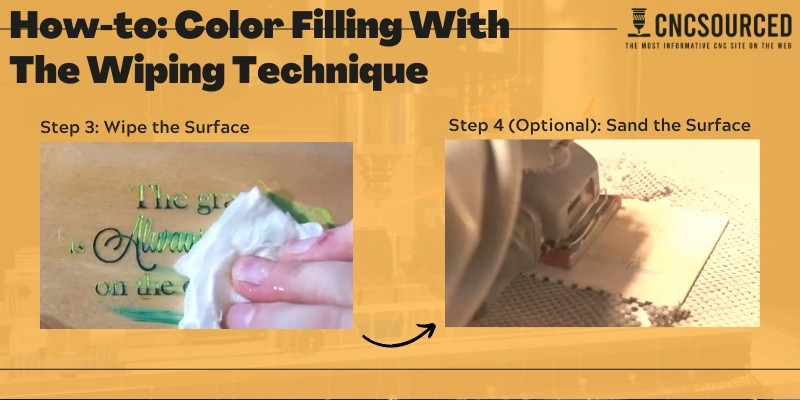
Step 3: Wipe the Surface
Use toilet paper to wipe the surface in gentle and smooth strokes. The goal is to clean the surface without disturbing the engraving.
You should exert pressure with a large area of your hand as opposed to fingertips, for example. Because fingertips can enter the engraving’s cavities and wipe their paint too.
After cleaning the surface, you should only have paint in the engravings. If the paint has dried on the surface, use solvent to remove it.
Step 4 (Optional): Sand the Surface
Mildly sanding the surface can remove any leftover painted spots. It can deliver a cleaner surface.
Laser Engraving in Color Using Color Powder
Powder coating is an industrial painting technique that creates a tough protective painted layer on stuff. However, you can buy powder colors and use them to create color engravings. This page is the oldest mention of this.
You don’t need a powder gun or industrial ovens to melt the powder. Your laser can melt the powder to produce a color engraving.
However, the color filling technique is much more versatile and widespread than this method, because using color powder has several drawbacks:
- It simply takes much more time than color filling since you have to put the material back into the laser machine, carefully home the laser, and go over the engraving again.
- The powder only stays put on horizontal surfaces – not round bottles, for instance.
- You must have the design file to go over the engraving with your laser, while you can use the second color filling technique on any random engraving.
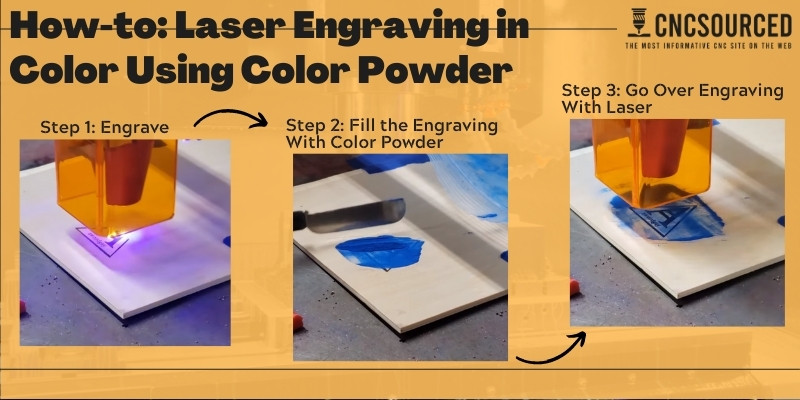
Step 1: Engrave
Engrave your material. I mention this step since you have to use the file again.
It is possible to create a raster file of random objects by taking their picture. But you’ll have to measure the object and scale the raster accordingly. This is just not worth the effort when you can easily use color filling.
Step 2: Fill the Engraving With Color Powder
Scatter the color powder on the surface. This is easier than color filling because you can use a ruler or a credit card to collect the extra paints from the surface and put them back in the paint bottle.
Step 3: Go Over Engraving With Laser
Put the material back in the laser machine to go over the engraving again. This time, you should use less laser power – only enough for melting the color powder.
Once the laser has finished melting the paint, your color engraving is ready.
Read more: the best laser cutters and engravers in every price range
Alternative: Single-Color Contrast Techniques
The alternative methods that follow have tremendous uses. However, they will not present various colors. These techniques are able to produce monochromatic contrast, meaning they can show marks with a single color.
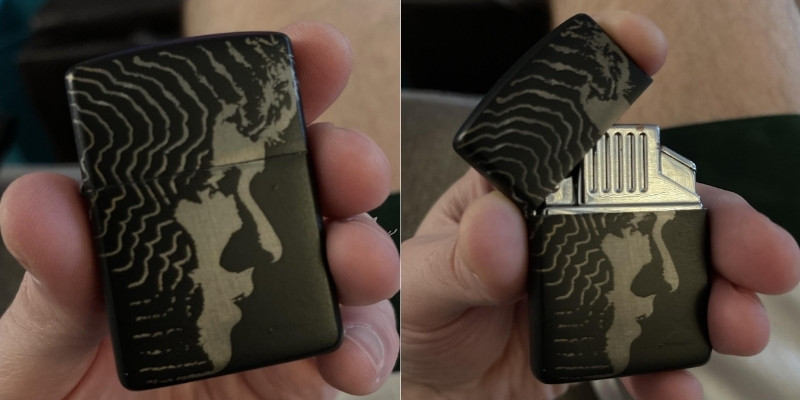
Laser Etching
With laser etching, you can create black or white (or grey) designs against the background. Laser etching works on almost all materials.
Laser etching gives you great contrast in the shortest amount of time. Laser etching is also the most economical laser marking method, and also works on the widest range of materials.
On the downside, laser etching wears off if the material is subject to abrasion. Plus, it doesn’t produce different colors.
Read more: laser etching vs marking vs engraving – the differences explained
Laser Charring
The act of laser engraving can char the material. Normally, we consider chars as unwanted stains. However, since engraving does not create much contrast on its own, some production lines prefer burnt engravings for their contrast, especially on steel.
This procedure is most handy for companies that engrave information on steel parts.
Laser Ablation
Laser ablation can remove the material’s coating. If the material has paint or a coated layer with a contrasting color, the ablation process creates contrast.
However, marking isn’t the main use of laser ablation – it is just a byproduct. Laser ablation has many scientific uses, but you can use your CO2 laser to create designs by laser ablation.
Can CO2 Lasers Color Engrave Plastics?
CO2 lasers can etch plastics to create a contrasting mark with the background. However, the marks are single color contrasts. So CO2 lasers can’t engrave in colors like yellow, for instance.
Can You Add Color to a Laser Engraving?
Color-filling techniques can add color to laser engravings. Lasering powder paints is also possible, but it’s more demanding than color filling. Alternatively, MOPA fiber lasers can directly color engrave metals with high precision.
How Much Does a Color Laser Engraving Machine Cost?
Color laser engraver prices start as low as $500 with 10W Chinese lasers, and go up to tens of thousands of dollars. However, you can get a decent fiber laser engraver for about $5000.
Summary
Engraving in color has artistic and practical applications. There are several methods of color engraving besides several techniques for creating monochromatic contrasts.
Laser marking is the only fully automatic color engraving technique. A MOPA fiber laser produces color marks on metals directly. Plastics can also reveal a range of contrasts in the same color shade with this method.
Color filling techniques require manual painting. Color filling is excellent for art projects. It is easy and versatile since it works on all materials and engravings.
Adding color powder is also possible for creative projects. However, it takes more effort and is not as versatile as color filling.
Finally, techniques for creating contrast are the most pervasive methods in all industries and brands. Laser etching and laser engraving (with possible charring) are the best methods for creating marks in color laser engraving.
Related posts:
- A Guide to Industrial Laser Cutters
- Best Glass Laser Engravers
- Get Inspired By Downloading These Free Laser Cut Files
- Laser engraving and etching anodized aluminum: guide
- The complete laser cutting and engraving materials guide
- Laser etching metal: guide