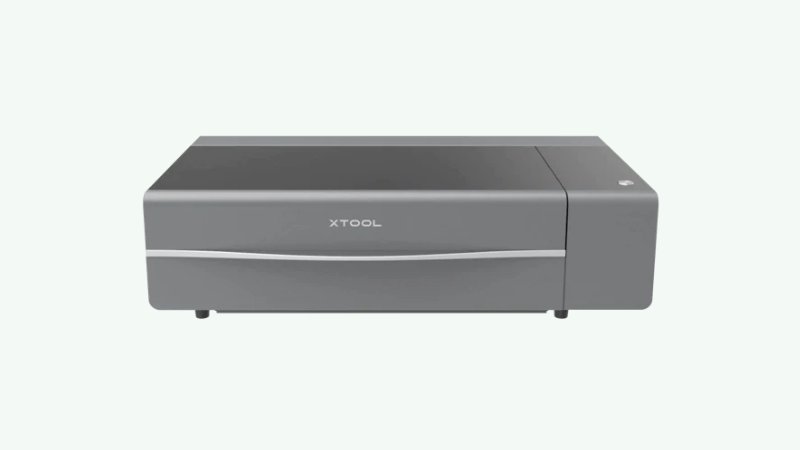
I’ve been using the xTool P2 for around a month now, and I’ve tested it on clear and black acrylic, woods, metals, slate, and tried out the curved surface engraving and batch processing tools – and if they’re really as great as they look. So, here’s my xTool P2 review.
Overall, I think the xTool P2 is the best desktop CO2 laser in the world right now.
Simple the best CO2 desktop laser right now. You can buy this, the rotary, riser base, and the automatic conveyor feeder, and it's still cheaper than a Glowforge Pro.
It's more powerful than competing lasers at 55W, can cut 20mm thick wood in a single pass, and the batch processing and curved surface engraving open up new possibilities for your business.
- Large processing area
- Powerful 55W laser cuts 20mm thick material in a single pass
- 16MP dual cameras autofocus for easy project preparation
- Curved surface engraving in XCS
- Batch processing features
- Can't use all features in Lightburn (but XCS software is really good now)
- Mirrors/lenses may be out of focus from transport and require fixing
It outperforms more expensive laser cutters like the Glowforge Pro, Gweike Cloud Pro, OMTech Polar, etc. Even with all the attachments, like the RA2 rotary roller, riser base, and conveyor belt feeder, it still costs less than a Glowforge Pro.
The best parts for me are the curved surface engraving feature which is an absolute game-changer, and the batch processing feature to quickly engrave potentially dozens of products at once.
I have been using the standard xTool P2, and also the Risers for engraving taller pieces, especially with the RA2 Pro rotary which I also have. I also have the automatic feeder for super-long 118 inch material feeding, but haven’t had a chance to use it yet.
xTool P2 Pros and Cons
Pros
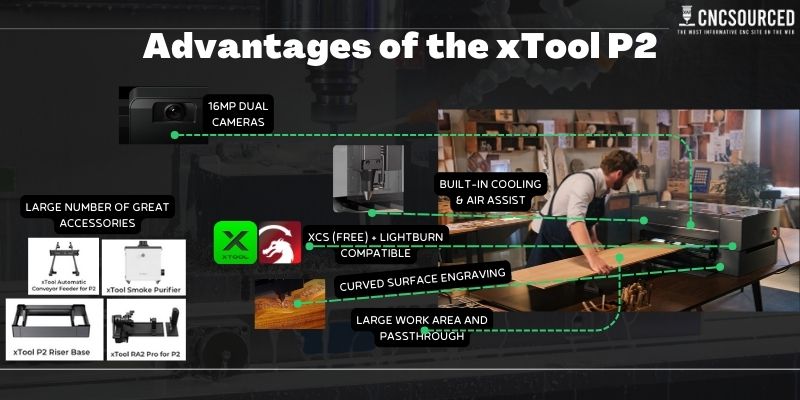
- Large work area and passthrough: especially with the automatic conveyor feeder add-on which allows up to 118 inches of material length.
- Cuts thick materials in a single pass: 20mm thick materials like basswood and acrylic are no problem for the xTool P2.
- Built-in cooling and air assist: with diode lasers you’ll need to purchase air assist separately, and it can be finicky to use.
- Lightburn compatible: though, you lose access to some features like uneven surface engraving, batch processing, and auto height detection that are only in XCS.
- 16MP dual cameras for general working area detection and a close-up precise option for intricate detailing. These also allow for instant material thickness measuring to perfect your laser settings. This saves so much time and hassle.
- Auto passthrough with the riser base attachment
- Curved surface engraving: I engraved spoons and other curved surfaces with this new feature, and if you buy the RA2 rotary then you gain even more functionality.
- Large number of great accessories: and they’re reasonably priced.
- Great safety features: for example the door auto-locks when in use, and there are fire extinguisher and smoke purifying accessories.
Cons
- Larger spot size than the D1 Pro: the xTool D1 Pro’s spot size is just a quarter of the P2’s. The xTool P2 has a 0.15 x 0.2 mm spot size, whereas the D1 Pro has 0.08 x 0.1 mm. For extremely precise engravings, a diode laser can be better, especially if you have good air assist.
- Your mirrors may be out of focus from transportation: my xTool P2 arrived upside down, and after getting it the right way up, it needed some focus adjustment. This takes some technical skill and takes time to do, so be prepared for this.
- Can’t use all features on Lightburn: you need to use XCS software for some features like Smart Fill for batch processing, the curved surface engraving, and auto-focus camera features.
Testing the xTool P2
Here are a few of the tests and projects I tried out to test the xTool P2.
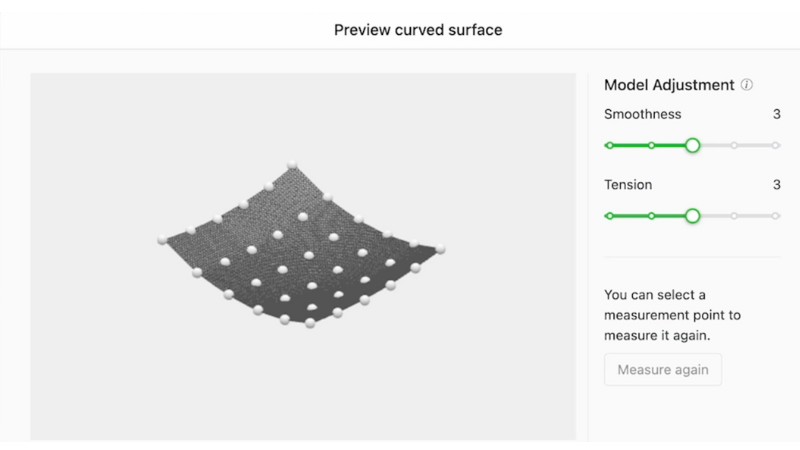
Curved Surface Engraving
The feature I was most excited for was engraving curved materials. xTool’s cameras scan your curved workpiece, and create a 3D mesh of the height at each point. This lets the laser adapt so your design doesn’t distort over the different areas.
So, I tried this with a wooden spoon I had lying around.
However, once the 3D mesh model has been created, the maximum speed option is 30mm/s.
So, even at 15% power, it charred up the engraving completely and it didn’t look as good as it could.
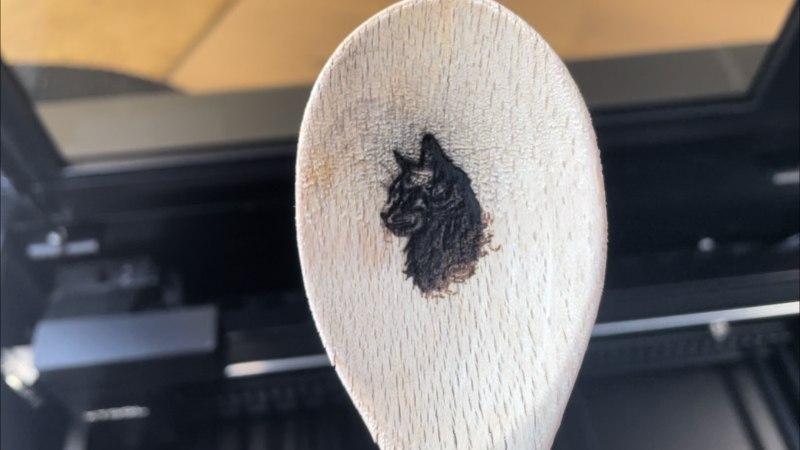
So, I tried again on the other side of the spoon, and reduced the power right down to 6%.
This created a more legible engraving, but even then this was mostly because it was a block-colored cat design. If there was more grayscale features it would have been illegible.
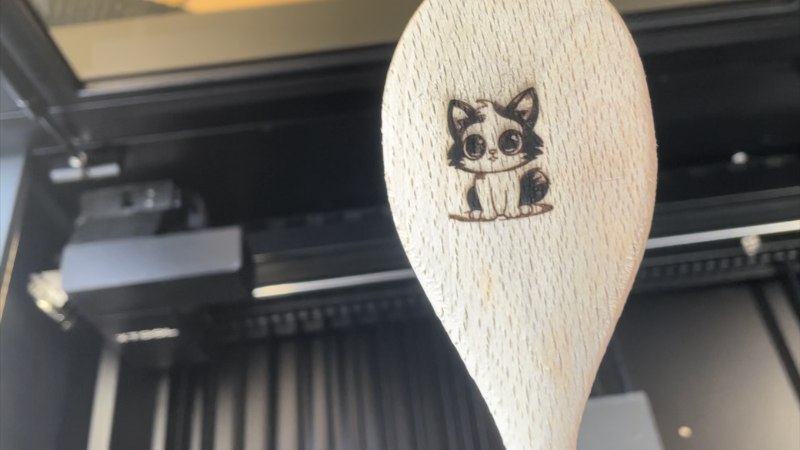
So, for curved models, you should mostly stick to line engravings, or go to 6% power or below for any very fine detailing.
Here’s my more detailed video on the curved surface engraving feature for the xTool P2:
Batch Processing Features
If you have multiple of the same workpieces, if you line up your design on one of them and click the “Smart Fill” button in XCS, it’ll automatically line up the designs in the exact same way on all the others.
This is a big time saver, and a great tool for small businesses lasering the same designs on a lot of objects in batches. This was one of the features I was most excited about.
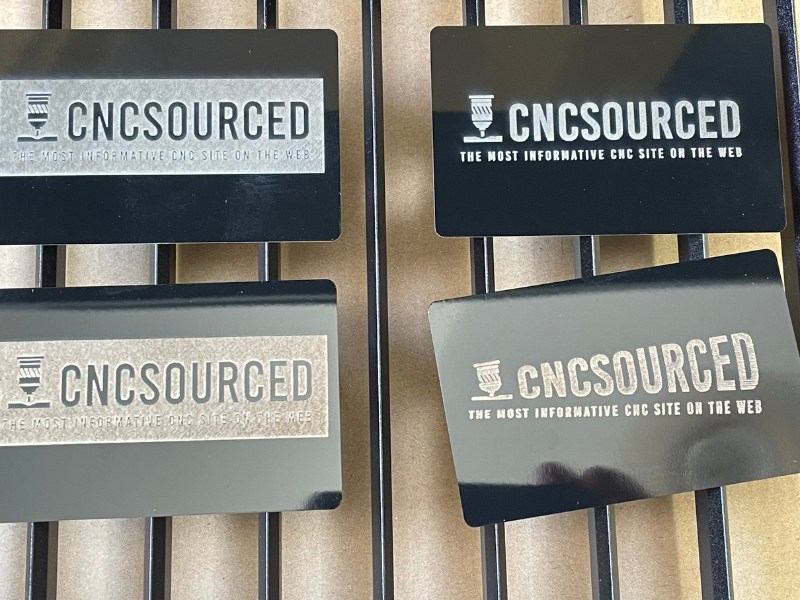
I tested this with some leather patches I had. I found the original CNCSourced logo source file, and lined it up once. Then it instantly adjusted the logo for the other two patches, so I was really impressed with this.
I’ve recorded the process live in the video below:
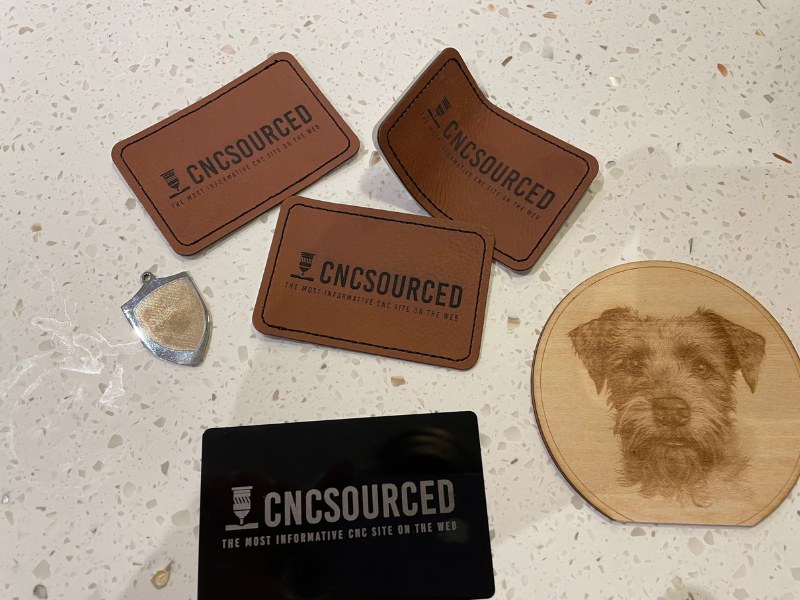
I first tried this batch processing feature with metal dog tags, to see if it would recognize these and adjust the same design.
First time around I was not able to get the camera to recognize them – I’d need to paint them with white paint or something similar to get this to work.
But, by putting a clear sheet of acrylic underneath them, it worked — just.
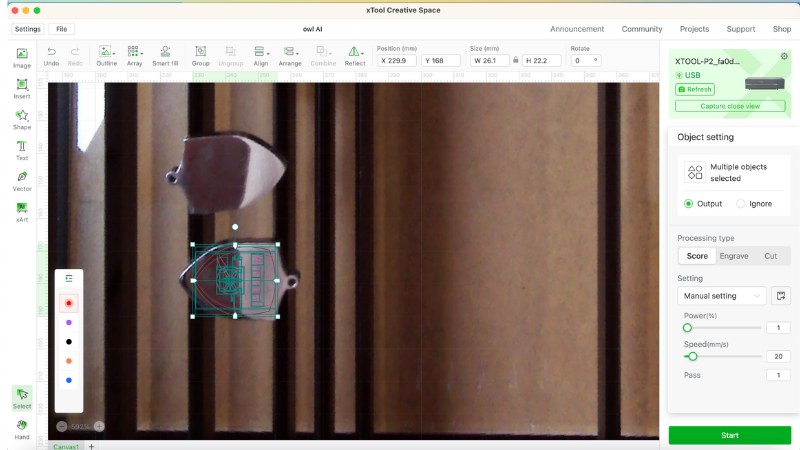
AI Text-to-Image Laser Engraving in XCS
XCS software has a feature called xArt, which turns your prompt into a file ready to import into the software and laser engrave.
I’ve personally experimented a lot with AI image generators for laser engraving files, and I’ll make a separate guide on how to get the best results, best prompts, and how to turn them into vector files in a separate guide.
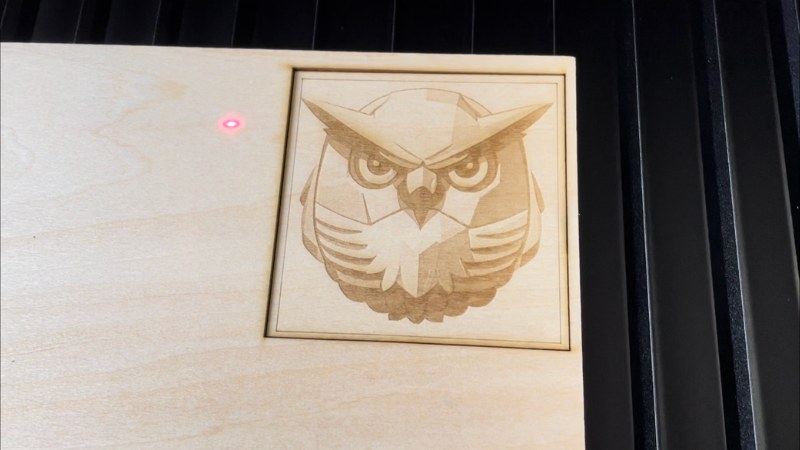
So when I saw xTool had built AI text-to-image features into XCS, I was excited to try it. I used a basic prompt and created an owl model:
“Cartoon owl with big eyes and large beak and wings. Block colors that are all easy to laser engrave.” And I used the Isometric setting.
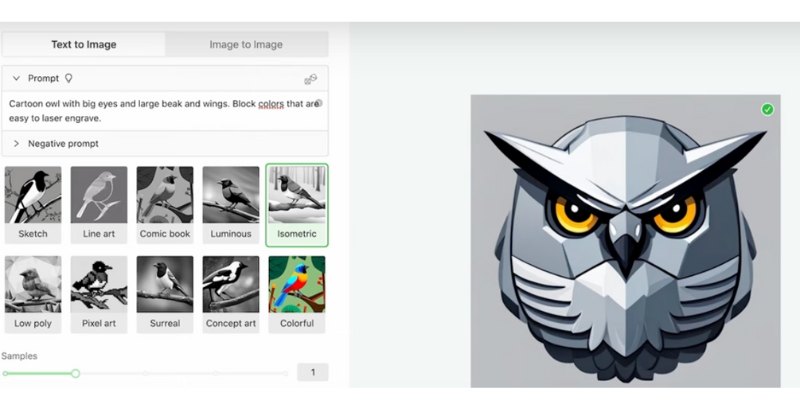
I then imported it into the XCS working project, and laser engraved it. It was really easy, and means you don’t need to go to Midjourney, or use the ChatGPT Photorealistic plugin to create your prompts for you. (You can still use Photorealistic for prompts and then just paste them into XCS xArt, though.)
Here’s my video showing how I used the AI xArt feature in XCS:
Slate Rock Laser Engraving Tests
I’m personally a big fan of laser engraved slate designs, and was looking forward to seeing how the xTool P2 engraved on slate.
I bought four slate coaster squares from the xTool store (they’re called “rock” rather than slate on the store if you want to find them).
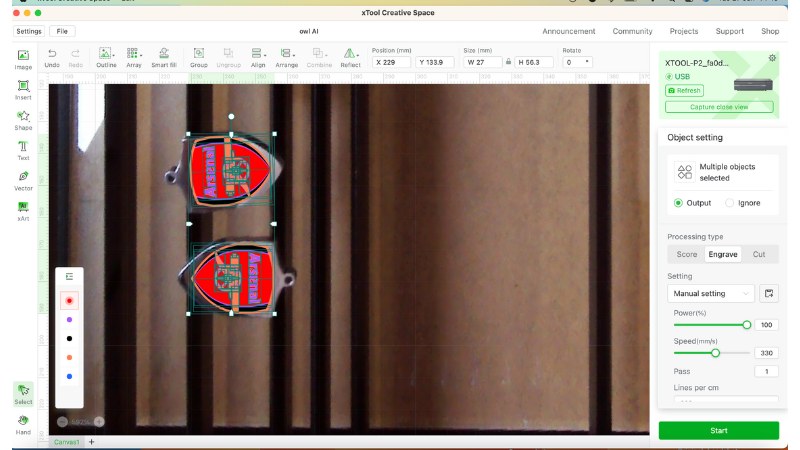
As a big fan of Arsenal FC, I tried to laser engrave the SVG file I had of the club crest.
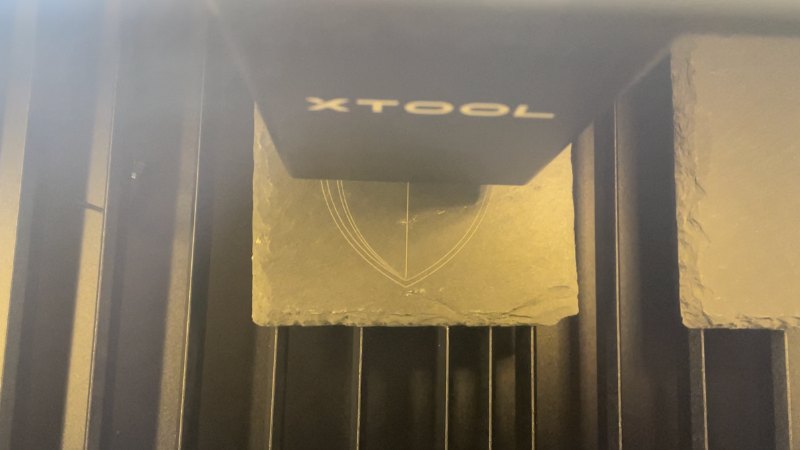
I tried xTool’s recommended settings, which for scoring rock slate are 15% power at 160mm/s, but I felt the lines were a bit thin and weak.
So, I changed this to 60mm/s and went back over a few of the layers of the SVG file again.
I was much happier with the deeper, thicker engraving in these sections, and I would personally recommend instead doing any line engraving at 60mm/s if you prefer these thicker details.
Though, I recommend buying slate coasters from Amazon or from your local Walmart or other store instead of the xTool store. They’re as cheap as $1 each on Amazon, but $4+ on the xTool store.
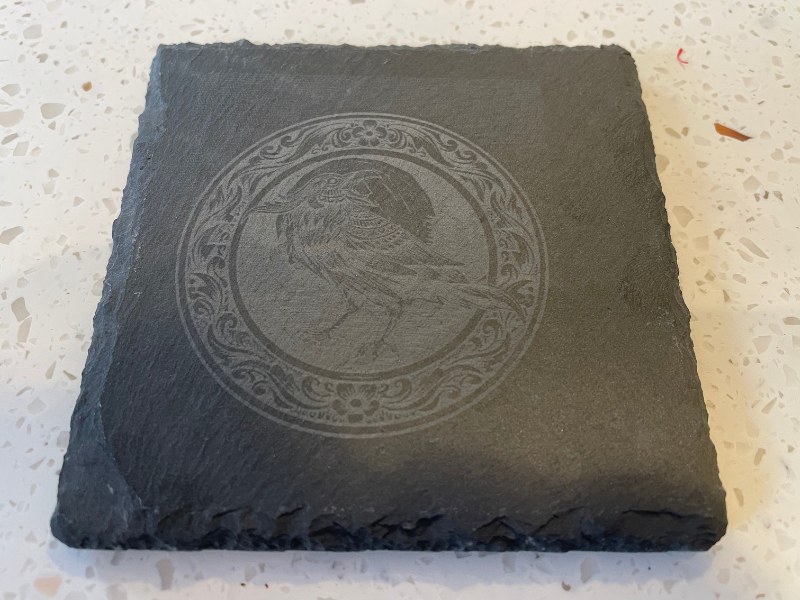
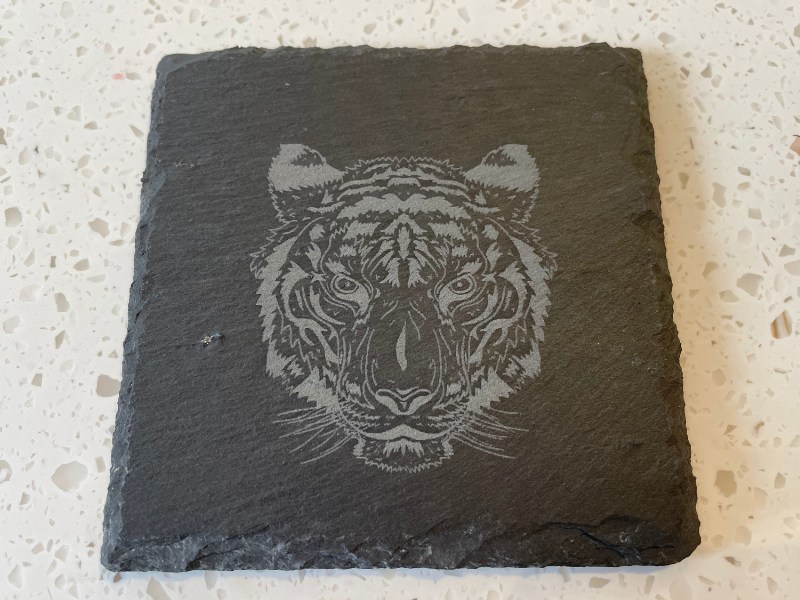
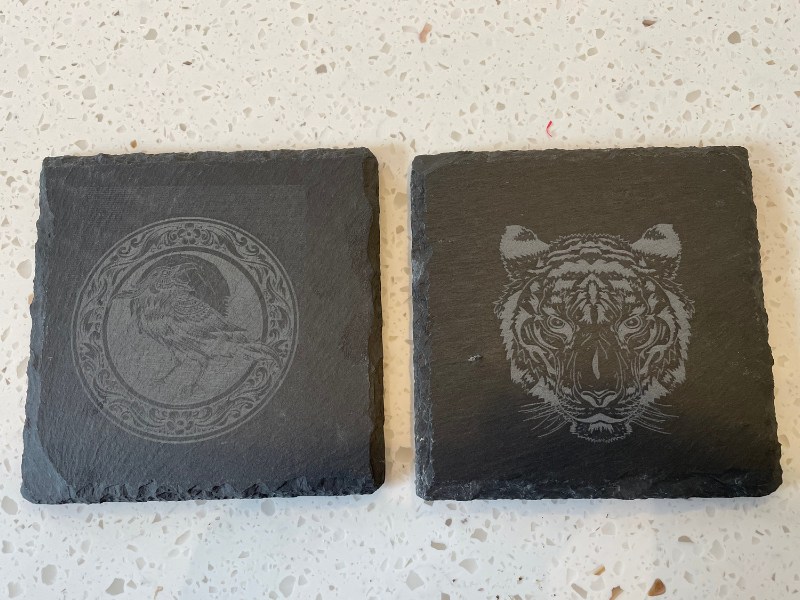
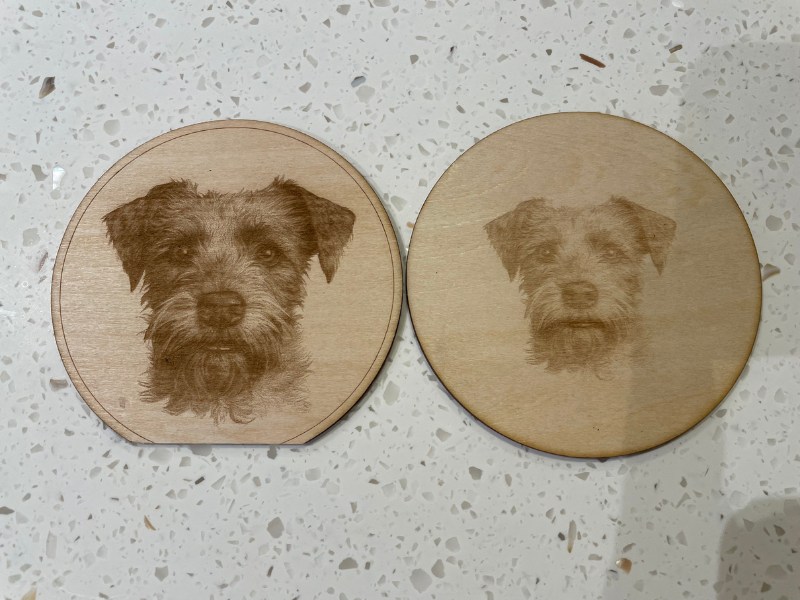
I also tried some general engravings that you can see below. The bird was at xTool’s recommended 12% power and 400mm/s, and the tiger is at 18% power and 300mm/s speed, because I wanted more contrast.
I prefer the higher settings, and have laid the two coasteres next to each other so you can see the differences:
Other tests
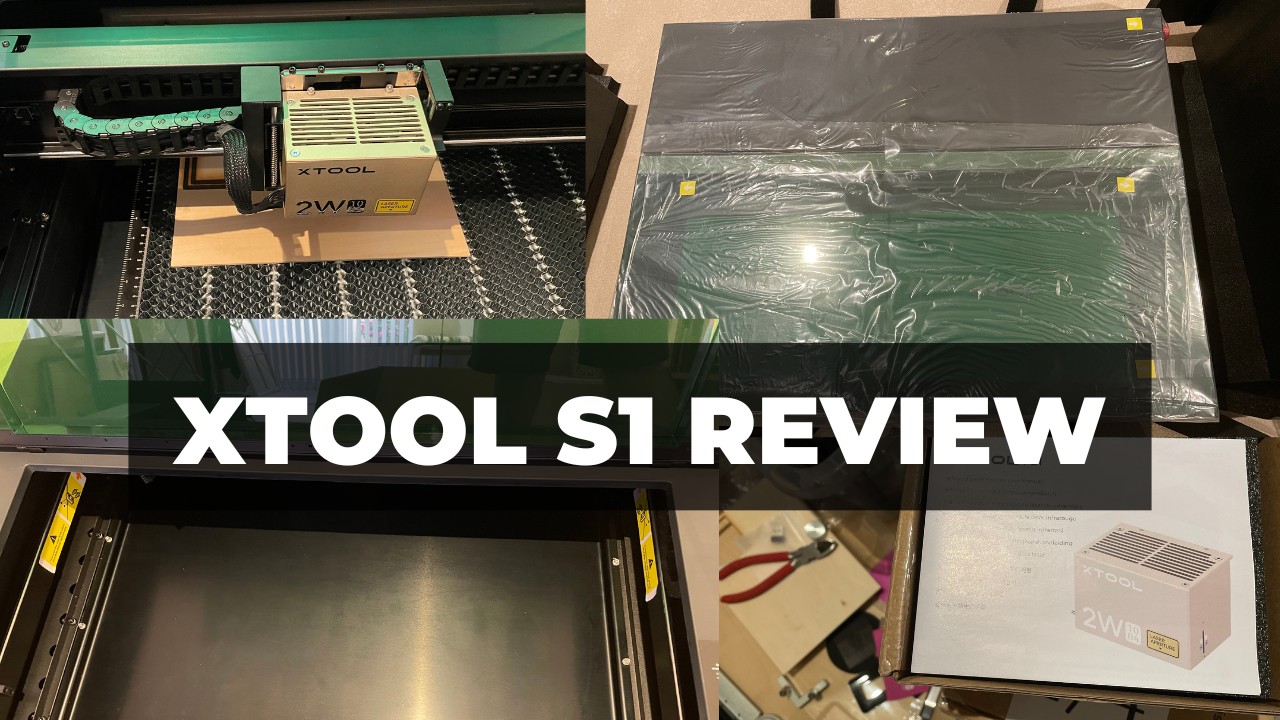
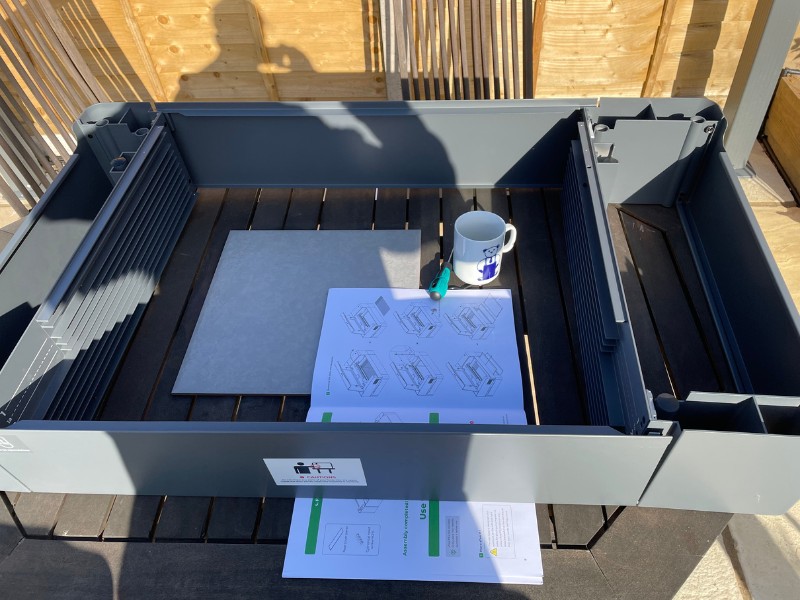
Unboxing and Setup
My xTool P2 was delivered the wrong way up, though luckily it was not damaged. But, the laser is 45kg, and so it took 2 people (me and another person) to turn over the package, and lift the laser up and put it on a table.

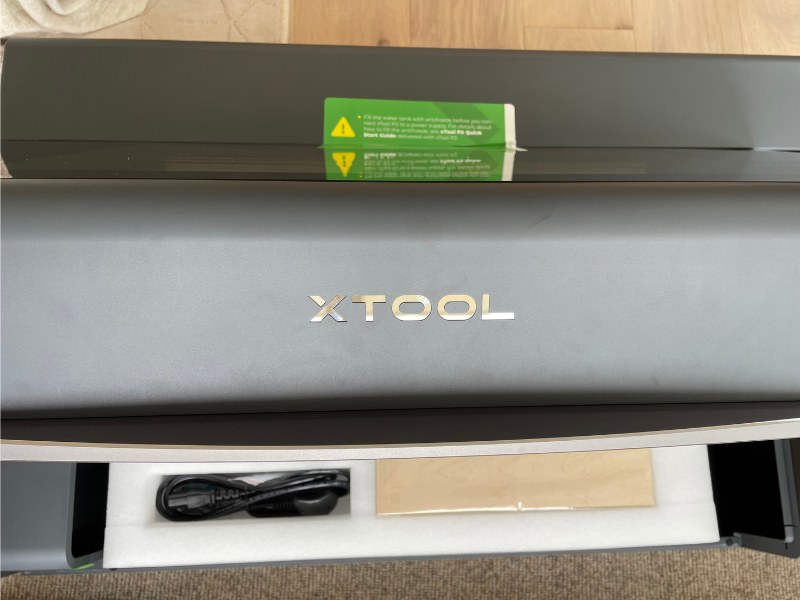
The xTool P2 setup process is simple and short, as the laser comes fully assembled with just some minor extras before you’re ready to get started.
You just need to unscrew the front and back screws in the laser, unscrew the water coolant container, and add the right amount of antifreeze and distilled water (you can’t use normal water, it has to be distilled water), based on the lowest temperatures you get where you live.
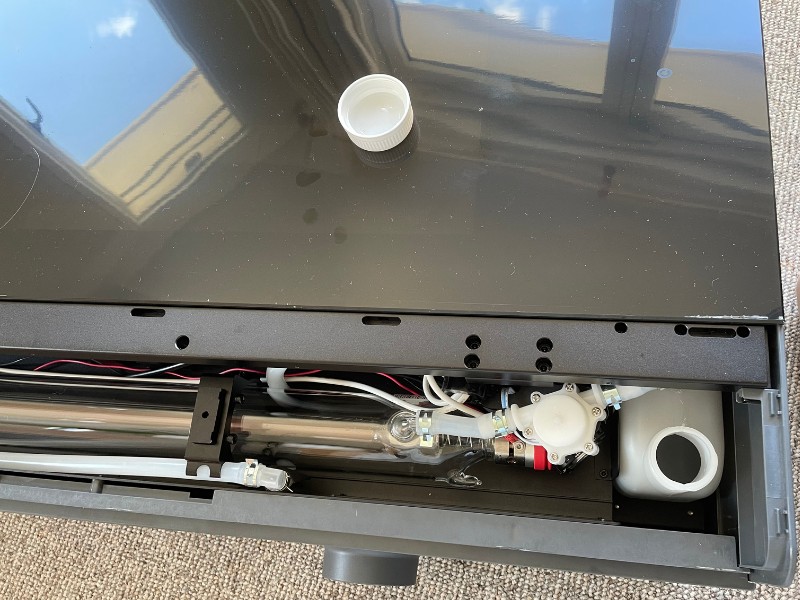
For example, for me in the UK, it can rarely hit just below -10C in winter, so I added 490ml of antifreeze as per the instructions. xTool supplies the antifreeze in the package.
What the xTool P2 comes with:
- Adjustable air assist.
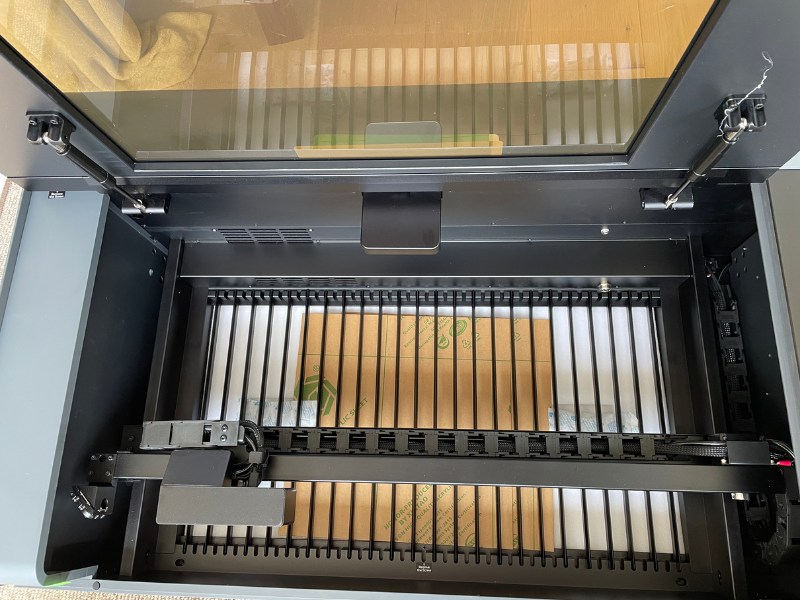
- Removable tray for engraving at the bottom for extra engraving height. However, with the extra riser attachment, you get the full 8.2” maximum clearance (essential for rotary engraving).
- Slats on the bed instead of the honeycomb-style bed xTool offer as an accessory with the D1 Pro. The slats are removable which gives you more versatility when cutting, and also allows for better airflow than a honeycomb bed during operation.
- 1 main button, with a display and relevant data like if you’re connected via WiFi or USB, the amount of time left, etc.
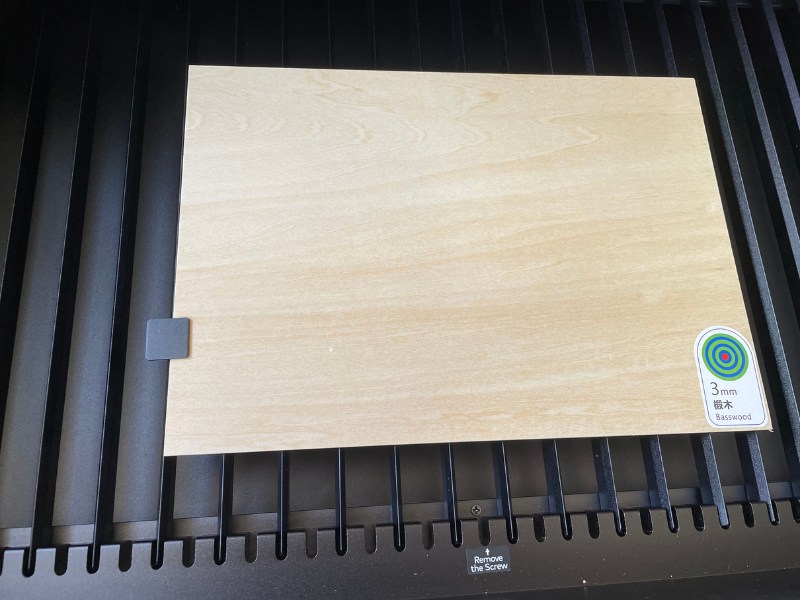
- Comes with 3mm basswood, corrugated cardboard, and clear acrylic.
- Antifreeze for the coolant, and a funnel for pouring it in.
- Clamps for keeping workpieces in place.
However, the mirrors may need realigning if they come misaligned. If the mirrors are out of focus, you can use this guide to fix this.
Working Area / Passthrough
The standard processing area for the xTool P2 is 600 x 308 mm, within the larger bed size of 680 mm x 360 mm.
However, you can put larger workpieces through the xTool P2 with the pass-through slot and the conveyor belt accessory. With this, you can put workpieces up to 118-inches in length through.
That’s even more than the 8-foot length in the 4×8 foot CNC – 8 feet is only 96 inches!
I also have the conveyor feeder and the riser base to use it with, and I will update this when I have had time to test this out.
Build Quality
The xTool P2 is well built. There’s a high-quality see-through window that I think is made from acrylic, that while being transparent, also blocks any laser light or fumes to keep you safe.
The internal parts are made from metal, and the slats that take the place of standard honeycomb bases are high-quality, as are the screws you remove to get to the water and antifreeze filler and CO2 tube.
The only thing I can find at fault is that it uses the same steel wheels as the xTool D1 Pro, which, while good quality, are not as good as linear rails.
The acessories are also high quality. For example, the riser base extra for engraving taller objects is fully made from high-quality metal parts. These feel robust and strong, and I’m impressed they were able to cast these custom parts for the $499 accessory price.
Safety Features
There are a number of safety features on the xTool P2, including some I haven’t seen on any other desktop laser cutters before.
- See-through acrylic window that blocks any laser light or fumes.
- Mechanical lock that locks when running. Instead of a switch that automatically stops the laser if you open the machine, the switch actually stops you from opening the door at all. This is a better safety feature in my opinion, and one that others don’t have.
- Emergency stop button.
- Fire safety features: the xTool P2 can detect fires, sound an alarm, and extinguish the fire. There’s also warnings on the screen if the motherboard or cooling system are overheating, or if there’s no cooling water, etc. xTool also sell a separate fire safety accessory.
- Hydraulic supports: these hold the laser door open at 70 degrees, and the supporting poles make sure the lid falls more slowly, so you don’t risk injuring your hands from the door falling on them.
Cameras
The xTool P2 has dual cameras that do some really impressive things.
The first camera is the wide-angle camera on the side of the laser enclosure. This lets you preview the workbed via your computer and prepare your project.
Then, there’s a second 16MP camera in the laser head itself. This is for precise close-up captures for small projects. For example, Chad’s Custom Creations used it to engrave a single grain of rice!
The high quality of the cameras means you can zoom in on your workpiece for very intricate engravings that are perfectly centered. And it’s so much easier than tracing the dimensions of your project on lasers that don’t have a camera.
This also means you can work on materials that aren’t completely flat, using the curved surface features to generate a 3D scan mesh grid of the surface and adjust to the different heights across the workpiece.
These cameras and depth sensors allow for 1-click auto-leveling. The corner red light camera detects the thickness of your material, and a secondary camera takes an even more accurate measure.
Alternatives: xTool P2 vs Glowforge Pro, OMTech Polar, Gweike Cloud Pro
I think the xTool P2 is the best desktop CO2 laser, and I think it is clearly better than the Glowforge Pro, Gweike Cloud Pro, and OMTech Polar – which are considered the main competitors in this price range.
The xTool P2 is more powerful than the other options, except the highest-power version of the Gweike Cloud Pro.
It’s larger than them, has the highest maximum speed of 600mm/s which is faster than the OMTech Polar and Glowforge, and the same as the Gweike Cloud Pro, and with the riser base has a far taller maximum material height – ideal for rotary engraving.
The only spec it loses out on is the Glowforge has 1355dpi, whereas the xTool P2 has 1000. But the xTool P2 is more than $2000 cheaper than the Glowforge, and you can buy all the attachments and it will still cost less. To me, it’s a no-brainer to go with the xTool.
Here’s the main points of comparison between all four desktop CO2 lasers:
| xTool P2 | Glowforge Pro | Gweike Cloud Pro | OMTech Polar | |
|---|---|---|---|---|
| Power | 55W | 45W | 50W / 55W | 50W |
| Working Area | 600 x 308 mm (23.6” x 12.1”) | 495 x 297 mm (19.5” x 11”) | 510 x 300 mm (20.1” x 11.8”) | 510.5 x 300 mm (20.1″ x 11.8″) |
| Max Material Height | 2.5” (8.5” with the riser base attachment) | 2” | 2” | 2” |
| Max Speed | 600mm/s | N/A (estimated around 300mm/s) | 600mm/s | 500mm/s |
| Available Attachments | Rotary, riser base, smoke purifier, conveyor feeder | Smoke filter only | Rotary, smoke filter, riser blocks | Rotary, air purifier |
| Precision in dpi | 1000 | 1355 | 1000 | 1000 |
| Camera | 16MP dual wide angle + macro | Wide angle and macro | 5MP wide angle | 5MP camera |
| Software | XCS, Lightburn | Browser-based Glowforge software only | Gweike Cloud browser-based, and DSP version of Lightburn | Lightburn |
| Connectivity | WiFi, USB, Ethernet | WiFi only | WiFi, USB, Ethernet | WiFi, USB, Ethernet |
| Passthrough slot | Yes, and 118-inch max length with conveyor feeder | Yes, unlimited length passthrough slot | Yes, and feeder option available | Yes |
| Curved Surface Features | Yes | No | No | No |
| Price | $4399 | $6995 | $3149-$3499 | $2999 |
| Where To Buy | xTool here | Glowforge here | Gweike Cloud here | OMTech here |
If you don’t want to spend the $4399 on the xTool P2 then that’s completely fair, and if you have to choose between the OMTech Polar and Gweike Cloud Pro, I would probably go with the Gweike Cloud Pro.
It is $150 more than the OMTech Polar, but it’s faster and more versatile in my opinion.
But, if you have the extra $1000, I think you’ll make it all back quickly with the added business you do if you buy the xTool P2. Even just the curved surface engraving feature offers so much business potential with new projects.
I think the Glowforge Pro is over-priced, and I don’t like that it’s browser-based only – though it is fantastic as a user-friendly machine for beginners. I recommend the xTool over it, and the Gweike Cloud Pro if you’re on a budget.
Accessories
Riser base
If you want to rotary engrave objects of a decent height, then I recommend getting the riser base accessory. It also gives you a pass-through slot for longer sheet cutting and engraving.
Automatic Conveyor Feeder
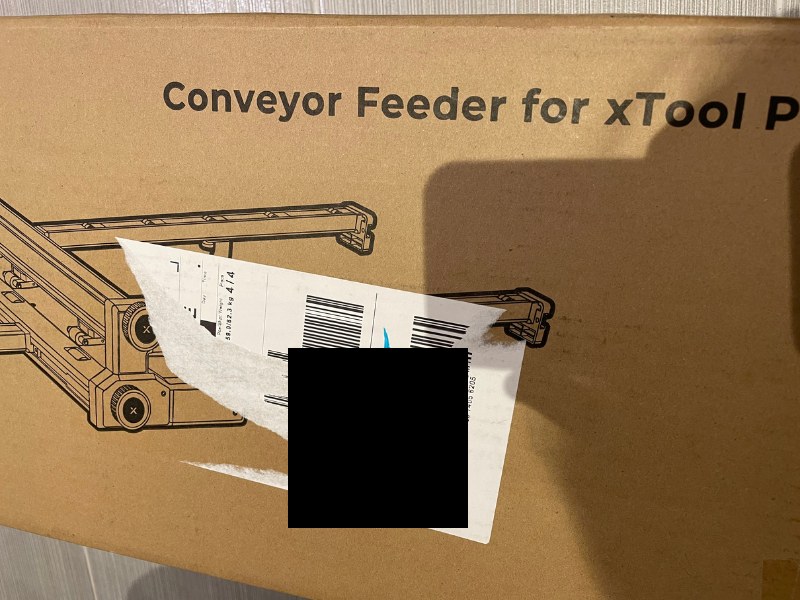
I still haven’t tried this yet, but I’m really looking forward to trying the conveyor feeder, which allows you to automatically feed long material blocks through the P2.
With it, you can engrave and cut material blocks up to 118 inches long!
RA2 Rotary Pro
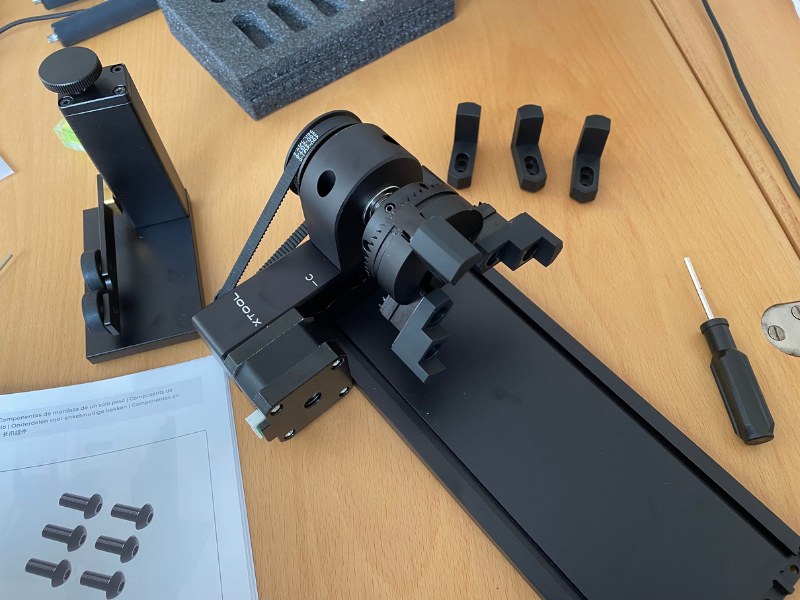
The RA2 Rotary works with my D1 Pro as well as the P2, which is great and saves time.
It’s strong, well-built, and only takes around 15 minutes to build. You can then choose which attachments to use, based on how large and long the cylindrical object is that you want to engrave.
With it, you can engrave on glasses, mugs, beakers, metal flasks, tumblers, and many more. These sell really well online, and are great money-makers for small laser businesses.
Software
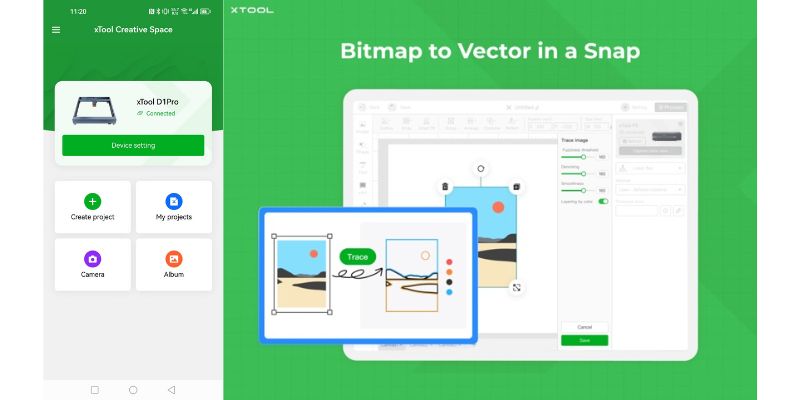
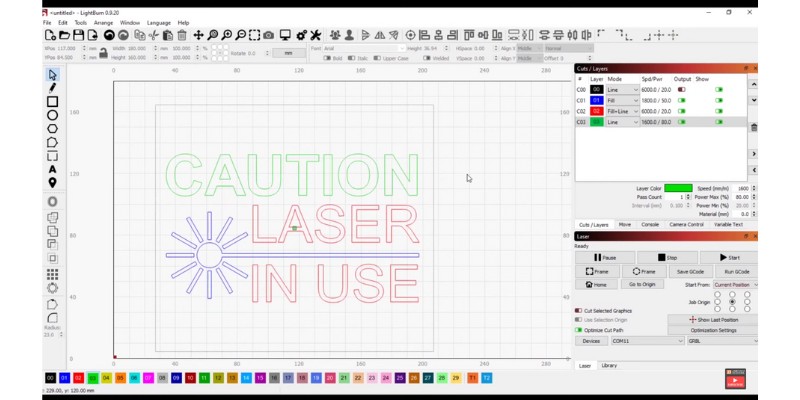
The xTool P2 works with either XCS (xTool Creative Suite) or Lightburn.
When downloading XCS, make sure you download the correct version. Not only for your operating systems (for example, I downloaded the MacOS one), but you also need to pick the xTool P2 and Laserbox version, not the D1 Pro version.
Lightburn works seamlessly for most uses, but you can only use the following features in XCS:
- Batch processing “Smart Fill” feature
- Curved surface engraving
- Controlling the automatic conveyor belt for auto-passthrough
- Text-to-image AI image tools
I actually enjoyed XCS a lot, even though I usually use Lightburn. It’s easy to use, draw shapes, and with the camera showing you where everything lies in your processing area, it’s so easy to line up your designs without tracking the design file area like on cameraless cheaper lasers.
It’s also really easy to use with the rotary RA2 accessory for curved workpieces, so I highly recommend it. XCS is surprisingly good, and reminds me of Snapmaker Luban software as a rare example of software that achieves ease of use and a simple UI.
Final Thoughts on the xTool P2
I’m very impressed with it overall, and I’ll continue to test it with the other accessories like the conveyor feeder, as well as testing it on thicker woods and acrylics.
If you’re in the market for a desktop CO2 laser for your small business, I think it’s better than the Glowforge, OMTech Polar and Gweike options, and I’m going to keep using my xTool P2 to crank out DIY projects to sell.
Simple the best CO2 desktop laser right now. You can buy this, the rotary, riser base, and the automatic conveyor feeder, and it's still cheaper than a Glowforge Pro.
It's more powerful than competing lasers at 55W, can cut 20mm thick wood in a single pass, and the batch processing and curved surface engraving open up new possibilities for your business.
- Large processing area
- Powerful 55W laser cuts 20mm thick material in a single pass
- 16MP dual cameras autofocus for easy project preparation
- Curved surface engraving in XCS
- Batch processing features
- Can't use all features in Lightburn (but XCS software is really good now)
- Mirrors/lenses may be out of focus from transport and require fixing
FAQs
Can you engrave glass with xTool P2?
Yes, you can engrave glass with the xTool P2, though you can’t cut it. xTool recommend 10% power, 300mm/s speed, and 100 lines per cm for laser engraving glass with the P2.
How thick can xTool laser cut?
The xTool P2 can laser cut up to 20mm thickness. But these include materials like woods, and acrylic, and not tougher materials like metal or glass.
Can you engrave stainless steel with xTool P2?
Yes, you can laser engrave stainless steel, but it’s recommended to use marking spray and prepare properly for this.
Can you make money with xTool?
Yes, you can make money selling laser projects with an xTool laser cutter. The P2 can batch process projects for producing a lot quickly, and cuts thick wood quickly in a single pass for producing more projects per day to increase your earnings.
Other reviews you may be interested in: