Quick Summary: the xTool F1 is a great portable laser that’s ideal for craft shows due to it’s fantastic 4000mm/s speed.
I highly recommend it for fast custom engraving on metal, slate, wood and acrylic, as well as for fast rotary engraving.
The xTool F1 is the best portable laser engraver right now, perfect for trade shows.
I was most impressed by its metal laser engraving ability, and engraved on a few dog tag necklaces as well as a larger metal flask, all of which came out really interesting. It can laser engrave aluminum, stainless steel, tool steel, copper, brass, platinum, gold, silver, iron, etc.
I look forward to using the xTool F1 to further expand my small business and the range of items I can offer!
It's portable and easy to carry to craft and trade shows, and it's the best laser for on-demand custom laser engraving overall. No laser matches its 4000mm/s speed, and the IR laser makes metal engraving a breeze. I highly recommend the xTool F1.
- Super fast
- Portable - weighs 10lbs
- Versatile - diode and IR laser
- Small working area
- High price
Key Specs
- Dimensions: 179 x 235 x 334 mm
- Working area: 115 x 115 mm
- Connectivity: USB, WIFI, smartphone app
- Operating systems: Android / iOS / iPad / Windows/ MacOS
- Laser power: 10W diode laser, 2W IR laser
- Weight: 4.6kg
- Max cutting thickness: 8mm wood, 5mm acrylic
xTool F1 Pros and Cons
Pros:
- Super fast: the 4000mm/s engraving speeds are ideal for finishing jobs quickly at craft shows, such as quick engravings on metal jewelry. It finishes these jobs in literal seconds.
- Ideal for small businesses and trade shows: there is no better suited laser engraver for trade shows in the world right now.
- Portable: the xTool F1 weighs around 10lbs, so it’s easy to carry anywhere. It also has an easy-to-carry handle.
- Versatile with the dual lasers: the 10W blue light laser is great cut cutting thin acrylic and wood sheets, whereas the 2W IR laser is ideal for fast engraving, especially on slate and metal.
- Accurate: can engrave fonts down to 0.3mm, and even more accurate for other designs.
- Great set of attachments: I have the rotary and the air purifier (I ordered the slide extension but it’s not available for a few more weeks), and they are great add-ons.
Cons:
- Small working area: 115 x 115 mm (4.5” x 4.5”) is not enough for any larger engraving. For anything larger, the xTool D1 Pro 10W is the same power, but with a far larger working area. You are restricted to around the size of a slate coaster.
- High price: The base cost is $1799, but with the purifier, slide extension, and rotary this rises to more than $2499. It’s not for fun hobbyist home engraving – it’s for a small business.
- The adjustment knob was difficult to use at first: The knob for focusing the laser would not push to start projects when I first tried, and I had to remove it and replace it on the machine to get it to work. It was fine after this very small adjustment however.
My Initial Thoughts
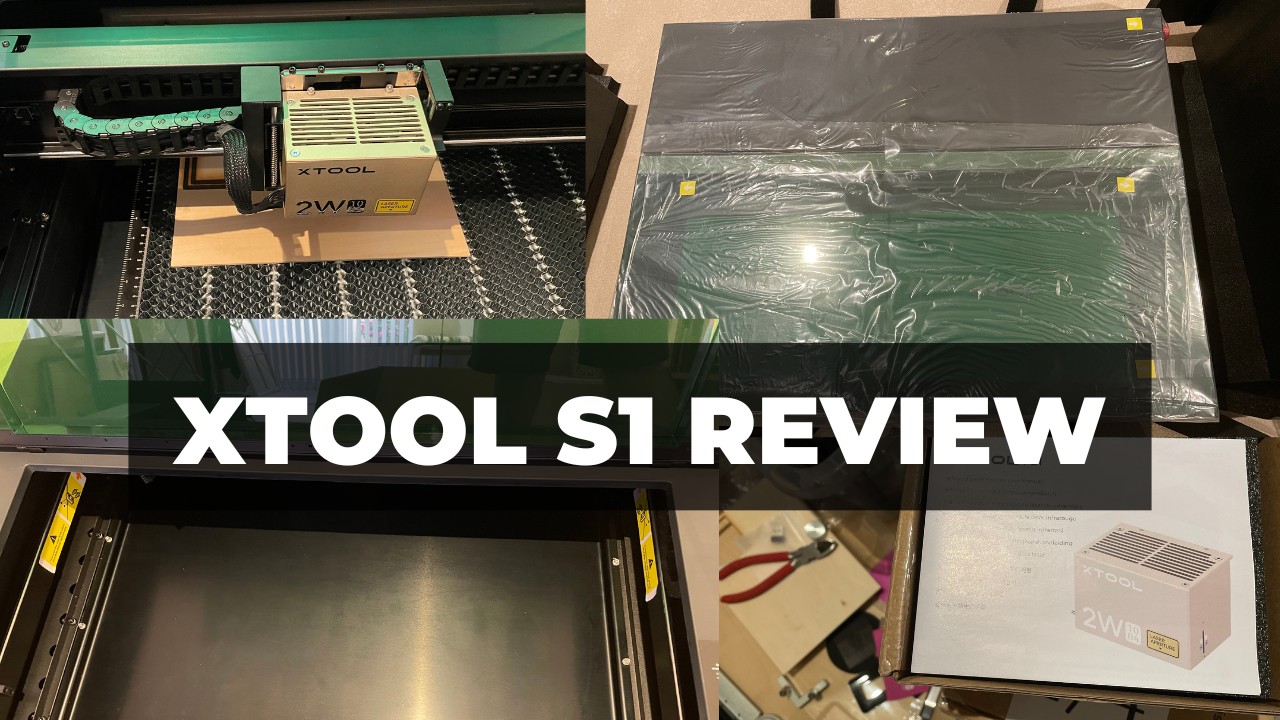
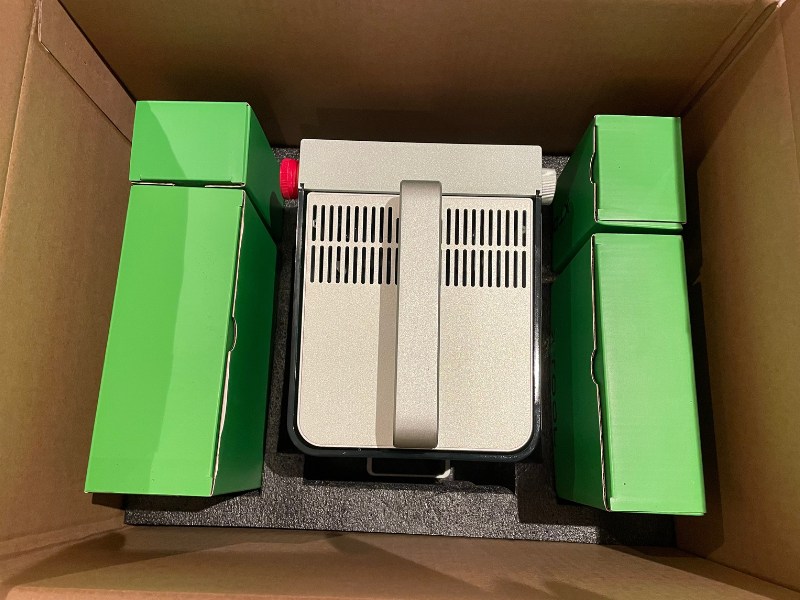
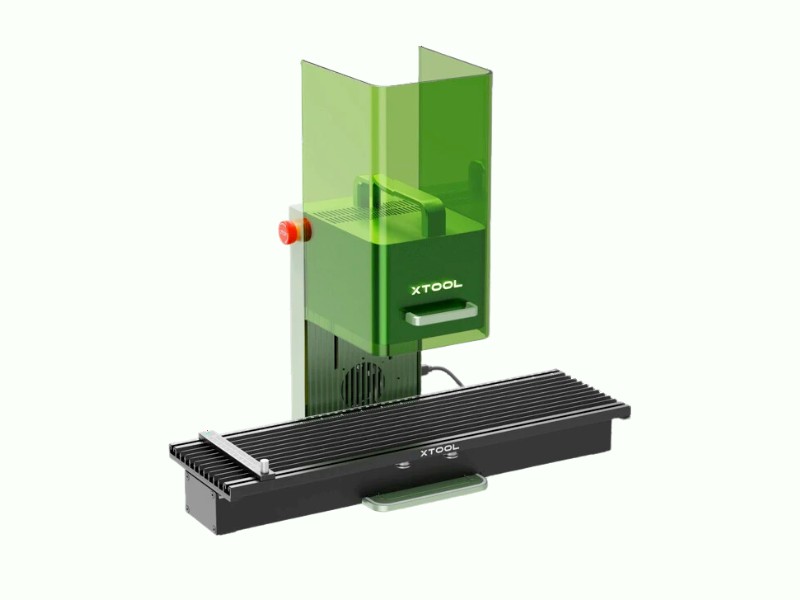
When the xTool F1 arrived I was surprised by how light the box was. There was one box for the laser itself, and one for the air purifier, and having been used to heavy CO2 lasers like my xTool P2, it felt like a feather compared to lugging the P2 into my workshop!
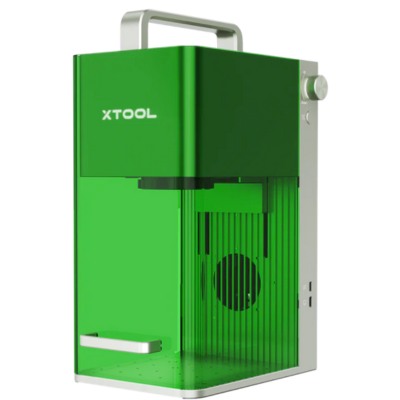
It’s light and portable – ideal for being moved around to trade shows.
It has two lasers:
- A standard 10W diode blue light laser, like on the xTool D1 Pro 10W
- A 2W IR 1064nm laser
The IR laser seems to be the same technology as the 1064nm IR laser that you can purchase for the xTool D1 Pro as an extra xTool attachment. It also comes with an L bracket; very useful for lining up materials for processing.
I got it up and running in literally 5 minutes. It was super fast – just connect a few USBs and plugs, connect the air purifier, and plug it in. I just had to update the XCS firmware and then it was ready to go!
I plugged my laptop directly in to test this, but it also has WiFi connectivity, which is ideal for craft shows as you can hot spot yourself from your smartphone. There’s also an XCS app so you can send artwork to engrave from your iPhone or Android.
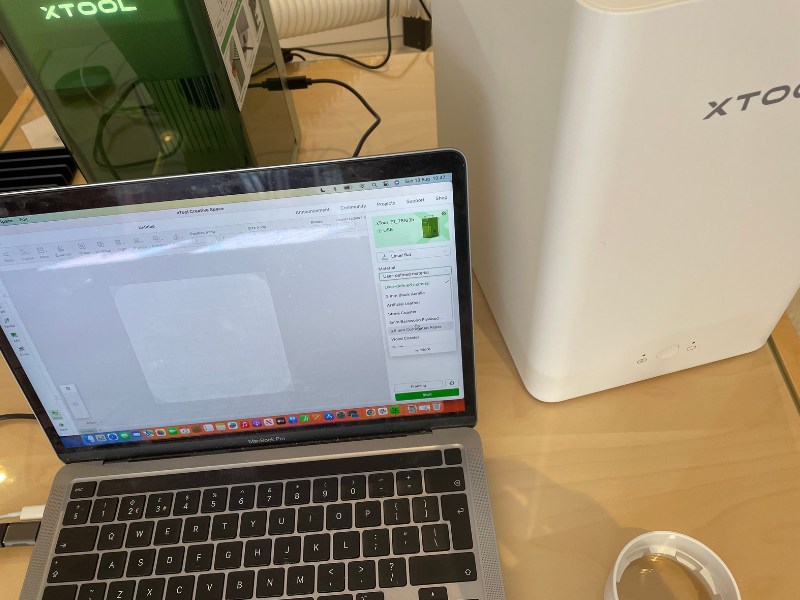
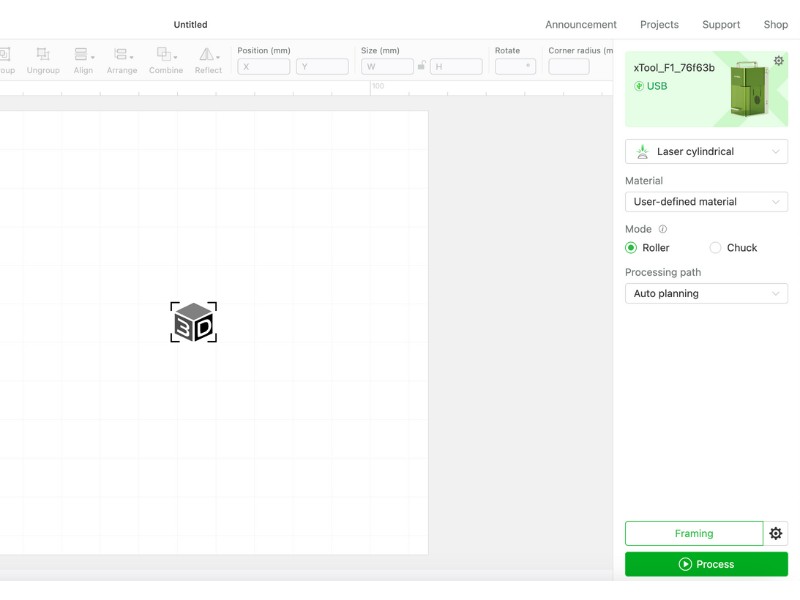
To focus it, you use the knob on the side of the laser to make the 2 dots line up. Then there’s a button below this for framing which shows the dimensions of your object, so you can see if it’s placed correctly on your material.
Though, there’s also a setting in XCS (xTool Creative Space, their laser software) that autofocuses once you put the thickness of your material in.
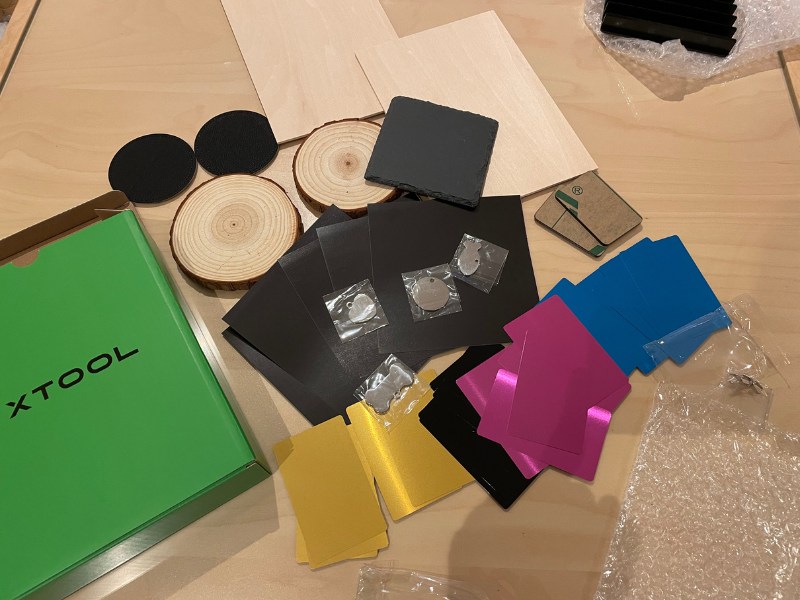
It can laser cut up to 5mm acrylic, and up to 8mm wood, in a single pass. It comes with 3mm basswood and acrylic, as well as a variety of other materials:
However, my particular model had difficulties pressing the Start button at first. I had to use pliers to remove the outer knob and replace it in order to get it to push down and actually fire the machine to start the project.
Though, this seems like a one-off issue, and it took just a couple minutes to fix.
Testing the xTool F1
Here are some of the main tests I did for my xTool F1 review:
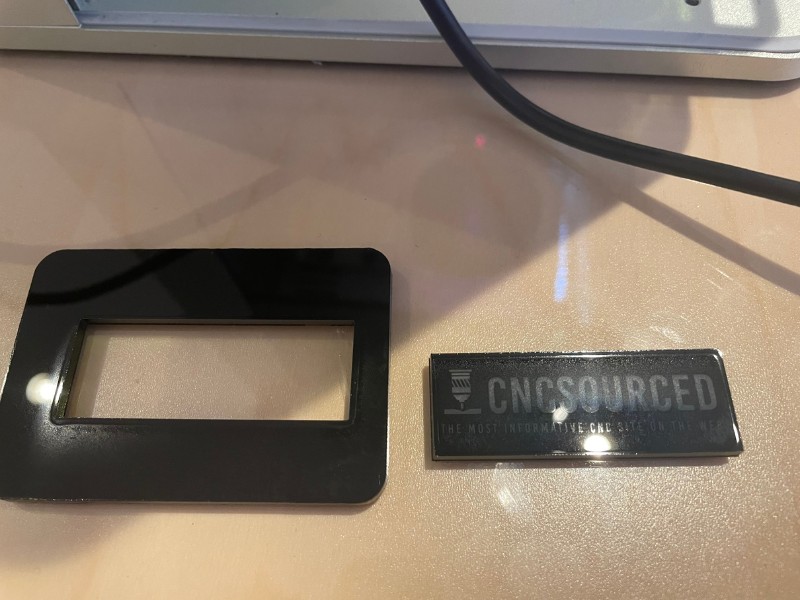
Metal business cards
The first tests I did were on metal business cards. I first used the CNCSourced logo, and instead of just scoring the logo onto the card, I wanted to engrave the entire background in reverse.
The result literally looked like it had been printed on. It is incredibly accurate, even with the small text underneath the logo, and I am extremely impressed with the accuracy.
You can see the precision here:
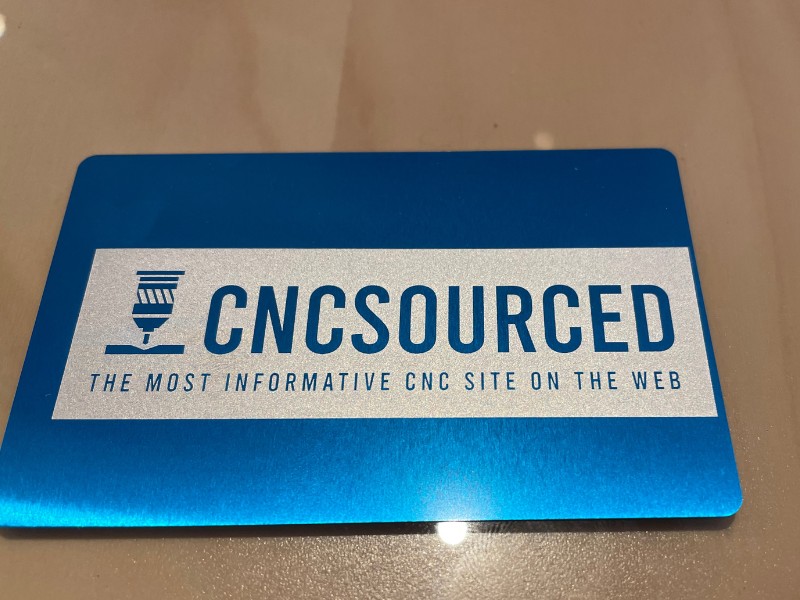
I used 750dpi, 100% power, and 150 dot duration for the laser settings. It took much longer than normal because it was scoring the entire background, at around 10 minutes.
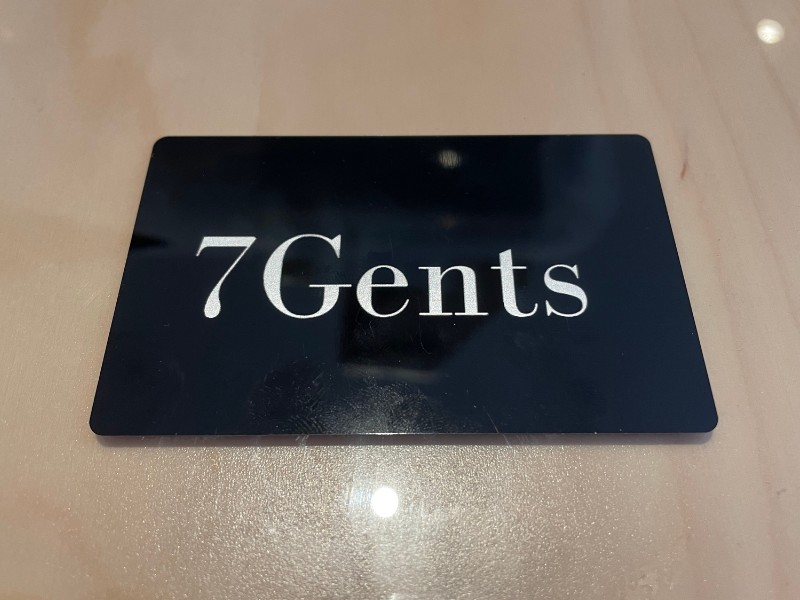
I also have a friend called Joe, who runs a website called 7gents.com about men’s fashion, accessories, and luxury cologne fragrances. I wanted to make him a similar card he could use for images for his site when he’s testing the latest products.
I used the same settings, and this just took one minute to do – and would have been much faster if I hadn’t used such specific laser settings.
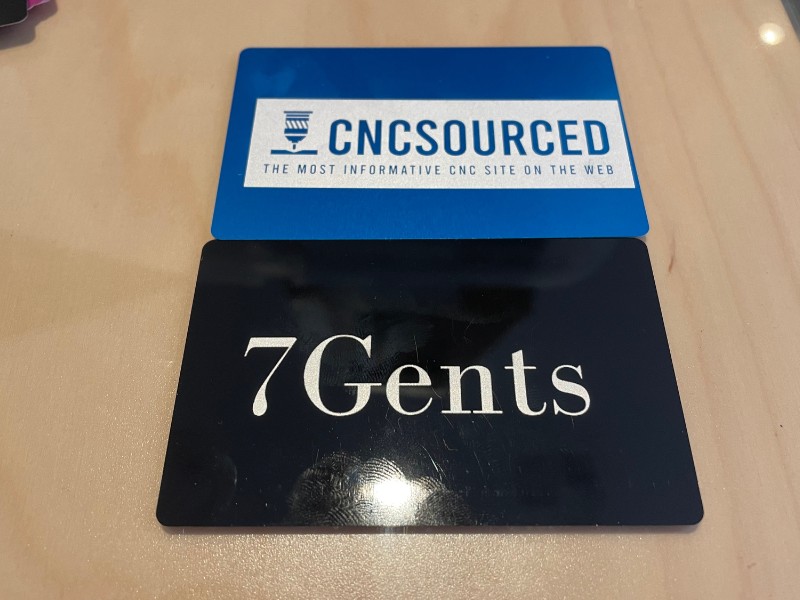
I then tried out the 3DSourced logo to create a card for our 3D printing site (if you haven’t read our articles over there, then you should!).
I used the same settings and it took a couple of minutes, and again the results were great – it really looks like it’s been printed on to the metal business card.
Overall, the xTool F1 infrared 2W laser is ideal for metal business cards and similar metal designs.
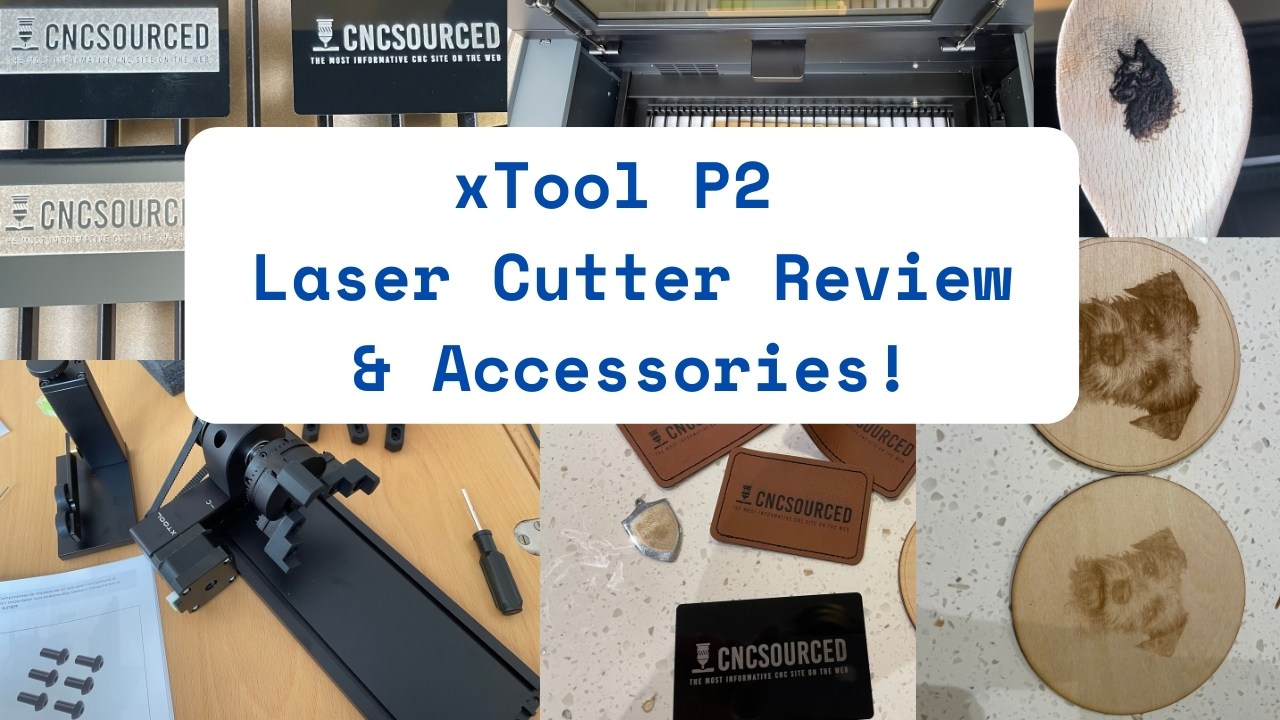
Metal dog tag jewelry laser engraving
I engraved on a bone-shaped dog tag, and it came out well on the 1.8mm coated metal. I messed up by laser engraving it upside down, but the results were still really impressive. The actual dog tag is tiny, just a few centimeters wide, so do have just crisp lettering is really impressive.
I can already think of all the money-making projects I can create on metal jewelry using the xTool F1!
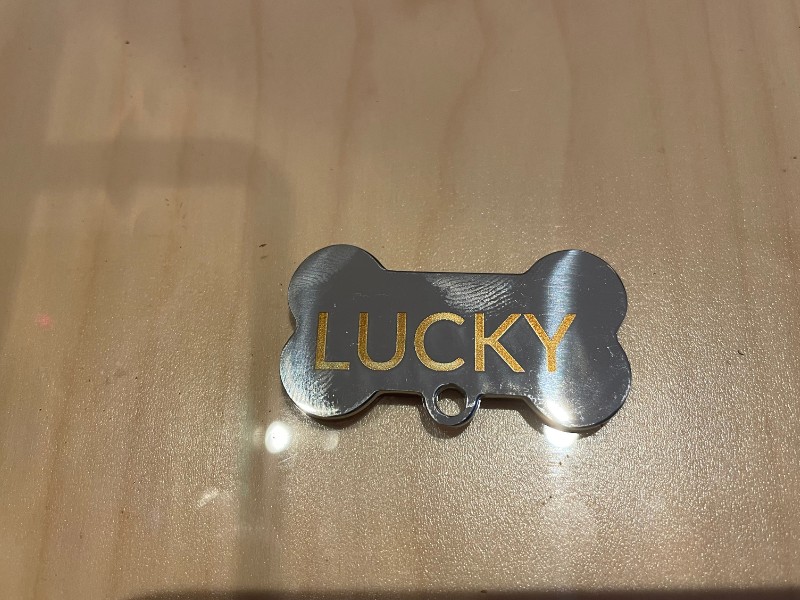
I was most looking forward to the metal laser engraving, as the xTool F1 has the IR laser especially for this.
It quickly laser engraved the design, and the second try on another metal necklace also came out well – this time on the 3DSourced logo to commemorate recent achievements from the team.
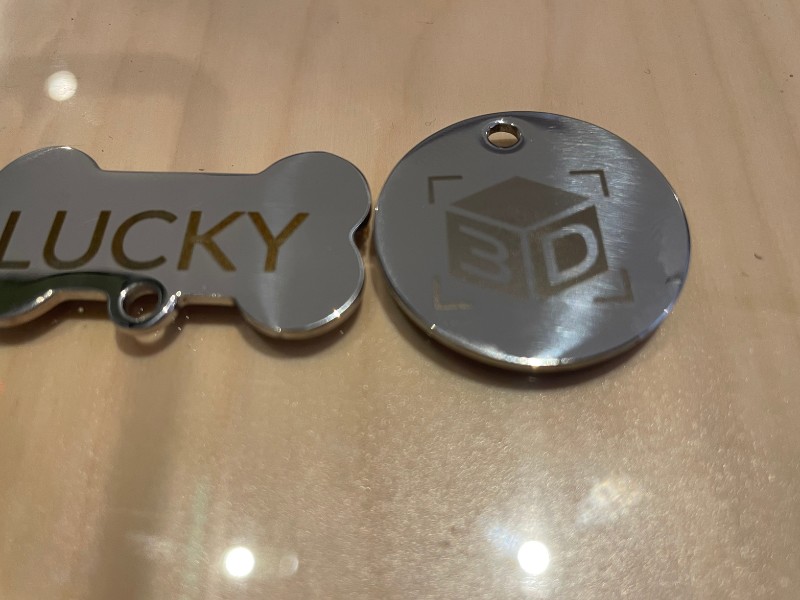
I highly recommend the xTool F1 for metal engraving – the results were clean and crisp and looked great on the jewelry pieces.
Slate coaster
I tried creating a quick custom design in XCS, and actually the design tools in the laser software are very good. I could obviously do a better job in a specialist design tool, but still managed to draw up the lettering and import the coffee design to make this coaster.
I wanted to test the difference between the IR and blue light laser on slate, too. The IR laser was used on the coffee design, whereas the 10W blue light laser was used for the text.
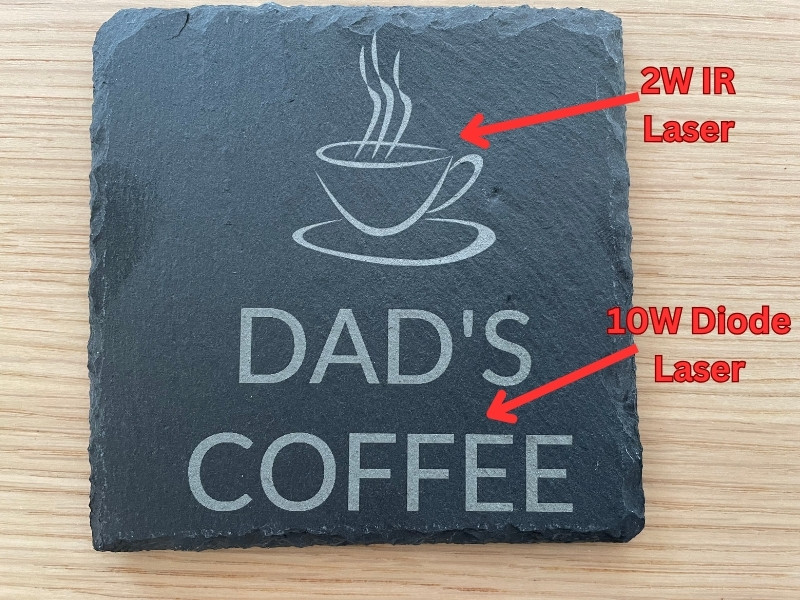
It’s difficult to see in the photo, but the 2W IR laser etched deeper, and created a more contrasting white color on the slate, that looks better than the 10W diode engraving. The text from the diode laser is greyer, less solid, and doesn’t look quite as good.
So, use the IR laser for slate laser engraving with the xTool F1.
Also, these slate engravings on the infrared laser came out better than on my xTool P2 55W CO2 laser. This is super interesting, and I’ll be using the F1 solely for slate projects now.
Wood coasters
I then tried the wood coasters that came with the xTool F1.
First, I tried a cat design I created using Midjourney, in the same way you might get a request at a craft show to engrave someone’s beloved cat onto a similar piece of wood.
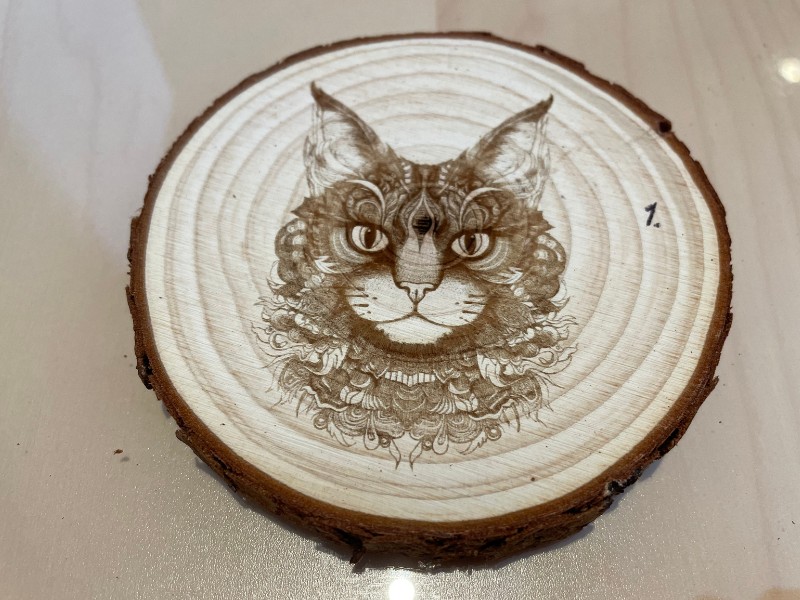
I was very impressed with the speed. The xTool F1’s blue light 10W laser engraved the entire design in 2 minutes 40 seconds, and it still had good dark tones in the image.
I used 100% power, 335dpi, and 450 dot duration.
But, I wanted to experiment with the settings, so I tried again with 100% power, 350 dpi, and 500 dot duration.
Here’s the second one:
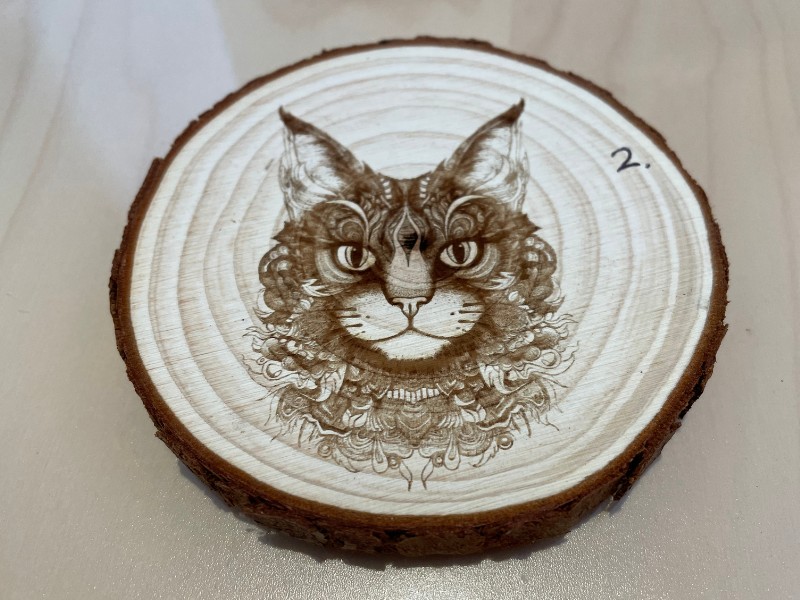
This came out better – with darker tones throughout the design and a more contrasting look.
I had a project ongoing for a local business, a physio clinic, to add their logo on a few promotional materials. I have my own other more professional laser cutters for this, but tried the xTool F1 on the other remaining wood coaster to try it out.
It’s very quick, and would work great for under-pressure craft show work where you need to produce designs on the spot.
3mm basswood
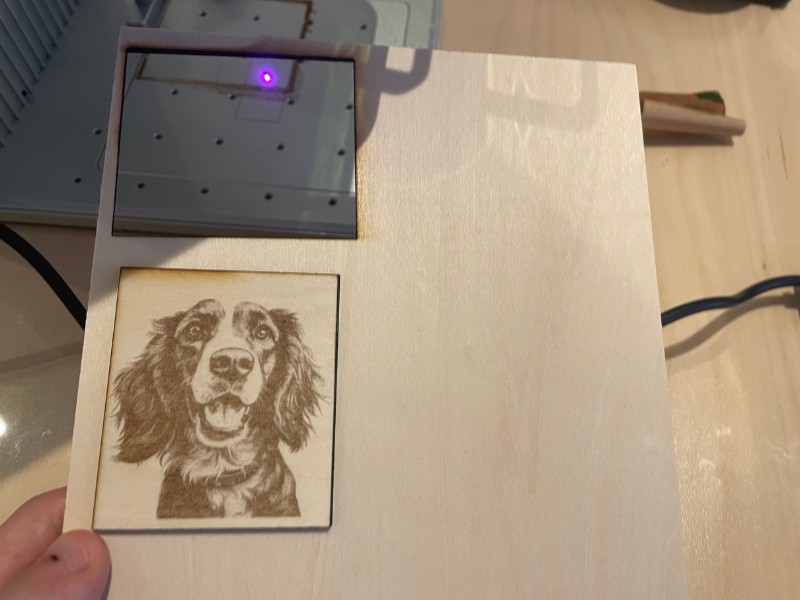
The xTool F1 successfully cut through the 3mm basswood plywood in a single pass, at 90% power, while engraving a dog design on the wood. It did more than just cut through, leaving marks on the metal laser base.
I still need to try it on 8mm wood that xTool claim it can cut, but the ease with which it cut this wood makes me feel it could definitely cut this. I’ve also cut 8mm-thick wood with the xTool D1 Pro’s 10W laser, and this looks to be the same technology.
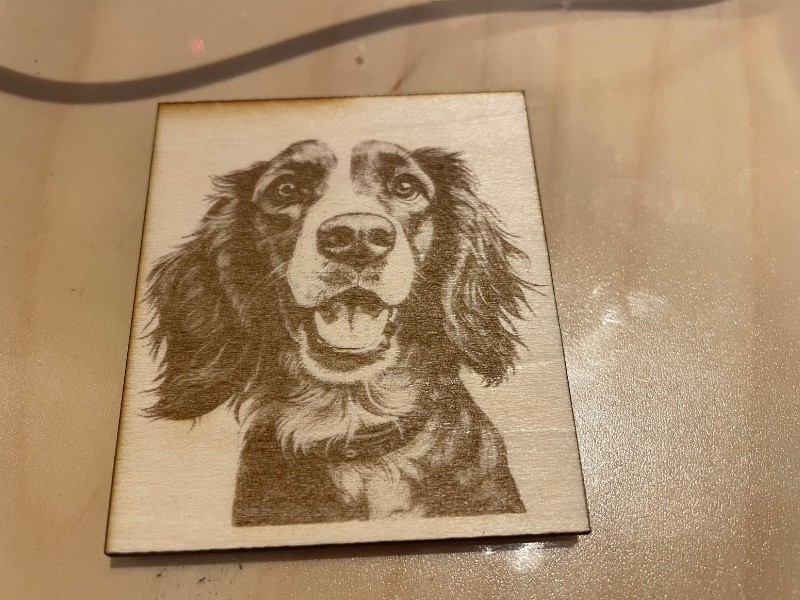
This would work well at craft shows for custom wood designs, and engraving of any images for couples or other commemorative occasions.
3mm black acrylic
I added the CNCSourced logo, and a rectangle I drew around it to test cutting and engraving on black acrylic.
The logo was engraved using the IR laser, whereas the cut was done using the 10W diode laser at 100% power and 2mm/s speed.
It managed to cut through 3mm black acrylic in a single pass (and more, as it engraved onto the metal base underneath!), with a clean cut on the acrylic.
Leather
I messed up a bit here – my settings were too high, and I burned through the leather here!
I tried to laser engrave a Tommy Shelby leather coaster for a friend who is a big Peaky Blinders fan, but while the silver parts came out nice with the light engraving, the other darker parts burned too far through the leather.
I’ll turn down the power and turn up speed settings for future projects like this on leather.
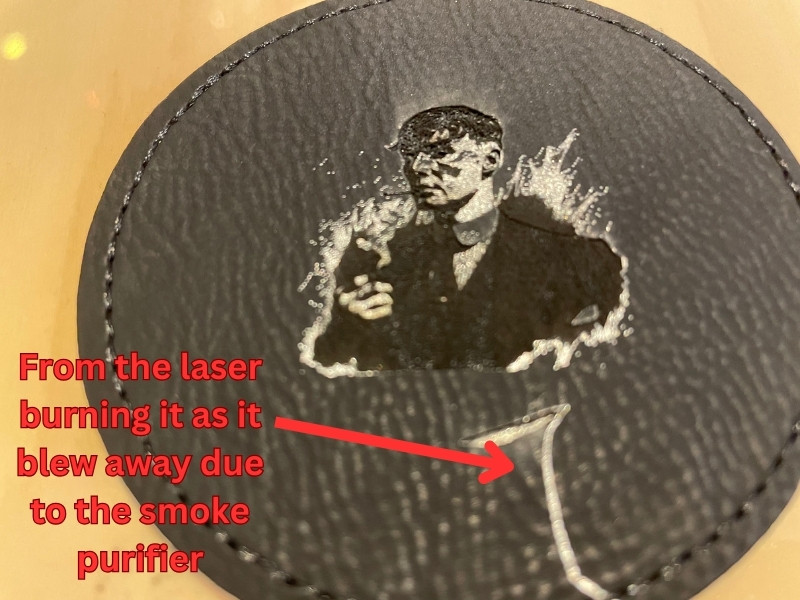
Also, the air purifier attachment caused the leather to fly off its position and ruined my first attempt here, so make sure you clamp down your lightweight materials when using the air purifier.
Overall from my testing, I was most impressed by the metal engraving parts, and also by how fast it engraved. It would finish projects in under a minute usually. It’s up to 10x faster than my xTool D1 Pro, which is still the fastest diode laser around!
Is it worth it?
Yes. Overall, the xTool F1 is definitely worth the money.
It’s ideal for craft and trade shows where you can make a lot of the purchase price back in a single day with very high profit items like metal jewelry, tumblers, and customized wood and acrylic items.
I managed to create some amazing metal, acrylic, wood, leather and slate designs – and I highly recommend it to anyone looking to create custom designs on-demand.
It’s the fastest portable laser engraver out for on-demand cutting, so it’s the best option for quick turnarounds at these craft shows.
It's portable and easy to carry to craft and trade shows, and it's the best laser for on-demand custom laser engraving overall. No laser matches its 4000mm/s speed, and the IR laser makes metal engraving a breeze. I highly recommend the xTool F1.
- Super fast
- Portable - weighs 10lbs
- Versatile - diode and IR laser
- Small working area
- High price
xTool F1 Accessories Review
Desktop Air Purifier
- Price: $499 — Available at xTool here
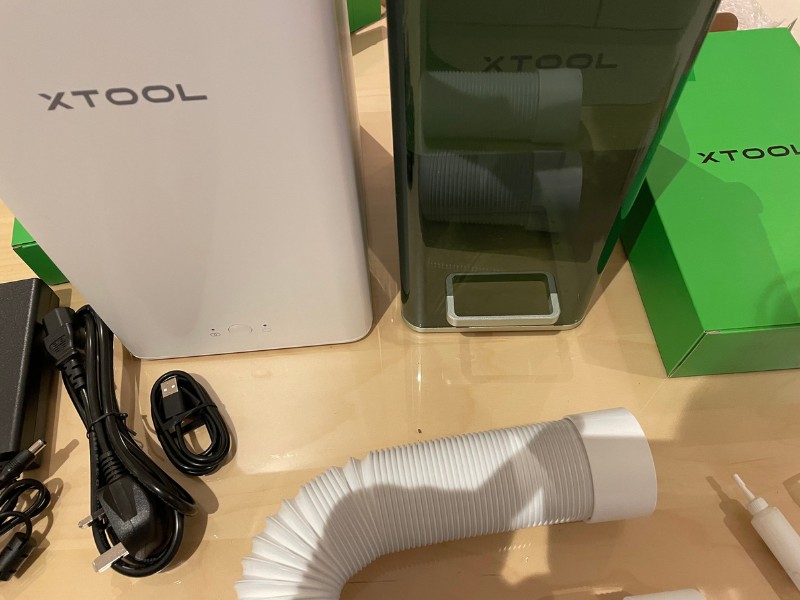
I absolutely recommend buying and using the air purifier when using the xTool F1.
The air purifier prevents any smoke escaping, making the laser safer to use inside your home or workshop, and it’s generally just essential to keep any harmful gases away from you.
It’s really easy to set up. I just attached the ventilation tubes between the F1 and the air purifier, and turned the accessory on to work when laser cutting. You can also control the settings more precisely in XCS software.
RA2 Pro Rotary
- Price: $279 — Available at xTool store here

I own two RA2 pro rotary attachments, and they’re great. Having two saves me time moving them between my xTool P2, xTool F1, and my xTool D1 Pro 20W, and every RA2 rotary attachment works seamlessly with all xTool lasers which is super useful.
If you want to make profitable laser projects, you have to buy the rotary. Tumblers, mugs and flasks are some of the best-selling products around, and all makers have these so there’s less competition on Etsy and at craft shows.
It comes like this:
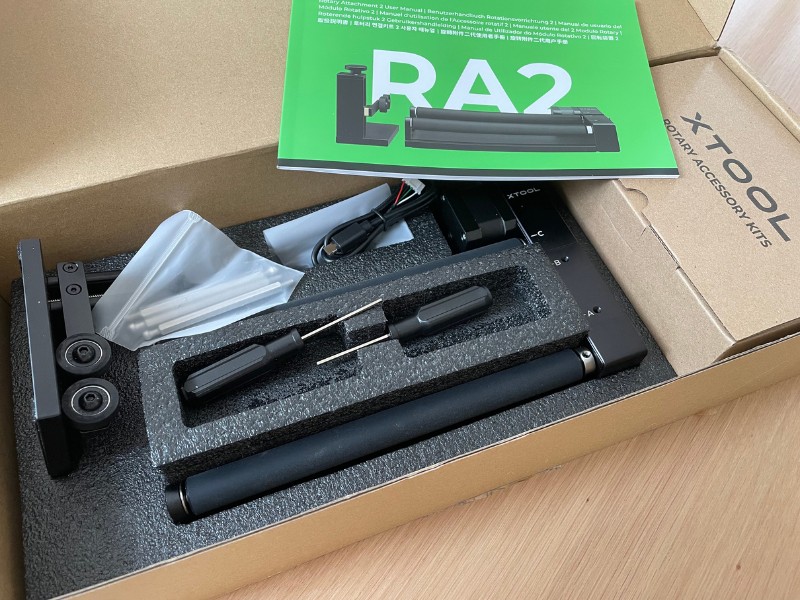
You can then move the rollers as far apart as you need for your specific project, and then attach the chuck based on how large your cylindrical object is.
I use my rotary to engrave glasses, metal flasks, and beakers. Frankly, if you’re going to spend $2000 on a laser engraver like the xTool F1, you may as well spend the extra couple of hundred dollars on the rotary!
Slide Extension
- Price: check, around $279
The slide extension accessory is basically like the automatic conveyor feeder attachment for the xTool P2, but a mini version for the F1.
It extends your working area from 115 x 115 mm, to 400 x 115 mm – which is basically the same in length as the xTool D1 Pro.
It’s for batch producing multiple projects at a time, for example laser engraving multiple coasters in one job. You just need to position them correctly before starting.
This is the only attachment I have not managed to test myself yet, as deliveries are currently delayed for a few more weeks. But I’ll update my xTool F1 review here once I get my hands on this last accessory! I’m super excited though, as all the videos on YouTube look amazing!
Software
The xTool F1 works with xTool’s XCS software, as well as Lightburn.
I typically use Lightburn for my laser projects, but XCS has won me over since I started using the batch processing and curved engraving features for my xTool P2.
So, I actually recommend using XCS now. You get super simple rotary features, and it also has built-in AI image generation using their own fine-tuned version of what I assume is either Midjourney or another image generation AI model.
For more information on the AI image generation, I made a video on this here:
If you don’t want to use XCS, Lightburn works perfectly with the xTool F1, so you won’t have any issues.
xTool F1 Alternatives
LaserPecker 4
A similar portable laser is the LaserPecker 4.
I’ve studied both, and overall I recommend the xTool F1 over the LaserPecker lasers.
This is because firstly the F1 ships ready to go, whereas you have to spend time assembling the LaserPecker 4. You also get autofocus features in XCS with the xTool F1, whicih aren’t available with the LaserPecker.
The main part for me though is that the xTool F1 is completely enclosed by the green shield, which locks the laser in and protects your eyes from the light, and your body from the fumes. The LP4’s shroud doesn’t hold all the smoke in.
In other areas they’re fairly even, but the xTool F1 build quality just feels superior for me, and I prefer it.
xTool D1 Pro
The xTool D1 Pro has a 10W diode laser, exactly like the F1 has. So, if you don’t need larger working areas, then go for the xTool F1, as it also has the IR laser for slate and metal engraving.
However, if you want to save money, and want a larger working area, and don’t need the IR laser for the jewelry engraving features, then go for the xTool D1 Pro. I personally bought the 20W version anyway, as it’s far more powerful than the 10W and can cut thicker wood sheets in a single pass.
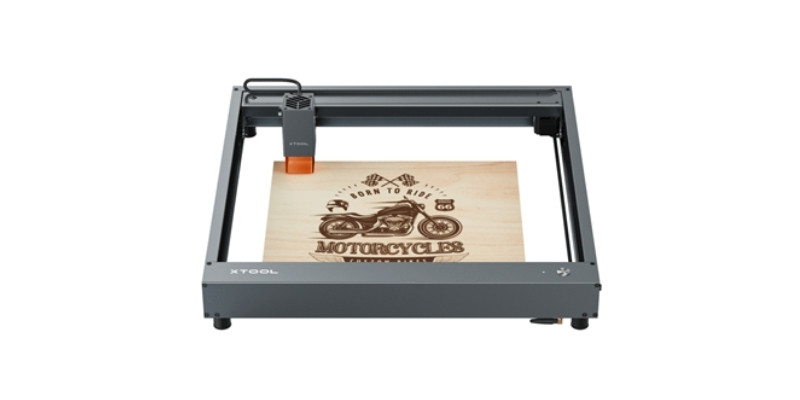
And if you need even more power, go for the 20W version (we did!)
If you’re looking to compare the xTool D1 Pro vs xTool F1, I’ve put together this table:
| xTool D1 Pro | xTool F1 | |
|---|---|---|
| Laser type | Diode laser | Diode laser + infrared laser |
| Laser power | 5W, 10W, 20W diode options | 10W diode, 2W infrared |
| Maximum cutting thickness in one pass (basswood) | 10 mm | 8 mm (diode laser) |
| Up to working speed | 400 mm/s | 4000 mm/s |
| Working area | 430 x 390 mm(Expandable to 920 x 430 mm with xTool extension kit) | 115 x 115 mm(Expandable to 400 x 115 mm with accessories) |
| Focus mode | Manual | Manual/Auto |
| Enclosed? | No, but compatible with xTool enclosure | Yes |
| Applications | XCS, Lightburn | XCS, Lightburn |
| Connections | USB, WIFI, TF Card, app | USB, WIFI, app |
Enclosure:
The D1 Pro has a transparent safety shield over the laser module, however there is a slight gap between the shield and the material. Because of this gap, you must always wear safety glasses to protect yourself from the 455 nm (blue) wavelength light.
xTool F1 has a fully enclosed design, it is relatively safe to observe the engraving process without laser goggles. The fully enclosed cover is good at blocking the powerful laser lights. This is why the xTool F1 package does not come with a pair of safety goggles.
Positioning:
The D1 Pro has a red LED in a corner which projects a red crosshair on the workpiece below. You can use it to align the start of the engraving on your piece very precisely – you just need to correctly set the offset values.
The F1 has threaded holes for the L bracket positioning piece that you can use for aligning materials.