Key Takeaways
- CNC shield benefits: A CNC shield reduces wiring, saves space, and is compatible with GRBL firmware. It is suitable for lasers, 3D printers, and small CNC routers.
- DIY wiring benefits: DIY wiring allows more control, flexibility, and power. It is suitable for larger CNC routers, CNC mills, and stepper motors that require more than 1.5 A/phase.
- Required hardware: an Arduino board, stepper motor driver, power supply, and wires. We’ve also added the code needed at the end of this article that you can use.
Whether you choose to utilize a CNC shield or go without one, understanding the differences in connecting your stepper motor is crucial. In this comprehensive guide, we will delve into the intricacies of both scenarios when connecting through Arduino to GRBL.
An Arduino board is excellent for controlling your stepper motors. You can also turn an Arduino board into a CNC controller with free firmware such as GRBL or TinyG. Then you can connect to, and control several stepper motors with G code.
I’ll walk you through my experience connecting stepper motors to Arduino using both CNC shield and DIY wiring – so you can decide which is right for you.
I’ve also shared my own code in this article so that you can download and test drive your stepper motors. With this code, you can practice how to set up the hardware, and adjust the stepper motor current.
CNC Shield vs DIY Wiring Stepper Drivers to Arduino and Stepper Motors
Connecting stepper motors to a CNC shield is easier than DIY wiring, but it has some limitations.
In short, a CNC shield eliminates the need for a lot of wiring. It looks neat and takes up a small space. But it is only suitable for lasers, 3D printers, and small 3-axis CNC routers.
You should choose DIY wiring if you want to learn how to control stepper motors with an Arduino.
If you are building a controller for a 3D printer, laser, or a small CNC, then a CNC shield is the easier option since it doesn’t require much wiring.
If you want to build a CNC controller for a larger CNC whose stepper motors require more than 1.5 A/phase of current, or a CNC that has more than three stepper motors, then DIY wiring is the right choice.
All CNC mills need direct wiring.
For instance, if you are using NEMA 23 or NEMA 34 stepper motors that usually take more than 1.5 A/phase, learning the DIY wiring benefits you.
The Hardware You Need for Connecting Arduino to Stepper Motors
You need the following items.
1. Arduino Uno/Due
The Arduino Uno is a cheap electronic board with a microcontroller. When coded, it can control stepper motors. It can also become your CNC controller if you flash it with GRBL.
You can check the latest Arduino prices on Amazon here.
You should buy the more expensive Arduino Due if you are building a G2Core CNC controller. We explain how to turn your Arduino into a controller in another article.
2. Stepper Motors
If you want stepper motors for a small CNC router or for experiments, StepperOnline’s 17HS19 is a good option – and it’s very affordable. You can use them in 3D printers and lasers too.

Affordable stepper motors for a small CNC router, 3D printers and lasers.
If you need stronger stepper motors for a midsize CNC router, you can buy 3 strong and affordable stepper motors in a set. These are StepperOnline’s 23HS22 with 126 Ncm of holding torque – the best stepper motors for CNCs in my opinion.
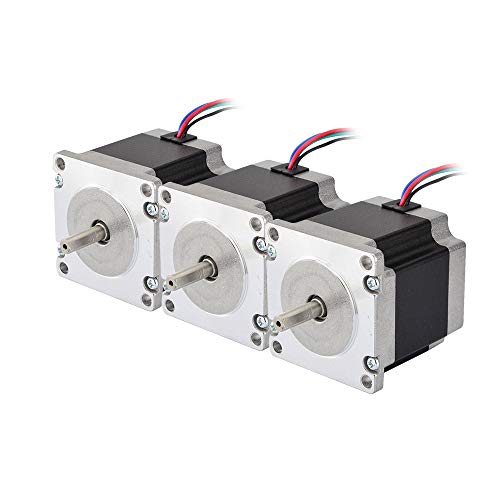
Stronger stepper motors for a midsize CNC router.
3. Stepper Drivers
You can’t connect the stepper motors directly to the Arduino. So, you need a stepper motor driver for each one of your stepper motors.
If you have a CNC shield, it may already have stepper drivers. If not, you need stepstick stepper drivers for your CNC shield – one driver for each stepper motor. You can insert them directly into the CNC shield. You can buy 5 DRV8825 drivers on Amazon for a reasonable price.

If you are not using a CNC shield, you need to buy appropriate stepper drivers that have their own electronic boards. You need one stepper driver for each one of your stepper motors.
If your stepper motors require 3 A/phase of current or less, then a TB6600 stepper motor driver is the cheapest option.
They are strong and surprisingly cheap stepper motor drivers.

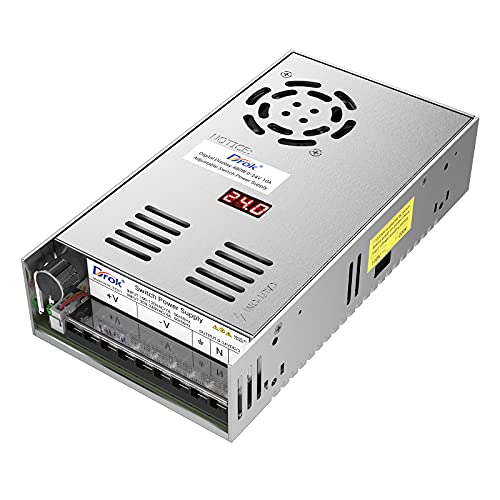
Power Supply
In short, you need a power supply between 24v to 40v. Also, for 3 TB6600 drivers, your power supply must have at least 480W of power.
You can power the TB6600 driver with 9v to 42v (this range can be a little different depending on the manufacturer). But I recommend that you power your TB6600 stepper drivers with 24v to 40v.
CNC shields also demand similar voltage ranges but always check your CNC shield’s voltage rating before buying a power supply. Similarly, avoid lower voltages in its range.
You might be thinking that your stepper motor requires a much lower voltage. Without going into too much detail, the bottom line is you are better off with much higher voltages for your stepper drivers.
You get much less performance and power from your stepper motors at lower voltages. Plus, your power supply has less power at lower voltages too.
If you are looking for a nice power supply on Amazon that can give up to 24v and is powerful (480W), we personally recommend this one.
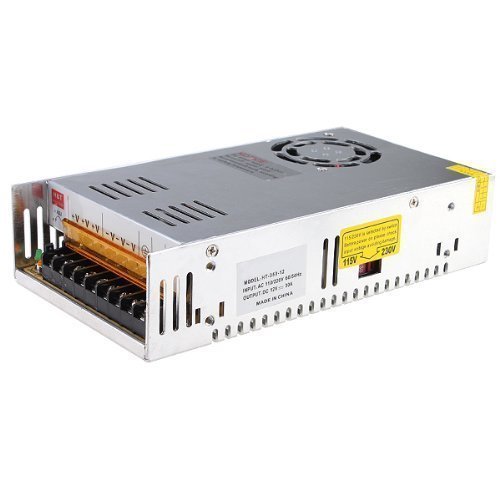
You can put two of these power supplies in series to get higher voltages and powers (watts).
Or you can pair it with this 12v, 360W power supply on Amazon. You can check how powerful and affordable it is.
Optional: CNC Shield
You don’t need a CNC shield if you are using a TB6600 or similar drivers for DIY wiring.
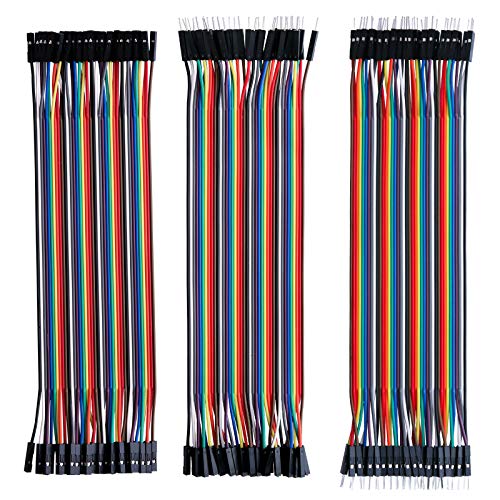
Wires
Generally, you don’t need wires for Arduino if you have a CNC shield. So, you only need ordinary wires for other purposes like connecting the power supply to the stepper motor driver.
If you don’t use a CNC shield, wires with male pin headers are best for the Arduino.
Next, we explain how to connect your stepper motors to Arduino with the two methods.
Method 1: Arduino With GRBL and a CNC Shield
So you have a CNC shield. You also need a CNC controller.
I will explain how to turn your Arduino into a controller in another article. Meanwhile, you can use my code to test your setup.
The most popular option is to buy an Arduino Uno and program it with GRBL. Then it can control your stepper motors for CNCs, 3D printers, and lasers.
Check whether your CNC shield has its own stepper drivers or if you need to insert drivers into it.
Next, connect the power supply to the CNC shield with the following table.
| The port in Power Supply | The Port in CNC Shield |
|---|---|
| V+ | Or Vcc |
| V- | Or GND |
Make sure that the voltage rating of the CNC shield is compatible with your power supply. Always double-check the wires of your power supply.
Then, the CNC shield directly connects on top of the Arduino board without wiring. The CNC shield has three sets of A+, A-, B+, and B- ports for each stepper motor.
So, all there is left to do is to connect the A+, A-, B+, and B- leads of your (3) stepper motors to the CNC shield.
Voila. You can connect your GRBL controller to a computer and send G codes to move the stepper motors.
Method 2: DIY Wiring
Without a CNC shield, you need to manually connect your devices. Connecting stepper motors and the power supply is similar to when you have a CNC shield.
The main difference is that for each stepper motor driver, you need 4 wires that connect to the Arduino directly. (Remember that we don’t use stepstick drivers in this method, we use stepper motor drivers with full electronic boards such as TB6600).
So, connect the stepper motor A+, A-, B+, and B- to the appropriate ports in the stepper motor driver.
Use the table below to wire your power supply to each of the stepper motor drivers.
Do not turn on your power supply until you have finished all of your wirings. Double-check all of your power supply’s wires.
| The port in Power Supply | The Port in Stepper Motor Drivers (TB6600) |
|---|---|
| V+ | Vcc |
| V- | GND |
Then, connect your Arduino board to the stepper motor driver. You need to find these pins on the Arduino board: direction, pulse, and enable.
These pins depend on the code or firmware inside the Arduino. For example, if you want to test your setup with the code I will provide, I will tell you the pin numbers for these (direction, pulse, and enable).
If your Arduino has GRBL, then the image below shows these pins for each axis.
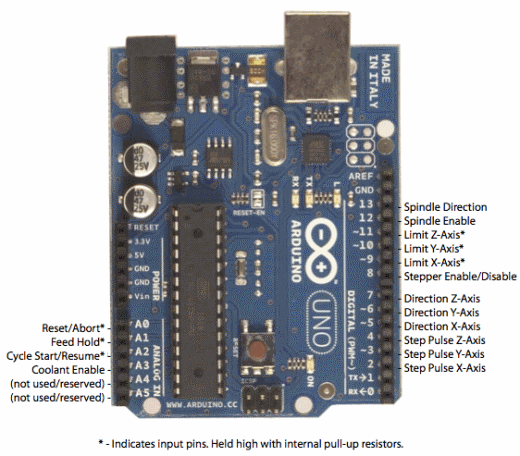
As you can see, GRBL uses the same Stepper Enable/Disable pin for all of the axes.
If you have bought an Arduino Due to make a G2Core controller from our other article’s instructions, find the pins in the image below.

Aside from the pins you just identified, find the 5v pin on the Arduino Uno (or the 3.3v pin on the Arduino Due).
Now connect these pins to the stepper drivers using this table.
| Port of Arduino (or GRBL) | Stepper Motor Driver (tb6600) |
|---|---|
| 5v of Arduino Uno or 3.3v of Arduino Due | EN+, Dir+, and PUL+ of each driver. In some drivers, there is only one 5v or reference pin. |
| Axis Direction | DIR- of the driver for that axis |
| Axis Step Pulse | PUL- of that axis’s driver |
| Stepper Enable/Disable | En- of the drivers |
Finally, you can power up your Arduino with an Adapter cable or just power it up from your computer’s USB.
Code to Test Drive Your Stepper Motors
If you have done everything correctly, you should be able to move your stepper motors now. If you have flashed your Arduino with a controller like GRBL, you can move your stepper motors by sending G codes from your computer.
If you have not turned your Arduino into a CNC controller yet, or you want to test your setup without G codes or experiment with stepper motors and stepper driver currents, you can use the code I wrote when I wanted to test my stepper motors.
If you are using a CNC shield that is compatible with GRBL, this code controls a stepper motor on the X-axis of your shield.
This code accelerates your stepper motor to 300 RPM (for a standard 1.8° stepper motor). Then, the stepper motor runs at that speed for a short time, then it decelerates and stops. The stepper motor rests for 3 seconds and then moves in the opposite direction. This code repeats this process indefinitely.
You need to install Arduino IDE for free from here. Arduino IDE can flash the code into Arduino Uno but not Arduino Due.
You can access the code directly from our CNCSourced GitHub, or you can copy the paste the code below:
int en = 8;
int dir =5;
int stp = 2;
int ref = 13;

void setup() {
  // put your setup code here, to run once:
pinMode (en,OUTPUT);
pinMode (dir,OUTPUT);
pinMode (stp,OUTPUT);
pinMode (ref,OUTPUT);
digitalWrite (en, HIGH);
digitalWrite (dir,HIGH);
digitalWrite (ref,HIGH);
}

void loop() {
  // put your main code here, to run repeatedly:
digitalWrite(dir, !digitalRead(dir));
int i = 3000;
int j=1;
for (i; i>1000; i--)
{
digitalWrite(stp , HIGH);
delayMicroseconds (1);
digitalWrite(stp , LOW);
delayMicroseconds (i);
}
for(j; j<1000; j++)
{
  digitalWrite(stp , HIGH);
delayMicroseconds (1);
digitalWrite(stp , LOW);
delayMicroseconds (i);
  }
for (i; i<6000; i++)
{
digitalWrite(stp , HIGH);
delayMicroseconds (1);
digitalWrite(stp , LOW);
delayMicroseconds (i);
}
delay(3000);
j=1;
}
Plug your Arduino Uno into your computer’s USB. Then open the code with Arduino IDE.
Click on Tools >> Boards >> Arduino Uno

Now, click on Tools >> Port >> then click on whatever COM port your Arduino is on. (Mine was on COM 3 in the image below).

After you have connected to the Arduino, click on the green arrow that says “upload.” After a few seconds, you should see a message that says “Done uploading.”
The code is in your Arduino. You can unplug it and connect the hardware.
The pinout for this code is in the table below. So, connect these pins to your stepper motor driver. Remember to connect Arduino’s 5v pin to stepper motor driver’s En+, Pul+, and Dir+.
| Pin function | Pin number |
|---|---|
| enable | 8 |
| direction | 5 |
| pulse | 2 |
When you have finished connecting your stepper motor driver to these pins, your power supply, and your stepper motor, then connect the Arduino to your computer’s USB to power it up.
Hold the Arduino’s reset button so it doesn’t run the code. Turn on your power supply. Now, if you release the reset button, your stepper motor moves.
When you have finished testing, wait for your stepper motor to stop. It rests for 3 seconds. Hold the reset button before it starts turning again, and turn off your power supply.
Summary
To sum up, Arduino is a great microcontroller board for controlling stepper motors. You can also build a CNC controller from Arduino Uno or Arduino Due. We have explained the hardware setup in this article.
You can’t connect stepper motors directly to Arduino, so you need stepper motor drivers. You can use a CNC shield or you can do your own wiring. We have explained both methods. Also, we have given you a code to test your stepper motor and Arduino setup.
Related articles:
- How to build a GRBL or G2Core controller for CNC
- Wiring stepper motors for 4, 5, 6 and 8 wire systems
- Stepover in CNC and CAM, and how to fix
- Things to fix in your DIY CNC machines for accuracy
- CNC shield guide
- Best GRBL Controller Software for CNC Routers and Laser Cutters