Key Takeaways
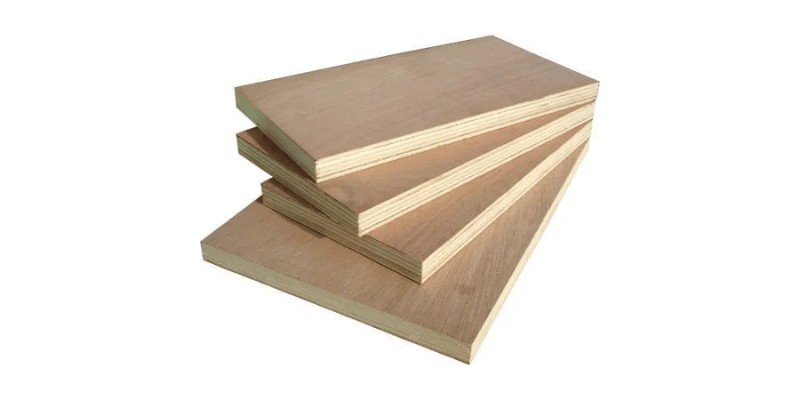
- Laser cutting plywood: Laser cutting plywood is a process of using a laser beam to cut or engrave shapes and patterns on plywood sheets. Plywood is a type of wood product made of thin layers of wood glued together.
- Laser cutter settings: The optimal settings for laser cutting plywood depend on the type, thickness, and quality of the plywood, as well as the desired outcome. Generally, you need to adjust the power, speed, and frequency of the laser to achieve a clean and smooth cut.
- Laser cutter tips: Some tips for laser cutting plywood are: use masking tape or transfer tape to prevent scorch marks, use air assist and exhaust to reduce smoke and fire hazards, use a honeycomb bed to support the plywood and prevent sagging, and test your settings on a scrap piece before cutting your final design.
- Laser cutter projects: You can use a laser cutter to create various projects with plywood, such as signs, boxes, puzzles, ornaments, furniture, toys, and more. You can also combine plywood with other materials, such as acrylic, metal, or leather. You can find many examples and tutorials online for inspiration.
Yes, not only can you cut plywood with a laser, it’s a favorite material among laser users. Both diode and CO2 lasers can cut plywood.
However, fiber lasers give a very poor finish, struggles to engrave plywood, and have a high chance of setting it on fire. So, stick to CO2 and diode lasers for plywood laser cutting.
There’s also a limit to how thick a laser can cut plywood. Most lasers can cut 12-20mm plywood, but it will take longer and require a larger number of passes. The finish also varies in quality on thicker plywood sheets.
Laser cutting plywood is ideal for making decorations or coasters with creative engraved shapes and text, as well as if you’re making architecture models.
But, if you use the wrong laser cutter, the wrong settings, or the wrong wood, you can:
- Fail to cut through
- Get poor results, with bad finishes
- Or, even set it on fire
It’s popular with laser users because it’s easy to buy, and can be both cut and engraved easily. Plus, it offers great aesthetics, and there are many different types of plywood, each with distinct properties ideal for different wood projects.
Plus, although plywood is a favorite material with many lasers, different lasers can give different results. So, I’ll also recommend the lasers I know work great with plywood at the end of this article.
How to Laser Cut Plywood
In short, here’s how you laser cut plywood:
- Use a CO2 or diode laser
- Use plywood with the right thickness and shade
- Prepare the vector file for cutting
- Open your laser control software and pick the right settings
- Use air assist for the best results
- Take the right safety precautions
- Use the right finishing techniques
1. Choose the Right Laser Cutter
You need a CO2 or diode laser to cut plywood.
The thickness you can cut depends on the type of plywood you’re using, and the laser’s power. For example, the same laser can cut much thicker basswood than birch or cherry plywood, since basswood is lighter and softer.
CO2 lasers are more powerful than diode lasers, and can generally cut thicker plywood, and faster. You can generally expect a 40W CO2 laser to cut 6mm birch plywood in one pass, and 8-15mm basswood plywood.
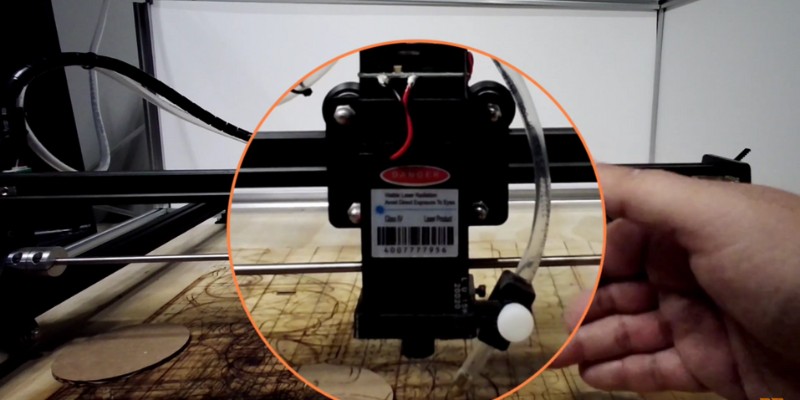
Although diode lasers are not as powerful, some still work well. The optical power is important, for example, 5W diode lasers can only cut up to 2-3mm basswood in one pass. On the other hand, my xTool D1 Pro 20W can cut up to 10mm basswood in one pass – but 20W diode lasers are more expensive, costing over $1000.
The table below compares the maximum thickness of various wood that a typical 5W, 10W, and 40W laser can cut:
| 5W Diode Laser | 10W Diode Laser | 40W CO2 Laser | |
|---|---|---|---|
| Basswood | 6mm | 8mm | 11mm |
| Pinewood | 10mm | 12mm | 15mm |
| Walnut | 5mm | 6mm | 10mm |
| Suitable Projects | Engraving at slow speeds.Cutting thin wood at very low speeds. | Engraving at slow speeds.Cutting thin plywood at slow speeds. | Engraving and Cutting at higher speeds.Cutting thicker materials.Engraving and cutting more materials like clear acrylic. |
| Best for | Hobbyists | Hobbyists | Hobbyists and Small Businesses |
2. Pick the Right Plywood Thickness
We just discussed how thick of plywood you can cut in one pass. But, how thick of plywood can you cut overall with your laser using several passes?
The maximum thickness of plywood you can cut is affected by several factors:
- The laser itself – laser power is a factor, but not the only thing that affects this.
- The plywood – different types can be cut to different thicknesses. For example, you can cut thicker basswood than you can cut cherry plywood.
- Air assist – you can increase the thickness that your laser can cut by using air assist.
Unfortunately, even with unlimited passes, there’s a limit to the thicknesses you can cut. This is because, beyond a certain thickness, your laser gets so out of focus that it simply can’t cut.
Also, the more passes, the higher your chance of burning the plywood, or even setting it on fire. So, avoid buying thicker plywood sheets than your laser can realistically cut.
Use the table I created in the previous section for estimating how thick you can cut.
3. Prepare the Design
Next, prepare the design for cutting and engraving.
For raster engraving on plywood, prepare the image as a png, jpg, jpeg, or other bitmap file.
For the cutting, you’ll need a vector file. If you have Lightburn, you can create the cutting patterns within the software. If your laser software doesn’t support this, you can use a vector design software tool like Adobe Illustrator or Inkscape to prepare the design, and save it as an SVG or other vector file format.
4. Pick the Right Laser Cutting Settings
Now, open your laser control software. Import the images for engraving or vector files for cutting.
You’ll need different laser settings for the engraving and cutting parts. So, if you’re in Lightburn, separate them into different layers, and choose the right settings for each. Most other software works in the same way, but it’s more difficult on LaserGRBL.
For laser cutting plywood, you need high laser power and high air assist, and low speeds. But the exact speed depends on the type of plywood, its thickness, and your laser.
Most laser companies perform tests on materials like plywood and instruct you on the best speeds to use, so check your laser’s manufacturer for this info.
But, you can still improve on that by testing various speeds at full power and checking the cut finish. Then, choose the settings with the least burns and the deepest cut.
The table below provides my general recommendations for cutting various plywood materials based on your laser’s power. Also, in the case of the 40W laser, you can improve the finish by lowering both the laser power and speed, though this increases the time it takes.
| 5W Diode Laser | 10W Diode Laser | 40W CO2 Laser | |
|---|---|---|---|
| Cut 1.5mm Basswood | 2 passes, 100% power, 10 mm/s | 1 pass, 100% power, 9 mm/s | 1 pass, 23% power, 15 mm/s |
| Cut 3mm Basswood | 2 passes, 100% power, 6 mm/s | 1 pass, 100% power, 6 mm/s | 1 pass, 28% power, 10 mm/s |
| Cut 10mm Basswood | N/A | 10 passes, 100% power, 1 mm/s | 1 pass, 40% power, 5 mm/s |
| Cut 6mm Clear Acrylic | N/A | N/A | 1 pass, 75% power, 20 mm/s speed |
| Cut 3mm Black Acrylic | 2 passes, 100% power, 2 mm/s speed | 2 passes, 100% power, 3 mm/s speed | 1 pass, 75% power, 40 mm/s speed |
| Cut 5mm Black Acrylic | 8 passes, 100% power, 4 mm/s speed | 6 passes, 100% power, 4 mm/s speed | 1 pass, 75% power, 30 mm/s |
For laser engraving plywood, you should use low air assist, low power, and high speed. Once again, you can check your specific laser settings and also perform tests. But, here are some recommendations for raster engraving (not vector engraving) to start experimenting:
| 5W Diode Laser | 10W Diode Laser | 40W CO2 Laser | |
|---|---|---|---|
| Wood | 100% power, 80 mm/s | 95% power, 100 mm/s | 22% power, 150 mm/s |
| Acrylic | 100% power, 80mm/s (Colored acrylic only) | 95% power, 100mm/s (Colored acrylic only) | 23% power, 150 mm/s |
| Cow Leather | 70% power, 100 mm/s | 65% power, 100 mm/s | 20% power, 350 mm/s |
5. Use Air Assist
Air assist is your best friend when laser cutting plywood. An air pressure of about 30-50 psi blowing on the plywood will:
- Let you cut thicker sheets
- Improve the finish significantly
- Reduce the chance of fire
- Reduce burns
- Increase the cutting speed you can use
It may sound strange that air assist allows you to cut deeper thicknesses. But, it’s true!
This is because the air assist blows the debris away, reducing the cutting kerf, and allowing the laser beam to penetrate much deeper.
Air assist also cools the plywood so you can cut deeper without burning or causing a fire. We also have a more in-depth article on the benefits of air assist with lasers.
6. Safety Precautions to Take
Here are some specific safety measures you should take when laser cutting plywood.
- Use air assist: helps prevent fires.
- Ventilate: cutting plywood emits smelly chemicals (glue vapor), so you should either use air ventilation or air filters.
- Don’t test very slow speeds at full power: this risks starting a fire.
- Don’t try cutting much thicker plywood than your laser can handle: this risks starting a fire.
- Clean the plywood surface from debris that may catch flare-ups.
- Have a fire extinguisher nearby
7. Finishing Techniques
Plywood is prone to charring when laser cut, so, to make your finished product look polished and clean, it can be worth the extra finishing process.
Here’s 5 tips that will help you get the best finish when laser cutting or engraving plywood:
1. Use air assist
I know I keep repeating these, but it’s just VERY important when laser cutting plywood!
2. Find a compromise between the depth of cut, and speed
Just because your laser can cut a certain thickness of plywood, this doesn’t mean you should. Slow speeds achieve deeper cuts, but also increase the level of burns.
So, to get a better finish, increase the laser speed and use more passes instead. This way, you’ll decrease the amount of heat you generate.
For example, an xTool D1 Pro 5W is able to cut a 1.5mm basswood laminate in one pass at about 6-7 mm/s. But, you’ll get a better finish by increasing the speed to 10mm/s and doing two passes instead.
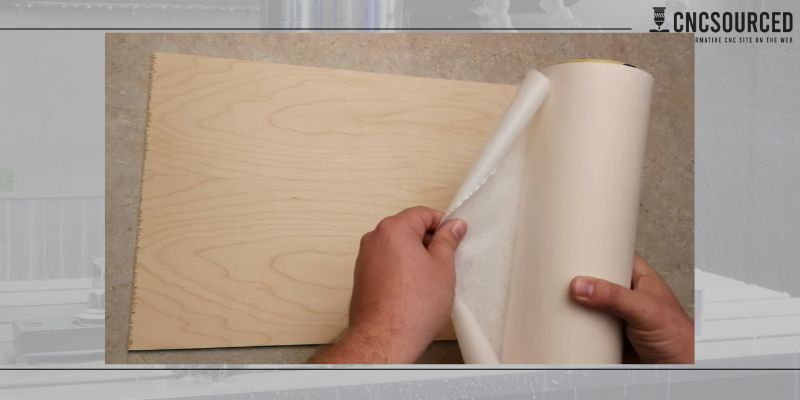
3. Mask the engraving area
If you’ve tried various different laser settings and your plywood engraving is still charring, one trick you can try is to mask the areas that are to be engraved.
This way, the masking tape suffers the burns, while the plywood gives cleaner results.
4. Sand the Edges
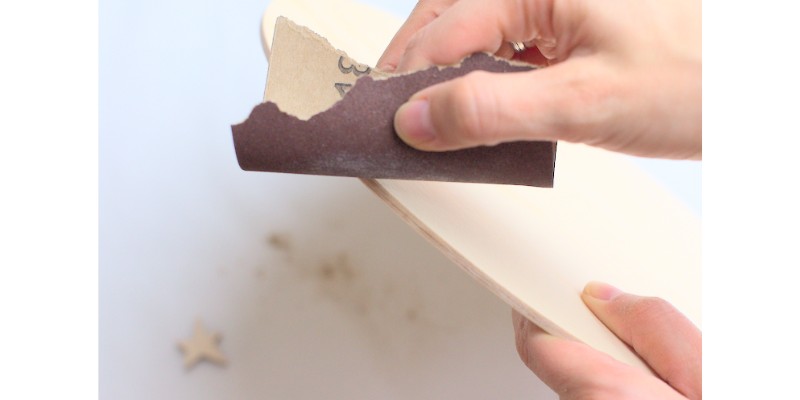
Using sandpaper will remove the burns from the cuts, and you can also sand plywood to improve the finish.
5. Clean With Denatured Alcohol
If you’re doing fine engraving on plywood, you can’t always use sandpaper. In these situations, you can still wash off the burns with denatured alcohol instead.
Troubleshooting common issues when laser cutting plywood
Here are some common issues people run into when laser cutting plywood, and what to look at to solve each problem:
1. Struggling to cut through the plywood
This is a common problem with low-power lasers. However, there are certain measures you can take to solve this:
- Check that the lens and optics are clean. Dirty optics reduce laser power.
- Increase laser power (unless you’re already at 100%).
- Increase the number of passes.
- Lower the speed, but not so much that you burn the edges.
- Use air assist.
- Adjust the focus or the laser height.
- Check whether your plywood is compatible with laser cutting.
- If nothing else works, the plywood is too thick for your laser, use a thinner sheet.
2. Plywood catches fire while laser cutting
Several small mistakes can cause plywood to catch fire. The following points will always solve this:
- Use air assist.
- Check that the area is clean and clear of debris.
- Check that you’ve correctly adjusted the laser focus (a defocused laser can ignite plywood)
- Increase laser speed and lower the laser power.
- Are you using a fiber laser? Plywood is more prone to catching fire from a fiber laser.
- Check that the plywood you’re using is compatible with laser cutting.
- Check that the plywood’s resin content is not too high, and that it doesn’t contain dark glue.
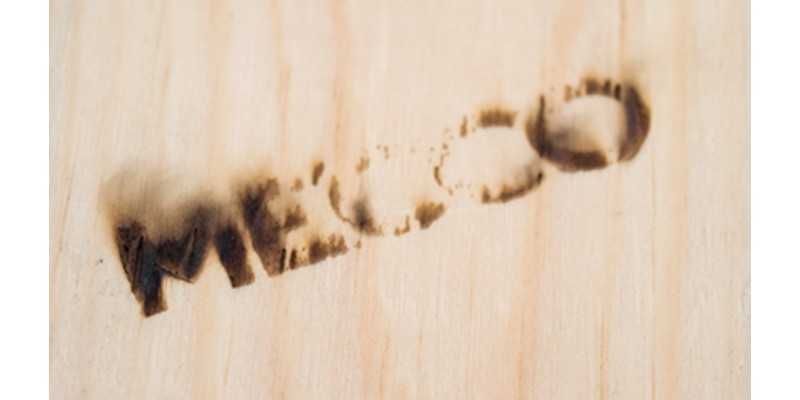
3. Charred or burned engravings
Charred engravings are when your engravings turn out black and burnt. Unfortunately, you can’t completely eliminate burns when laser engraving plywood, and you may have to settle for washing off the burns.
But, there are ways to improve the engraving finish and reduce charring:
- Decrease laser power.
- Increase engraving speed.
- Increase the line spacing.
- Use masking tape.
4. Laser cut edges are yellow or burnt
Laser cutting plywood and can burn the edges with a color that may range from yellow to black. Cutting cleaner, burn-free edges is much more difficult than engraving, as you’re using more power to cut.
However, these are the measures that can improve the finish on those edges:
- Use air assist.
- Decrease laser power, and use more passes if possible.
- Increase speed.
- Cut thinner sheets, as cutting thicker sheets will burn the edges.
- Remove the burns with sandpaper.
Pros and cons of laser cutting and engraving plywood
Laser cutting plywood is great in that it’s common, easy to engrave and cut, stable, light, and really versatile.
However, the maximum thickness you can laser cut is limited, and it’s delicate – it’s easy to ruin the finish or even start a fire. Here’s the full list of pros and cons:
Pros
Easy to laser cut and engrave
Light
Easy to buy
Stable and durable
Comes in a variety of wood types, thicknesses, and shades
Aesthetically pleasing and great for art and decor
Easy to join pieces
Easy to post-process with drills and other tools
Cons
Thickness limit – you can’t laser cut thick plywood
Maximum thickness varies between different types of plywood
Can’t endure too much stress – may bend and break
Lasers can’t cut higher-density and harder plywood as deep
Burns easily and a fire hazard
Not all plywood sheets are compatible with laser cutting
Can’t shape plywood edges with laser
Can’t pocket or create custom shapes and joineries
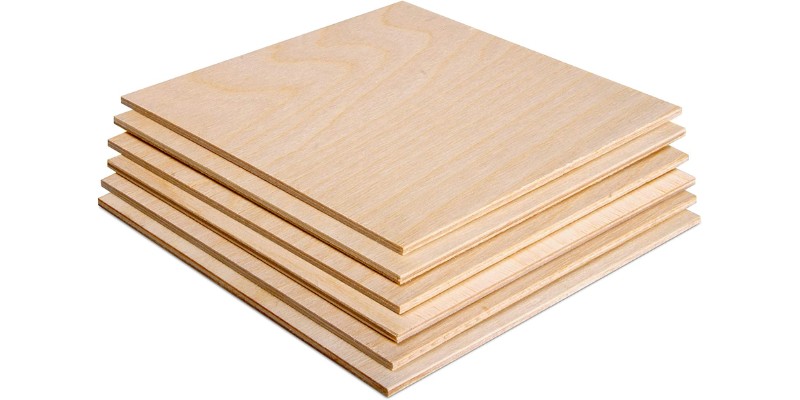
The Best Plywood To Use for Laser Cutting
The best plywood for laser cutting should have appropriate density, hardness, and glue. Birch, bamboo, basswood, beech, pine, and Jarrah are excellent plywood for cutting with a laser, with birch the most popular pick.
Here are more details about all of these plywood sheets. We also have an article on the best woods for laser cutting for more details.
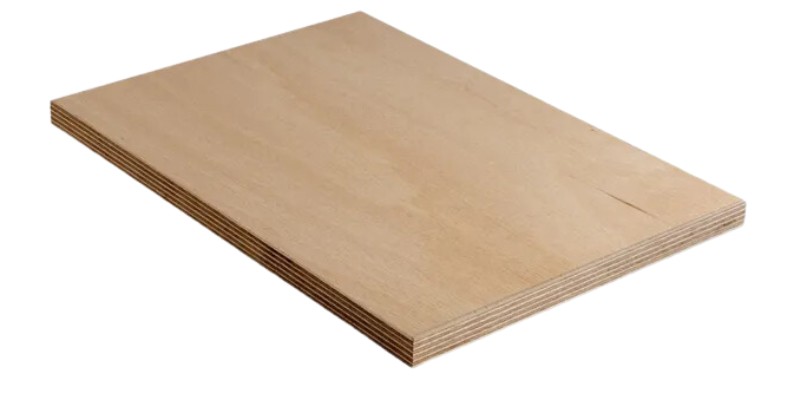
Birch
- Best for: general projects with a light color appearance and a clean finish, and cheaper projects
Birch has several qualities that make it popular among hobbyists and professionals alike. It’s inexpensive, easy to work with, and looks good – with clean and smooth surfaces when cut.
But, not all birch plywood is ideal. For example, some have better veneer and glue contents for laser cutting, so watch out for this..
Bamboo
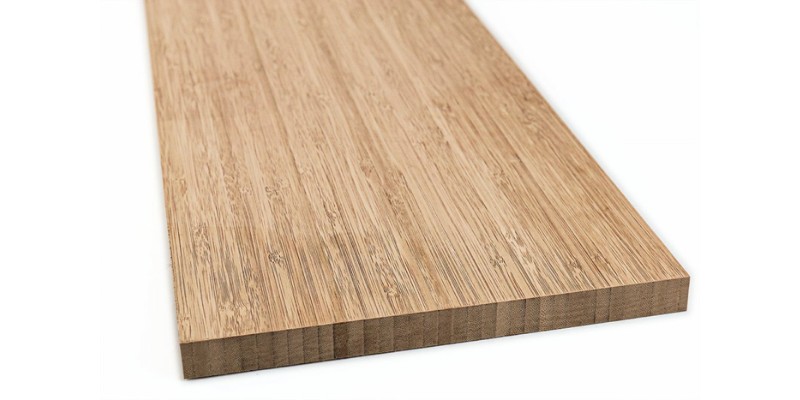
- Best for: designs with specific colors, consistent finishes
Bamboo is the most consistent type of plywood for laser cutting, due to its very consistent grain density. So, you can’t really go wrong with bamboo.
Bamboo also comes in many colors, so it’s versatile based on your planned projects – which is a luxury not all other plywoods offer.
However, bamboo costs around twice as much as birch. Also, if you have a lower-power laser, you can cut thicker birch than bamboo, which may limit you.
Basswood
- Best for: low power lasers, budget option
Basswood is ideal if you want to cut thicker sheets, but don’t have a strong laser. It’s also the most budget-friendly plywood. It usually has a lower grain density and is made from softer veneer, so the laser can cut it easily if it also has the right glue content.
However, it’s easier to burn basswood is easier to burn, and generally, the cut edges don’t look as good as bamboo.
Basswood is also considered a low-quality option compared to other plywood I’ve listed.
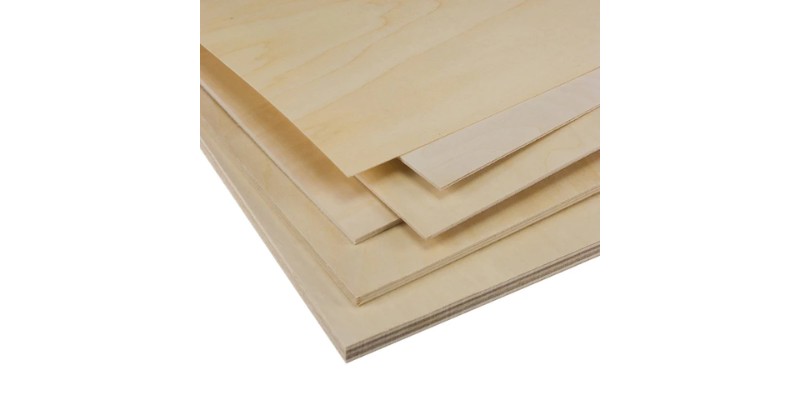
Beech
- Best for: dazzling look, and aesthetics
Beech brings unique qualities to laser cutting – mainly its aesthetic beauty.
As a result, some people buy thin beech sheets to create eye-catching business cards. Beech laminates also have excellent quality in comparison to basswood laminates.
Jarrah

- Best for: rare plywood color projects
Jarrah comes in a dark red shade. If you can nail down the settings for laser engraving and cutting, it looks great, but it’s not right for many projects.
Most of the time, you’ll need a lighter shade with higher contrast engravings that cost less (hint: birch). Still, you can make unique projects by laser cutting Jarrah.
Best Laser Cutters for Plywood
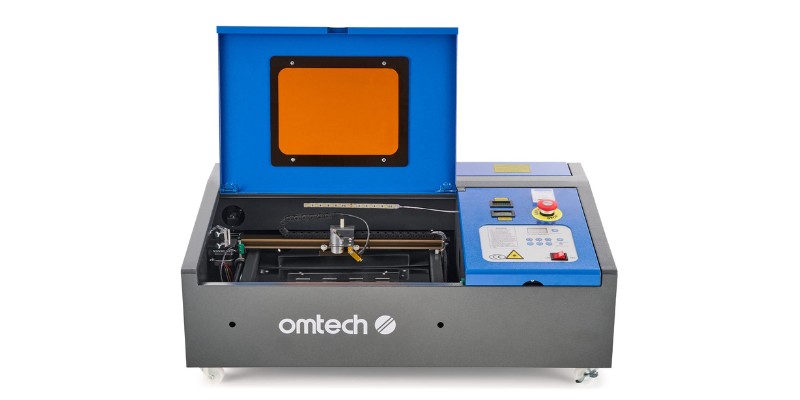
OMTech 40W – Budget CO2 Laser
| OMTech 40W | |
|---|---|
| Type of Laser | CO2 |
| Laser Power | 40W |
| Work Area | 203 x 304mm (8”x12”) |
| Appropriate Engraving Speed on Plywood | 150-180 mm/s |
| Software | LaserDRW, K40 Whisperer |
| Work Table | Vented Level Board |
| Exhaust System | Fan |
- Price: See on Amazon here
- Working area: 203 x 304mm (8”x12”)
- Power output: 40W
Pros
CO2 laser – the best type for plywood
High power and speed for the price
Extremely affordable CO2 laser
Cuts thicker plywood than any other laser up to three times the price
Enclosed
Cons
Small working area: only cuts plywood sheets up to A4 size
Not beginner-friendly
Needs an upgrade to work with Lightburn
I’ve already discussed how CO2 lasers are your best bet for laser cutting plywood. So, how about one of the cheapest, yet, high-quality CO2 lasers on the market?
The OMTech K40 is a 40W CO2 laser that can cut 5mm birch plywood in one pass. Few other lasers under 3-4x the price offer this level of capability.
It’s also pretty fast for the price. It engraves and cuts plywood 3-5x faster than lasers which cost twice as much, and it engraves up to about 300mm/s.
However, there are some drawbacks. The working area is small (8” x 12”). Plus, it’s enclosed, so you can’t extend the working area (unlike most diode lasers, which often have extension kits). So, you are limited to smaller plywood sheets that can fit inside the working area.
Also, the OMTech 40W ships with OMTech’s cheapest controller. If you don’t upgrade this, it’s not compatible with Lightburn, which is my personal choice for laser control software. More generally, it’s just a lot less beginner-friendly than other lasers like xTool and Ortur in diodes, and Glowforge or Muse lasers for CO2.
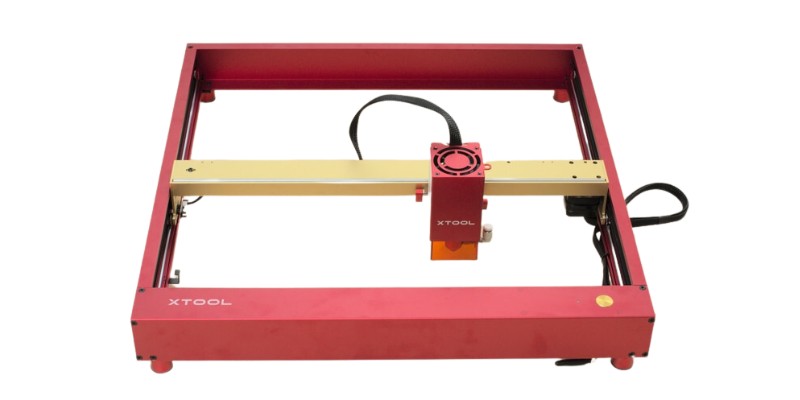
xTool D1 Pro 20W – Best Diode Plywood Laser Cutting Machine
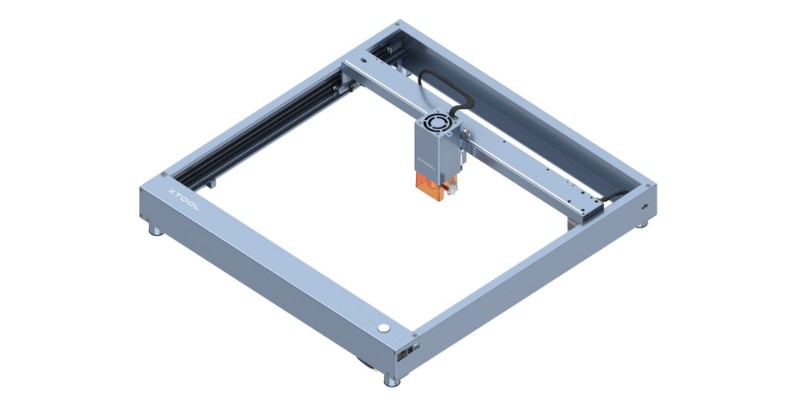
| xTool D1 Pro 20W | |
|---|---|
| Type of Laser | Diode |
| Laser Power | 20W |
| Work Area | 432×406mm (Upgradable) |
| Appropriate Engraving Speed on Plywood | 100 mm/s |
| Software | XCS, Lightburn |
| Work Table | Optional Honeycomb |
| Exhaust System | Optional: Enclosure With Fan and Pipe |
- Price: Check latest price at xTool here
- Work Area: 432×406mm
- Optical Output: 20W (also 10W and 5W versions)
Pros
High-quality diode laser
Excellent combination of price, work area, and power
Can cut up to 10mm basswood in one pass
xTool sell their own basswood plywood sheets available optimized for laser cutting
Many upgrades available
Cons
Slow
Diode laser (low beam power)
Need to add enclosure and ventilation to manage plywood fumes
The xTool D1 Pro 20W is one of the most powerful diode lasers, and can cut the thickest plywood sheets out of any diode laser I’ve used. It also offers one of the best combinations for cutting plywood: a large working area at a low price with enough power to cut through thick sheets. In my opinion, it’s one of the best wood laser cutters in its price range.
I personally own the 20W version, though the 10W should also be fine for most projects. I preferred just being able to cut thicker sheets faster.
The 20w version can cut 10mm basswood plywood in a single pass, which is honestly amazing for a diode laser. There’s also an optional enclosure add-on you can buy, which helps manage the fumes emitted.
The cutting speed is not super impressive. It can cut 3mm basswood sheets at about 6mm/sec (and even slower speeds for birch). While xTool say the laser engraves at 400mm/s, this is the maximum possible theoretical speed, and on materials like plywood it’ll be around 100mm/s realistically.
The working area is a great 432 × 406 mm, which is much larger than lasers like the OMTech 40W. And, if you want to extend it even larger to 930 x 430 mm, you can buy the extension kit.
So, what you lose in power, speed, and a little bit of money compared to OMTech K40, you gain back in the working area, upgradability, and ease of use.
For software, it’s compatible with Lightburn and xTool’s own in-house software, XCS. Overall, beyond the software, it’s just generally a lot easier to use than the OMTech 40W. So, if you’re looking to cut larger pieces of plywood, and are fine with a diode laser, I highly recommend the xTool D1 Pro based on my time testing it.
Glowforge Pro – Good CO2 Plywood Laser Option
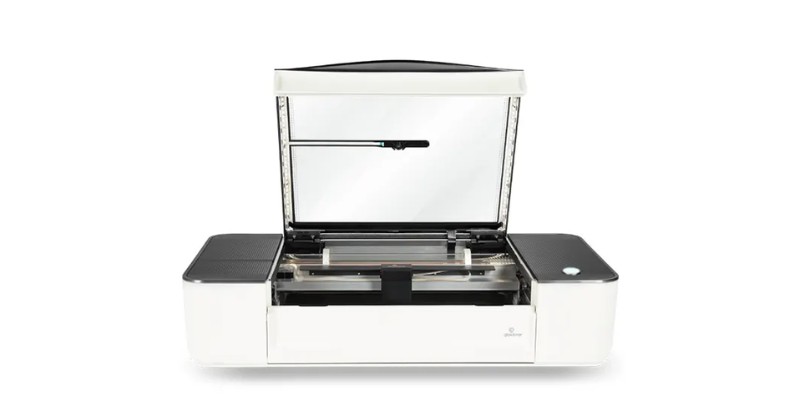
| Glowforge Pro | |
|---|---|
| Type of Laser | CO2 |
| Laser Power | 45W |
| Work Area | 280 x 480mm |
| Appropriate Engraving Speed on Plywood | 335 mm/s |
| Software | Glowforge Print |
| Work Table | Honeycomb |
| Exhaust System | Efficient Fan – Optional Air Filter |
- Price: $6995
- Engraving area: 280 x 480mm
- Power output: 45W
Pros
Extremely easy to use and beginner-friendly
Glowforge sell Proofgrade plywood sheets with optimized laser settings
Camera and autofocus
Passthrough slot for feeding long plywood sheets in
Big community and forum help
Cons
Slow and low power for the price
Software requires internet access and is browser-based
No rotary option
You’ll get the most convenience in plywood laser cutting with a Glowforge Pro (or any Glowforge, for that matter). It’s in a class of its own when it comes to ease of use, and also has a 45W laser tube with good beam quality.
A great convenience is that you can buy Proofgrade plywood sheets from the Glowforge store. They’re specifically sized and optimized for Glowforge machines, and your laser will automatically adjust to the right settings without any tinkering – especially useful if you’re newer and have less experience. It also means you don’t have to cut the sheets down before cutting.
All you have to do is let the laser scan the QR code on each sheet, and it’ll automatically adjust to the right settings.
Glowforge Pro’s camera does much more than scan QR codes: it has an AI function that automatically focuses the laser. This is very convenient, you’ll never have to adjust the focus, saving you time.
The Glowforge Pro also has a passthrough slot that allows you to feed long sheets of plywood, so while the working area is limited, you can pass through material sheets far longer than this build area. Only the width is limited, to 19”.
However, Glowforge lasers are only compatible with their online Glowforge App software. This means you have to be online to run projects (it connects to the cloud to start your job), whereas almost all other software run offline, like LaserGRBL, Lightburn, and others. It is very easy to use though if that’s any consolation.
Overall, your money buys a lot of conveniences, like autofocus, but not the best performance. Given its high cost, there are less expensive, faster, and more powerful lasers available.
Also, none of the Glowforge machines (not just the Pro) are compatible with a rotary, though this isn’t a big deal when cutting plywood sheets. But, for other cylindrical projects this is a limitation.
Project ideas you can make with plywood
Now that you’ve got all the info you need to laser cut plywood, let’s take a look at some cool stuff you can make! And, for a wider range of wood projects, we also have an article on different laser projects you can make.
Wooden Wall Clocks
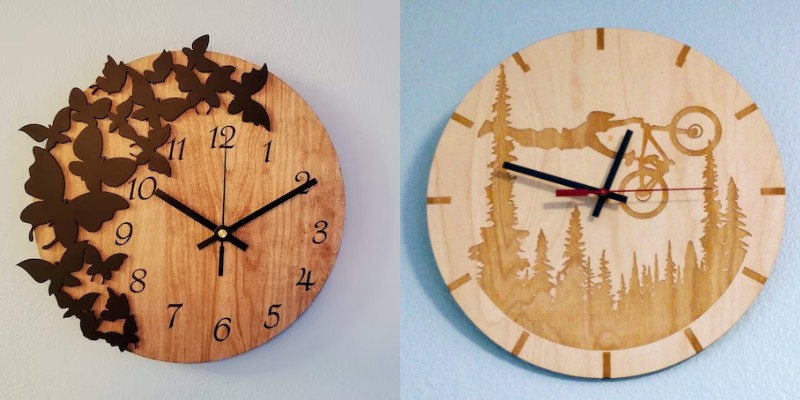
- Example: Etsy
- Designer: KainorDesign
Making a simple clock face with plywood is an easy and rewarding way to add to your home décor in a practical way. The hard part is engineering the mechanism to get it working, but that can come later.
With plywood versatility you really can cut and engrave any kind of design you like – the horse above is just one example of the silhouettes you can use.
Business Cards
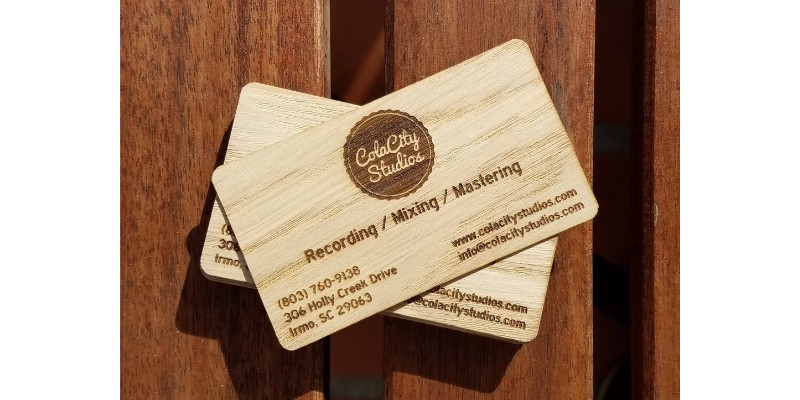
- Examples: Pinterest
- Designer: Sara Fond Design
Business cards need to be memorable and easy to find in order to draw attention. If you are a professional woodworker or use laser engraving as part of your business, then what better way to advertise your services than by cutting and engraving your own business card with plywood?
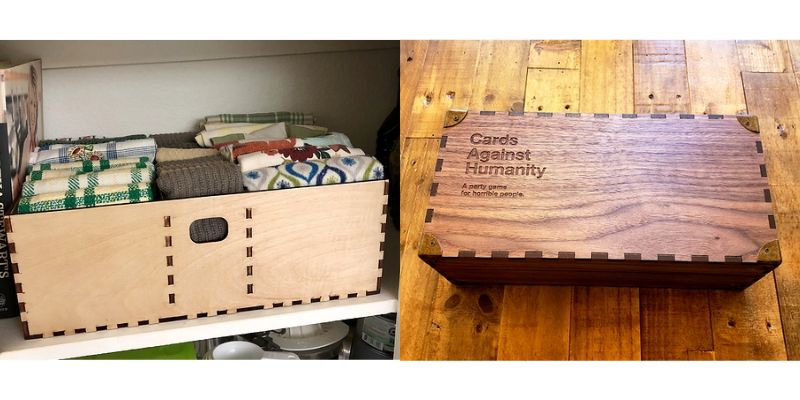
Ornaments
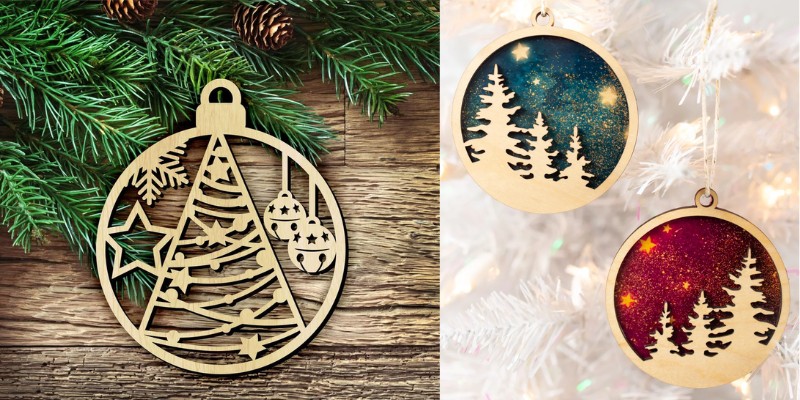
- Download: Etsy
- Designer: TheWoodILike
- Price: $4.99
Wooden seasonal decorations and ornaments are great for celebrating special events and times, and a great way to make them even more special is to laser cut and engrave your own.
Seasonal decorations are easy to cut, and add a unique touch to your holiday tableau. The decorations above are a great example of simple ornaments you can cut from plywood, but you can also try your hand at cutting Halloween ornaments and even nativity scenes if you’re feeling creative enough.
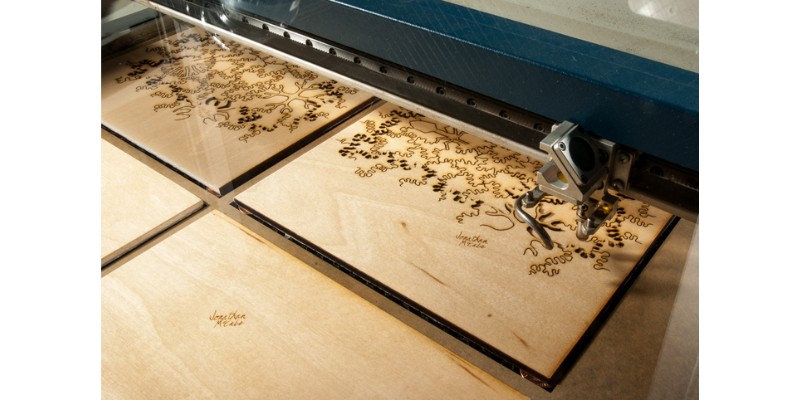
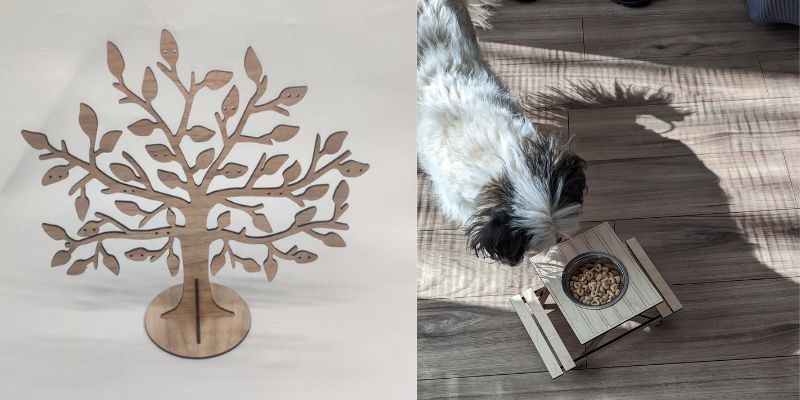
Wall Art
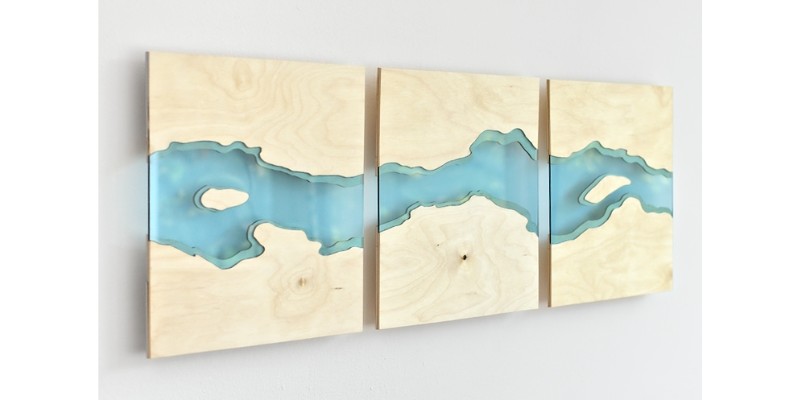
- Example: Etsy
- Designer: AlmajoWooden
Plywood is perfect for making great wall art designs for any taste. The example above is the ever-popular Tree of Life, but of course, you can use plywood to cut or engrave any design you like, whether downloaded from a reputable site or original designs you’ve made from scratch.
Coasters

- Example: Etsy
- Designer: 6DogArtsHome
Coasters are amongst the simplest things you can cut and engrave with plywood. They’re small and therefore don’t take much material, so even if you don’t get things exactly right, you’ll know you haven’t wasted too much.
This makes them not only fantastic and practical things to make with your laser cutter, they also act as tests to make sure you’ve got your settings and calibration right.
Just remember that plywood can be quite absorbent, so if you are planning on cutting coasters, then simply adding an acrylic primer or similar once you’re done will help protect them and make sure your coasters are usable for years to come.
FAQs:
How thick plywood can Glowforge cut?
Glowforge lasers can cut 6mm birch plywood in one pass, and 10-15mm plywood with multiple passes. Though, this depends on the plywood used, for example you can cut thicker basswood plywood than bamboo plywood in one pass.
Can a 5W laser cut plywood?
Yes, a 5W laser can cut plywood, but only very thin 3mm basswood sheets in one pass, or 3mm cherry plywood in multiple passes. It requires around 5 passes for a 5W laser to cut 6mm plywood (if the plywood is optimized for laser cutting).
What laser do I need to cut ¼ Plywood?
You’ll need a CO2 laser with around 40W of optical power output to cut ¼” plywood in one pass. You can cut ¼” plywood with weaker lasers, but it will require more passes and more time.