|
Best Affordable Laser

|
Safest & Best For Beginners
|
|
CNCSourced Rating: |
CNCSourced Rating: |
|
4.7
|
4.9
|
|
$629.99
|
$1,799-$2,299
|
|
Laser Power:
10W or 20W
|
Laser Power:
20W or 40W
|
|
Supported Materials:
card, felt, fabric, leather, plastics, acrylic, wood, anodized aluminum, stainless steel & others, reflective metals if using infrared module
|
Supported Materials:
card, felt, fabric, leather, plastics, acrylic, wood, anodized aluminum, stainless steel & others, reflective metals if using infrared module
|
|
Working Area:
430 x 390 mm
|
Working Area:
608 x 385 mm
|
|
Preassembled:
No
|
Preassembled:
Yes
|
|
Software:
XCS (desktop only), Lightburn
|
Software:
XCS (desktop only), Lightburn
|
|
Accessories:
Rotary, infrared module, enclosure, expansion kit, honeycomb working panel, smoke purifier
|
Accessories:
Rotary, infrared module, riser base, automatic conveyor feeder
|
|
|
|
If you’re a beginner looking to buy your first laser engraver or cutter, you’ll want one that’s beginner-friendly, simple to set up, easy to use, and most importantly, reliable.
However, you also want a good level of quality for your budget. This means:
- A good working area (size of the materials you can cut)
- Good power (for how thick you can cut)
- High-quality precision (especially for intricate engravings)
TLDR: I recommend the xTool S1 as the best laser engraver for beginners overall. It comes pre-built, is very easy to set up, and it is enclosed so it keeps fumes away from you, with built-in ventilation. It’s also fast, and has two power options of 20W or 40W so you can choose how thick you want to be able to cut.
Quick Overview
- xTool S1: The safest, simplest, and best for beginners overall
- xTool D1 Pro: Cheap all-rounder
- LaserPecker 2: Great portable option
I’ll review and recommend the most beginner-friendly lasers in this article. I recommend lasers in different price ranges, all of which make it easy for novices to get up and running, and also explain which ones to avoid.
Best Laser Engravers For Beginners – Reviews
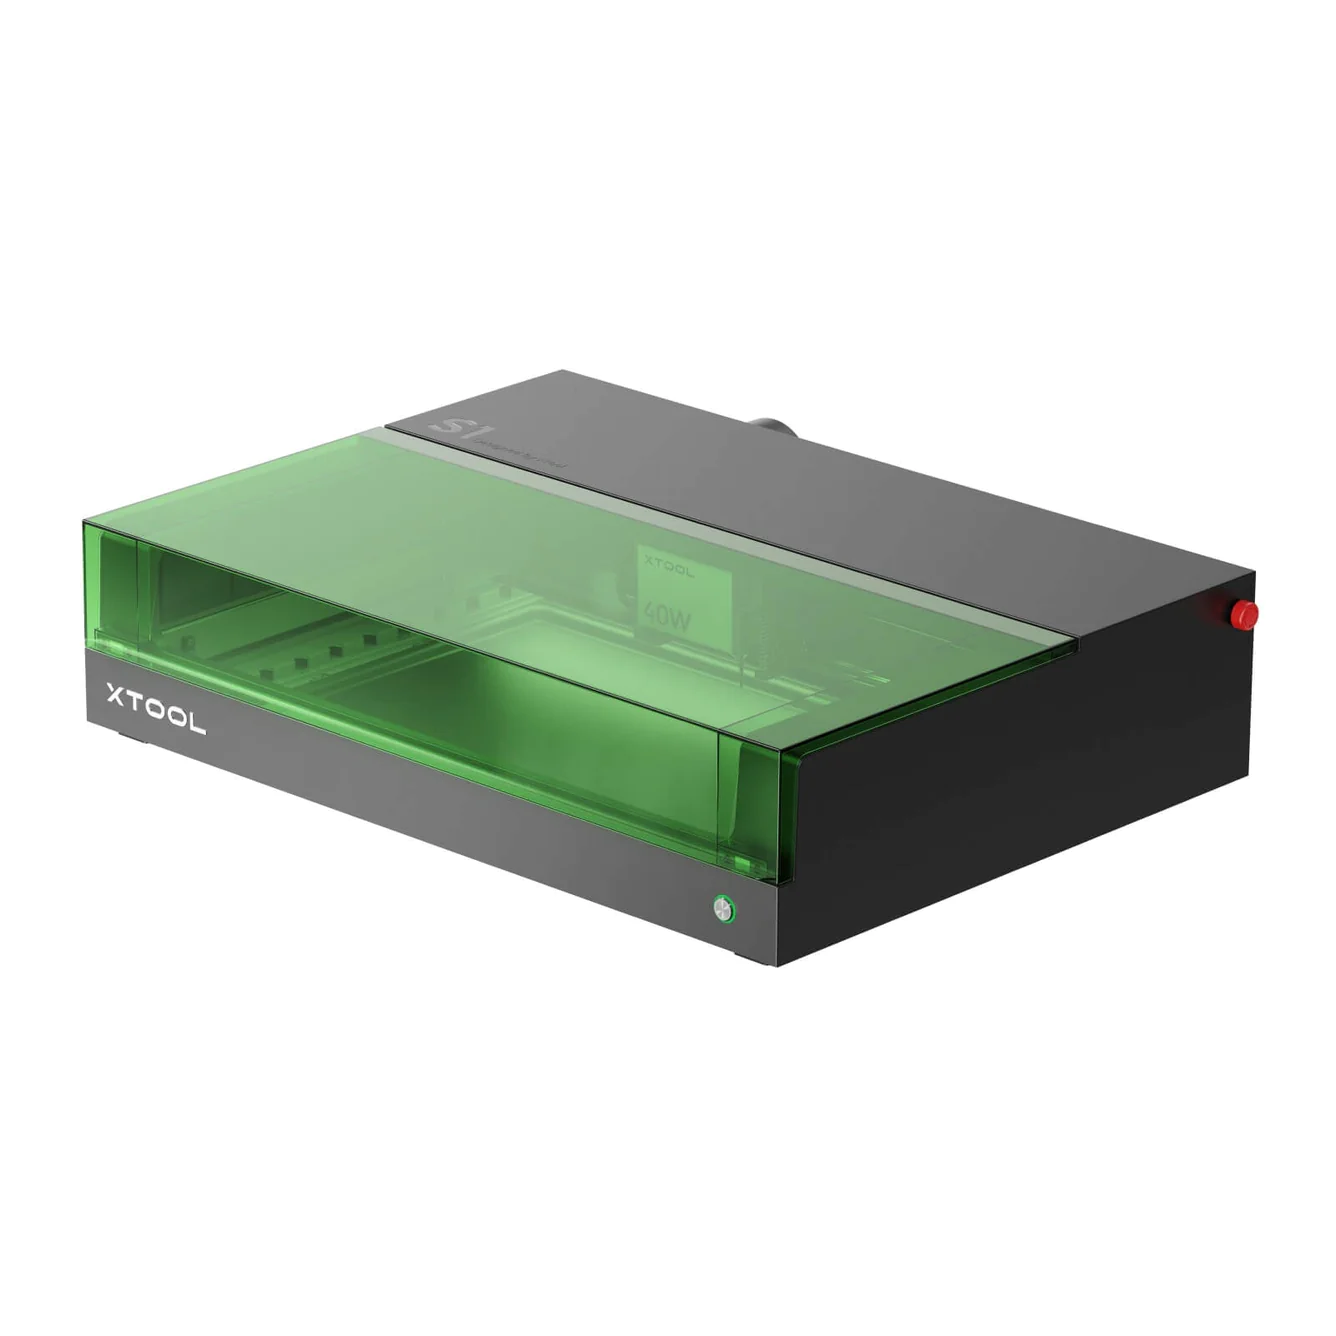
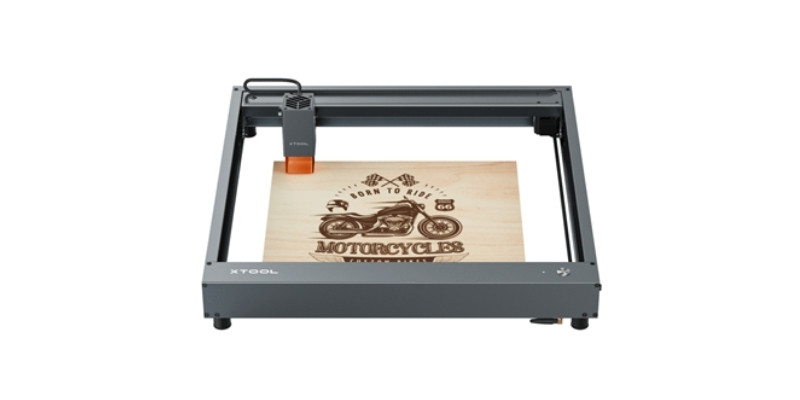
1. xTool S1 – Top Pick
- Price: $1,799 to $2,299 – Available at xTool here
- Work area: 608 x 385 mm
- Laser power: 20W or 40W (2W IR laser attachment also available)
- Laser type: Diode
- Rotary: Yes
- Max speed: 600 mm/s
Pros
Fully enclosed for safety
Easy setup and comes pre-assembled
Easy and quick to switch between laser heads
Beginner-friendly software
Autofocus
Cons
May need to prop thin materials with riser base
Not portable
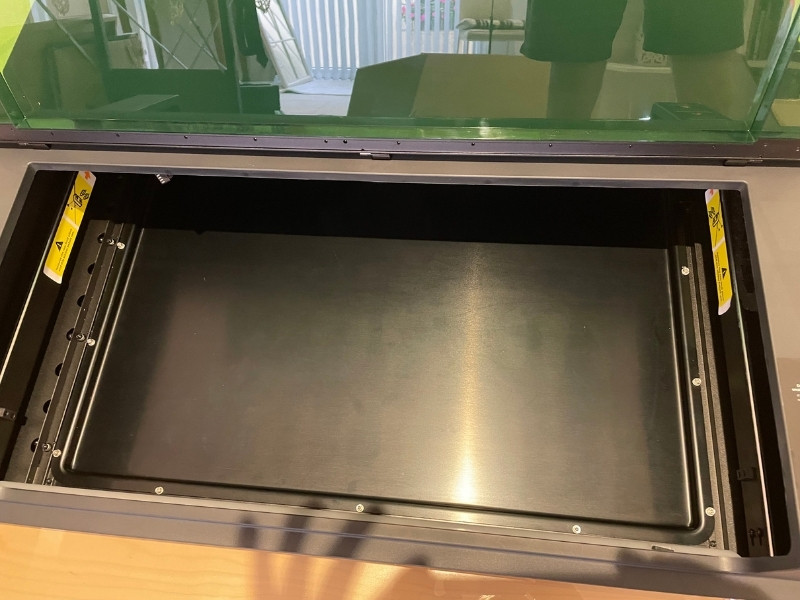
The xTool S1 is a good first laser to start with. Its enclosed design makes it much safer to operate compared to open lasers, containing fumes and any potential fires. The ventilation also keeps the fumes from acrylic or wood cutting completely away from you, which is a really nice upgrade for health and safety. I really appreciated the built-in safety features like automatic stoppage if the machine is tipped or a fire is detected.
Setting up the xTool S1 right out of the box takes just a few minutes and even a complete beginner could do it. It takes just a few minutes and a few screws to release the laser head, and then you can add the riser base attachment if you have it, add the honeycomb bed, and then screw in your chosen laser head and you’re ready to start laser cutting.
Swapping between either the 40W or 20W diode laser, and 2W IR laser for metal engraving, literally takes like 90 seconds – it’s really simple.
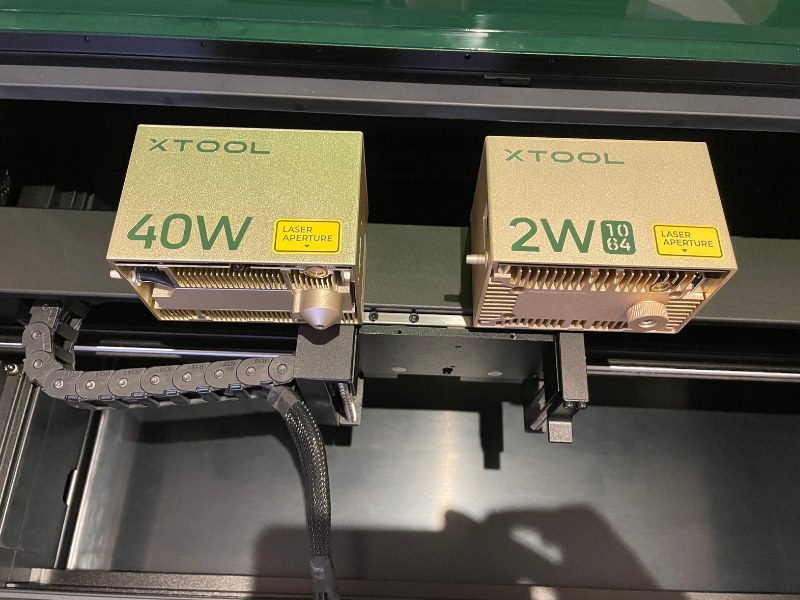
The XCS software is very user-friendly, and xTool have their recommended settings for every material type online to start with and then tweak from there. The S1 has autofocus features that the D1 Pro doesn’t have, so most of the work is done for you. And for anything I did have an issue with, the support handled it really quickly.
While not as powerful as CO2 lasers, the 40W diode laser still cuts through 15mm basswood which is more than enough for most beginners’ projects.
My only caveat is the potential need to prop up thin materials when using the riser base to avoid distance sensor issues. But overall, the xTool S1 is ideal for laser beginners wanting a safe, affordable, and easy-to-use laser cutter.
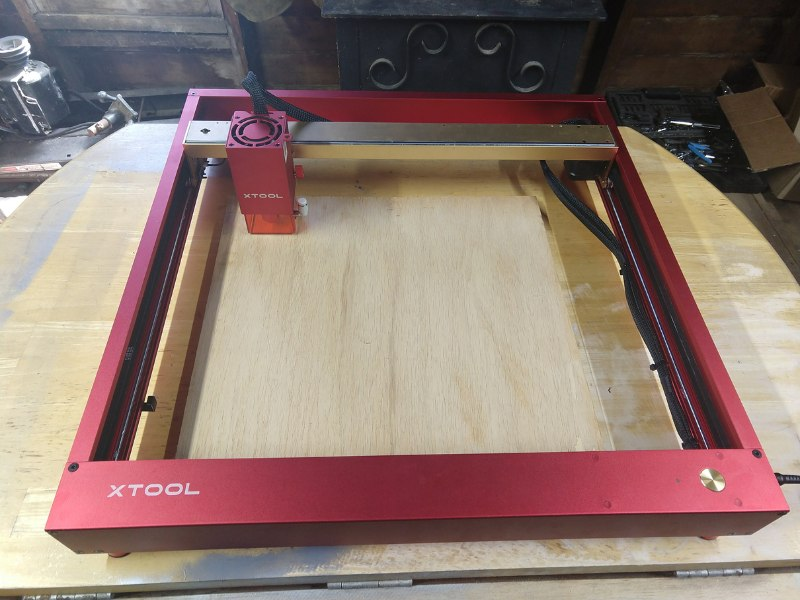
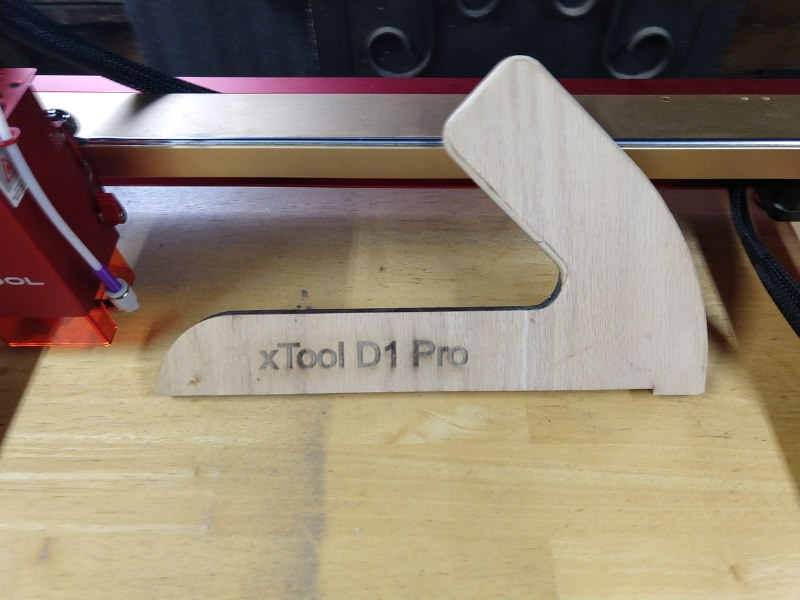
2. xTool D1 Pro – Cheaper Option Than S1 (But Not As Safe or Beginner-Friendly)
- Price: Check latest price at xTool here
- Laser power: 5W, 10W, 20W or 40W options
- Supported materials: card, felt, fabric, leather, plastics, acrylic, wood, anodized aluminum, stainless steel & others, reflective metals if using infrared module
- Maximum cutting thickness in one pass: 10mm wood and 5mm acrylic
- Working area: 430x390mm
- Preassembled: No
- Software: XCS, Lightburn
- Accessories: rotary attachment, infrared module, enclosure, expansion kit, honeycomb working panel, smoke purifier
Pros
Powerful and highly precise laser
Wide variety of upgrades and accessories
Intuitive beginner-friendly XCS software
Good working area, with option to extend further with the extension kit
Cons
Doesn’t come preassembled, but it is easy to build (I built mine in around 30 mins)
Often when starting out in a new hobby or venture, it can tempting to start off with the cheapest option. However, this can honestly be counterproductive.
The xTool D1 Pro certainly isn’t the cheapest laser cutting machine for beginners, but its mix of quality and usability makes it my top pick. I personally bought the 20W version, but you only need the 10W version for everything except much thicker wood and acrylic cutting.
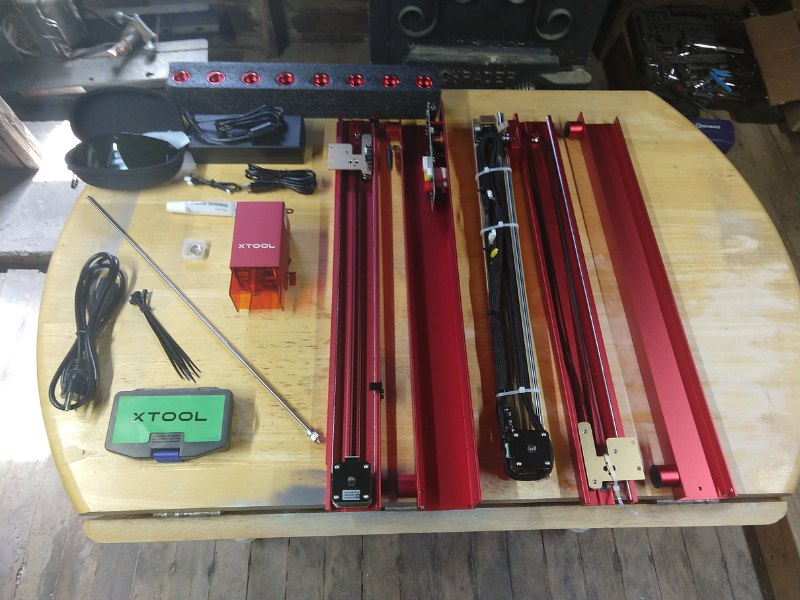
There’s not many parts to assemble. The main part is just attaching the four sides of the chassis together with the screws that come with it, and then attaching the gantry and laser head. A complete beginner could built it in under 45 minutes.
It offers a 430 x 390mm working area, which lets you work on fairly large projects, such as personalized pens, keychains, small signs, beakers (if you have the RA2 rotary module), and even laser-etched portraits.
You can pick between a 10W or 20W laser module, with the more powerful 20W costing around $400 extra. Both options have a very fine compressed spot size of 0.08 x 0.06 mm, allowing you to engrave precisely down to 0.01mm. For reference, some lower-quality laser engravers have significantly larger spots of 1.5 x 1.5 mm.
The main difference is that the 20W can complete the same jobs in fewer passes. Also, as using a laser at 100% of power wears it out quicker, using a 20W at 50% instead of a 10W at 100% can be more efficient in the long term. I’ve also compared all the different powered versions together in my hands-on xTool 10W vs 20W vs 40W comparison.
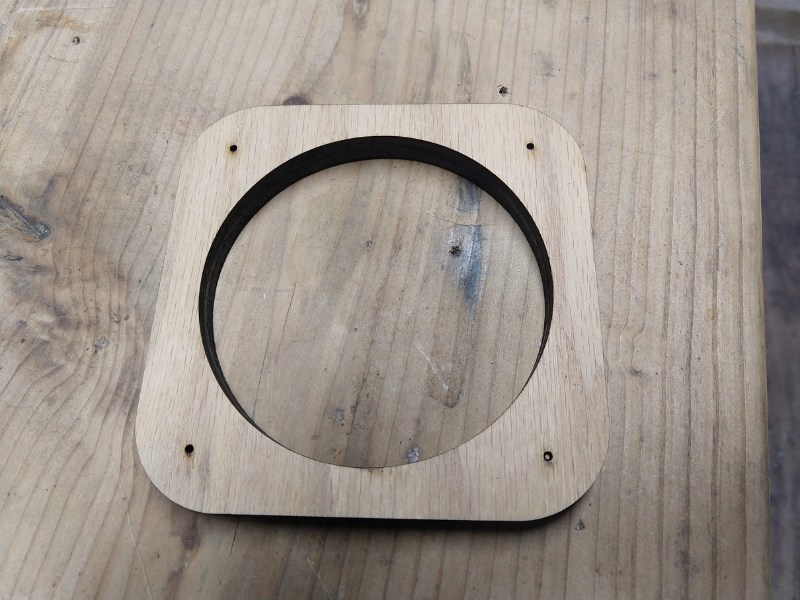
The laser module is very high quality, allows for impressive cutting depths of 5mm on acrylic and 10mm wood with a single pass. So, it’s one of the most effective acrylic laser engravers in this price range. You can see the thick pieces of wood I cut with it below:
Intuitive software is one of the most important considerations when buying an entry-level laser engraver. xTool’s XCS software has numerous beginner-friendly features, as well as free design files and easy image importing, and one-click operations. You can also use it with Lightburn, which is my favorite laser software, and Lightburn is extremely easy to use.
I personally recommend going with Lightburn if you’re a beginner. It’s $60 for a license, but it’s very easy to use, and most other lasers also use it, so it’s worth getting used to it now for any future lasers you may use. XCS is great, but only xTool lasers use it, so you won’t build the skills for the future with it.
Another nice thing about the D1 Pro is its upgradeability. In particular, it’s one of the few hobbyist laser engravers with an infrared laser add-on. Infrared lasers are more powerful than diode lasers, particularly for metal engraving, which makes them the go-to choice for jewelry engravers.
So, while you may not need to start off with an infrared laser as a beginner, the D1 Pro allows you to easily upgrade later, without having to buy a new machine.
Similarly, xTool offers an extension kit for the D1 Pro that doubles the working area to 430 x 930mm. So, you can start off small, and upgrade to a larger size later to work on larger projects like big signs and cutting boards. Another available accessory is the rotary attachment, which is ideal for working on cylindrical objects.
The rotary is high-quality, but almost $300 extra. But if you have plans to start a small business from your home workshop, engraving beakers, glasses, and other rounded objects are some of the best-selling and profitable projects. I bought the RA2 Pro rotary and I am very happy with it. If you’re worried about being a beginner and building it, it’s also simple to build, and takes around 45 minutes.

And if you need even more power, go for the 20W version (we did!)
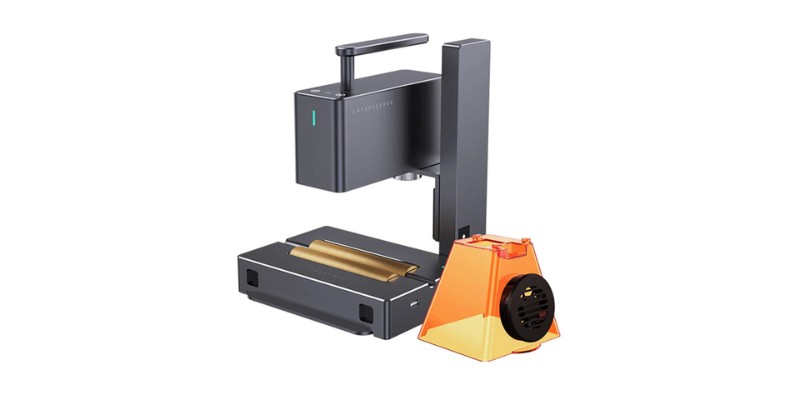
3. LaserPecker 2 – Most Portable Laser for Beginners
- Price: Check latest price at Amazon here
- Laser power: 5W
- Supported materials: card, felt, fabric, leather, plastics, acrylic, wood & others
- Maximum cutting thickness in one pass: 5mm wood and 2.5mm acrylic
- Working area: 100x100mm
- Preassembled: Yes
- Software: LaserPecker app (mobile and desktop)
- Accessories: rotary attachment, power bank
Pros
Handheld and portable
Easy engraving straight from your smartphone
Great for rotary engraving
Come preassembled
Very fast
Cons
Expensive
Small working area
Low power: 5W laser
The LaserPecker 2 Pro is the most expensive machine on your list, but don’t be intimidated by the price. In fact, its price is largely determined by how intuitive and beginner-friendly it is.
One of the highlights that sets the LaserPecker 2 Pro from most other laser engravers is that you can use it as a handheld laser engraver.
This is great for beginners who want to attend craft clubs, events, or just want the flexibility of an easy-to-transport engraver.
You can also opt to have the LaserPecker rotary roller included, which is perfect for engraving tumblers, mugs, and other circular objects.
Another factor that makes this one of the best laser engravers for beginners is how easy it is to set up and use. The LaserPecker 2 is a plug-and-play machine, so you can get up and running within minutes – far quicker than other DIY laser kits.
Perhaps its most novice-friendly features, though, are in the app. Available on iOS and Android (as well as Mac and Windows), the LaserPecker app allows you to engrave directly from your camera roll, allowing you to create detailed portraits and whatever else.
You can also draw your own designs in the app, or use any of the clipart designs from the extensive library.
We also like that the app has an intuitive interface, detailed user guides, and a strong community aspect. You can share projects with other users and check out featured DIY projects, which is a nice way to get inspiration for new projects. Alternatively, you can pair your engraver with third-party software like Lightburn and LaserGRBL.
However, the LaserPecker 2 uses a relatively modest 5W laser, so it can’t cut the same depths as the likes of the D1 Pro. It still has enough power for most small crafts and beginner projects, but it’s not ideal for engraving metals. The small working area may also be an issue for some.
What it lacks in power, it makes up in speed, though, with the LaserPecker 2 Pro capable of cutting up to 600mm/s. That’s a whole 200m/s faster than the D1 Pro, making this one of the fastest laser engravers for beginners. It also has a finer compressed spot with the D1 Pro of 0.05 x 0.05mm, making it one of the most precise lasers in its price range.

Which Lasers to Avoid for Beginners
I recommend avoiding the following lasers if you’re a beginner:
- Lasers from lesser-known brands
- Lasers with bad reviews or a lack of reviews on sites like Amazon
- Lasers that aren’t compatible with beginner-friendly software like Lightburn
- Overly complex CO2 lasers
- Fiber lasers and other types designed for industrial work
The lasers I recommend are all diode lasers, which are the simplest to use as a beginner. CO2 lasers are more powerful, but are less suitable for novices.
Why not a CO2 for a first laser?
You can find relatively cheap K40 lasers, such as the OMTech K40, on Amazon and other sites.
However, they don’t have any of the beginner-friendly features we highlight in the reviews above, such as easy software, customizability, and strong customer support. They’re far more complex, and I really recommend starting with a diode laser.
As 40W CO2 lasers are significantly more powerful than 5-20W diode ones, they can also be more dangerous if you don’t know what you’re doing.
How To Pick – A Beginner-Friendly Guide
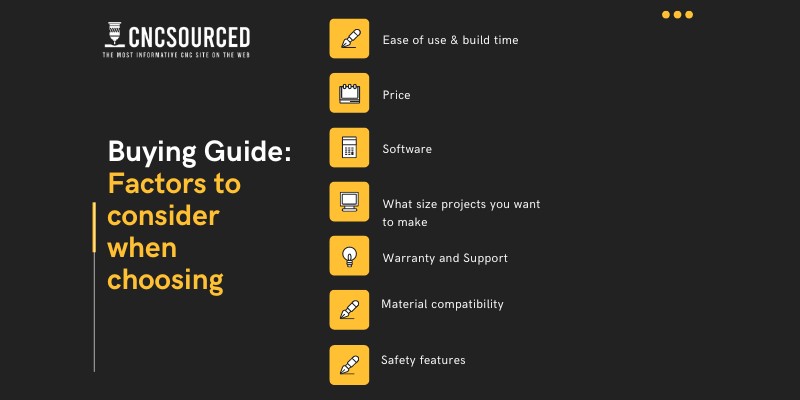
Ease of use & build time
Building a laser for the first time can be an intimidating process, so pick a fast machine to assemble, or buy a pre-assembled machine like the xTool S1.
Entry-level laser cutters usually come as kits to build, and can take up to an hour to build. Go for reliable brands like xTool and Ortur, which come with clear instructions and have the simplest assembly process.
I’ve built the xTool D1 Pro 20W and it took half an hour, and I’ve also built three Ortur lasers (LM2, LM2 Pro, and LM3) and they were all simple enough.
The main difference is the rotary. xTool’s rotary comes as a chuck ready to go, whereas the Ortur YRR 2.0 comes as a kit that takes 45-60 mins to assemble. I prefer the xTool’s rotary, but it’s 3x the price – so it’s your choice here.
Software
One of the most user-friendly and popular options is Lightburn, which you have to pay for, while LaserGRBL is the most widely used free alternative. You can read more in our guide to picking laser engraving software.
There are also apps that some lasers come with, for example both the Atomstack and LaserPecker mobile apps let you engrave designs directly from your camera roll.
What size projects you want to make
The best laser cutters for beginners come in a variety of different sizes, from small handheld models like the LaserPecker 2 Pro to large laser cutting machines like the D1 Pro and S1. Between 200x200mm and 400x400mm is the typical engraving area of medium-sized beginner cutters.
A laser’s size affects the size of the materials you can work on. On top of that, larger desktop machines are heavier and less portable.
Warranty and Support
Laser engravers aren’t cheap, so if you’re buying one for the first time, go for one with a longer warranty period in case you have any issues.
Laser brands like LaserPecker, xTool, Atomstack, and Ortur offer one-year warranties, but this isn’t the case with all companies – so it’s always worth checking.
Go for a brand with decent customer support in case you encounter technical problems. Be wary of cheaper machines from lesser-known brands that may not offer the same level of support.
Another benefit of going for a bigger brand is that they have communities you can engage with on forums and social media groups. Glowforge have a huge community where you can get help, as do Ortur, xTool, and other brands.
Material Compatibility
The materials you can cut and engrave depend both on the type of your laser, and its power. Most hobbyist diode lasers are generally used for softer materials, such as card, felt, acrylic and other plastics, and the best woods for laser cutting.
Another key factor to remember is that some laser companies lie about how powerful their lasers are. For example, some companies list their lasers as 20W, 30W and even higher, when the laser itself is actually a 5W laser. The options we’ve listed are correct and we trust these.
If you’re interested in engraving reflective metals like stainless steel, gold, or silver, you need an infrared or fiber laser. The D1 Pro is one of the few hobbyist machines that offers an infrared module as an add-on, though the S1 now offers this too.
Safety features
There are some potential hazards that come with using a laser engraver, so I advise beginners to go for machines with safety features. The following features can you engrave safety:
- Emergency stop button for instantly switching off the machine when needed.
- Position or sloping protection that switches off the machine if it’s jogged while in operation.
- A safety lock to prevent children from accessing the laser.
- An enclosure around the laser to help protect your eyes.
- Ventilation to keep the fumes away from you.
Most lasers also come with laser safety glasses that you should wear while working. It’s also important to have a proper ventilation system in place due to the harmful fumes emitted when laser engraving. This is why I like the xTool S1, which has good ventilation built into it, as well as an extra add-on for air purifying.